.png?width=250&height=99&name=CivicEye_Identity_Secondary%20(4).png)
Performing NIBRS Validation in CivicRMS
This guide will walk you through the steps needed to perform NIBRS Validation in CivicRMS.
CivicRMS NIBRS Validation
This guide will walk you through the steps needed to perform NIBRS Validation in CivicRMS.
1. Introduction
This training video will guide you through the process of using CivicRMS NIBRS validation tool.
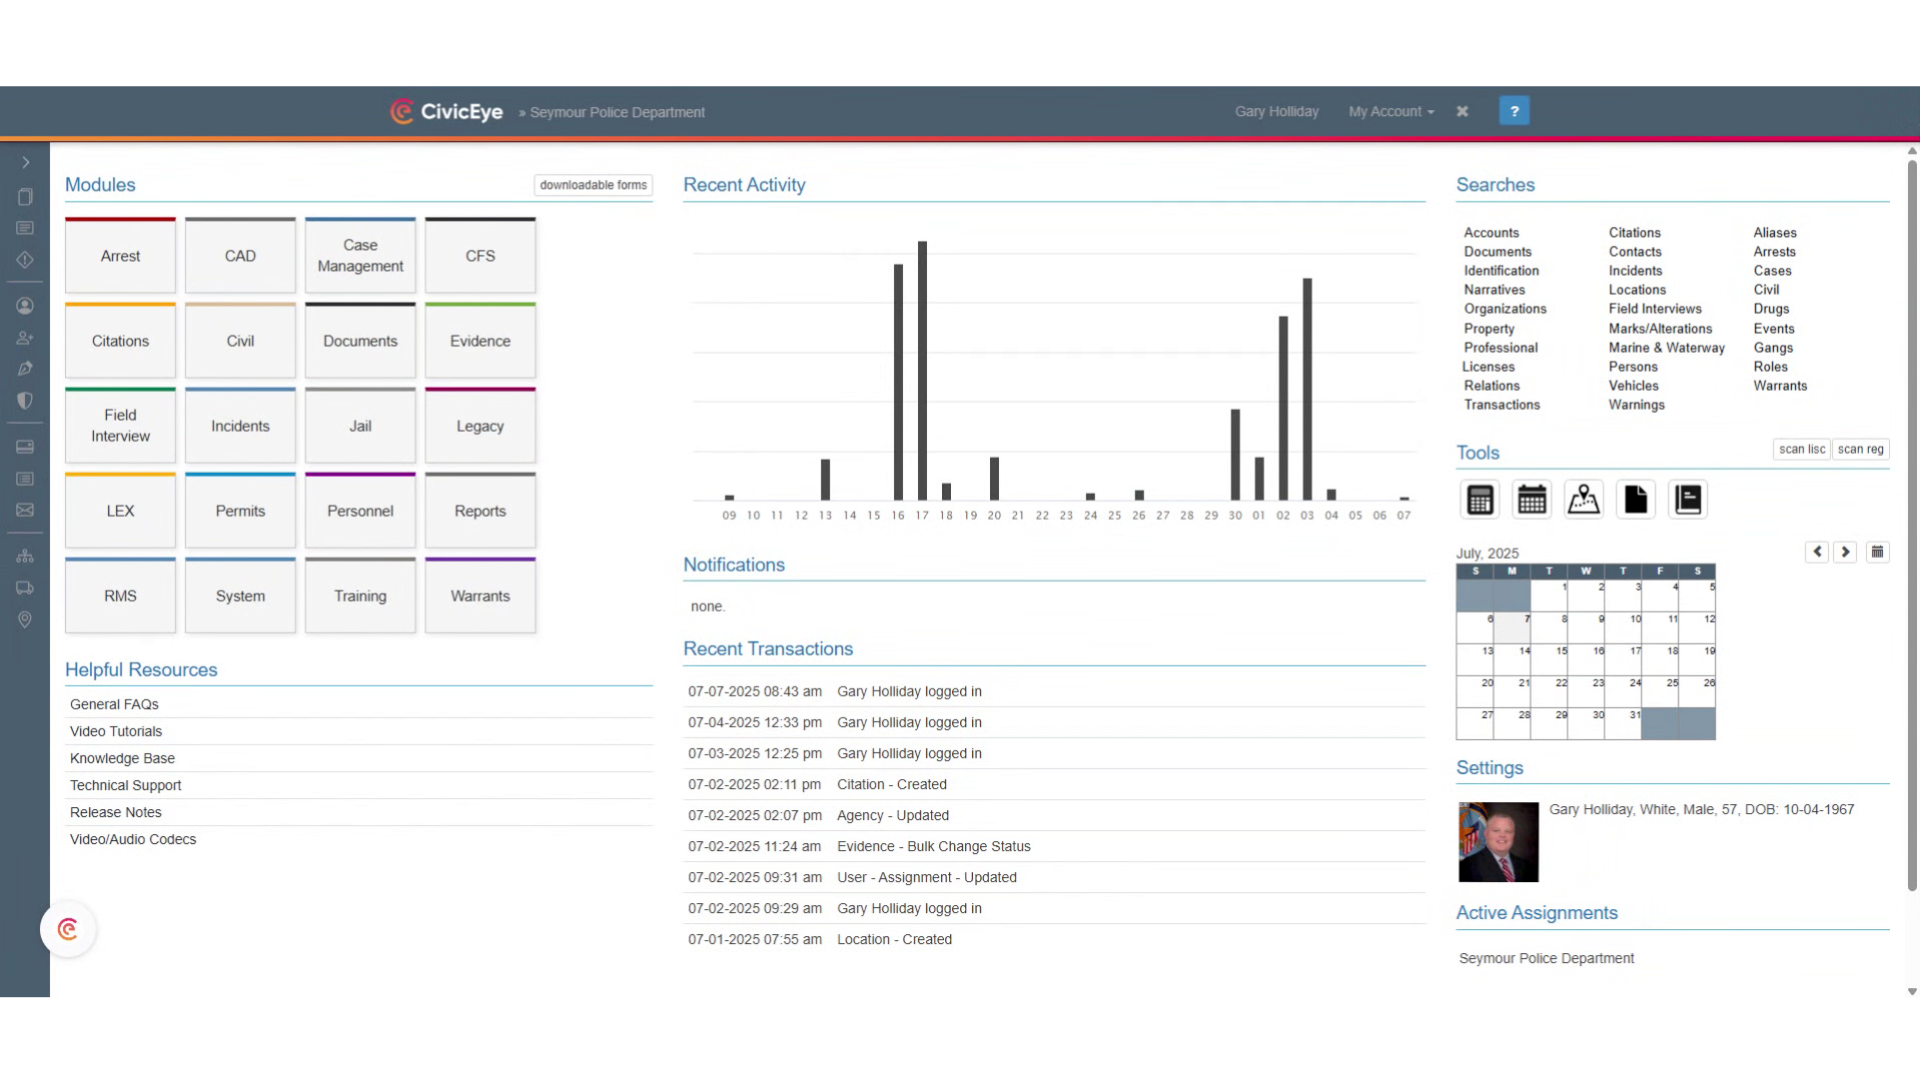
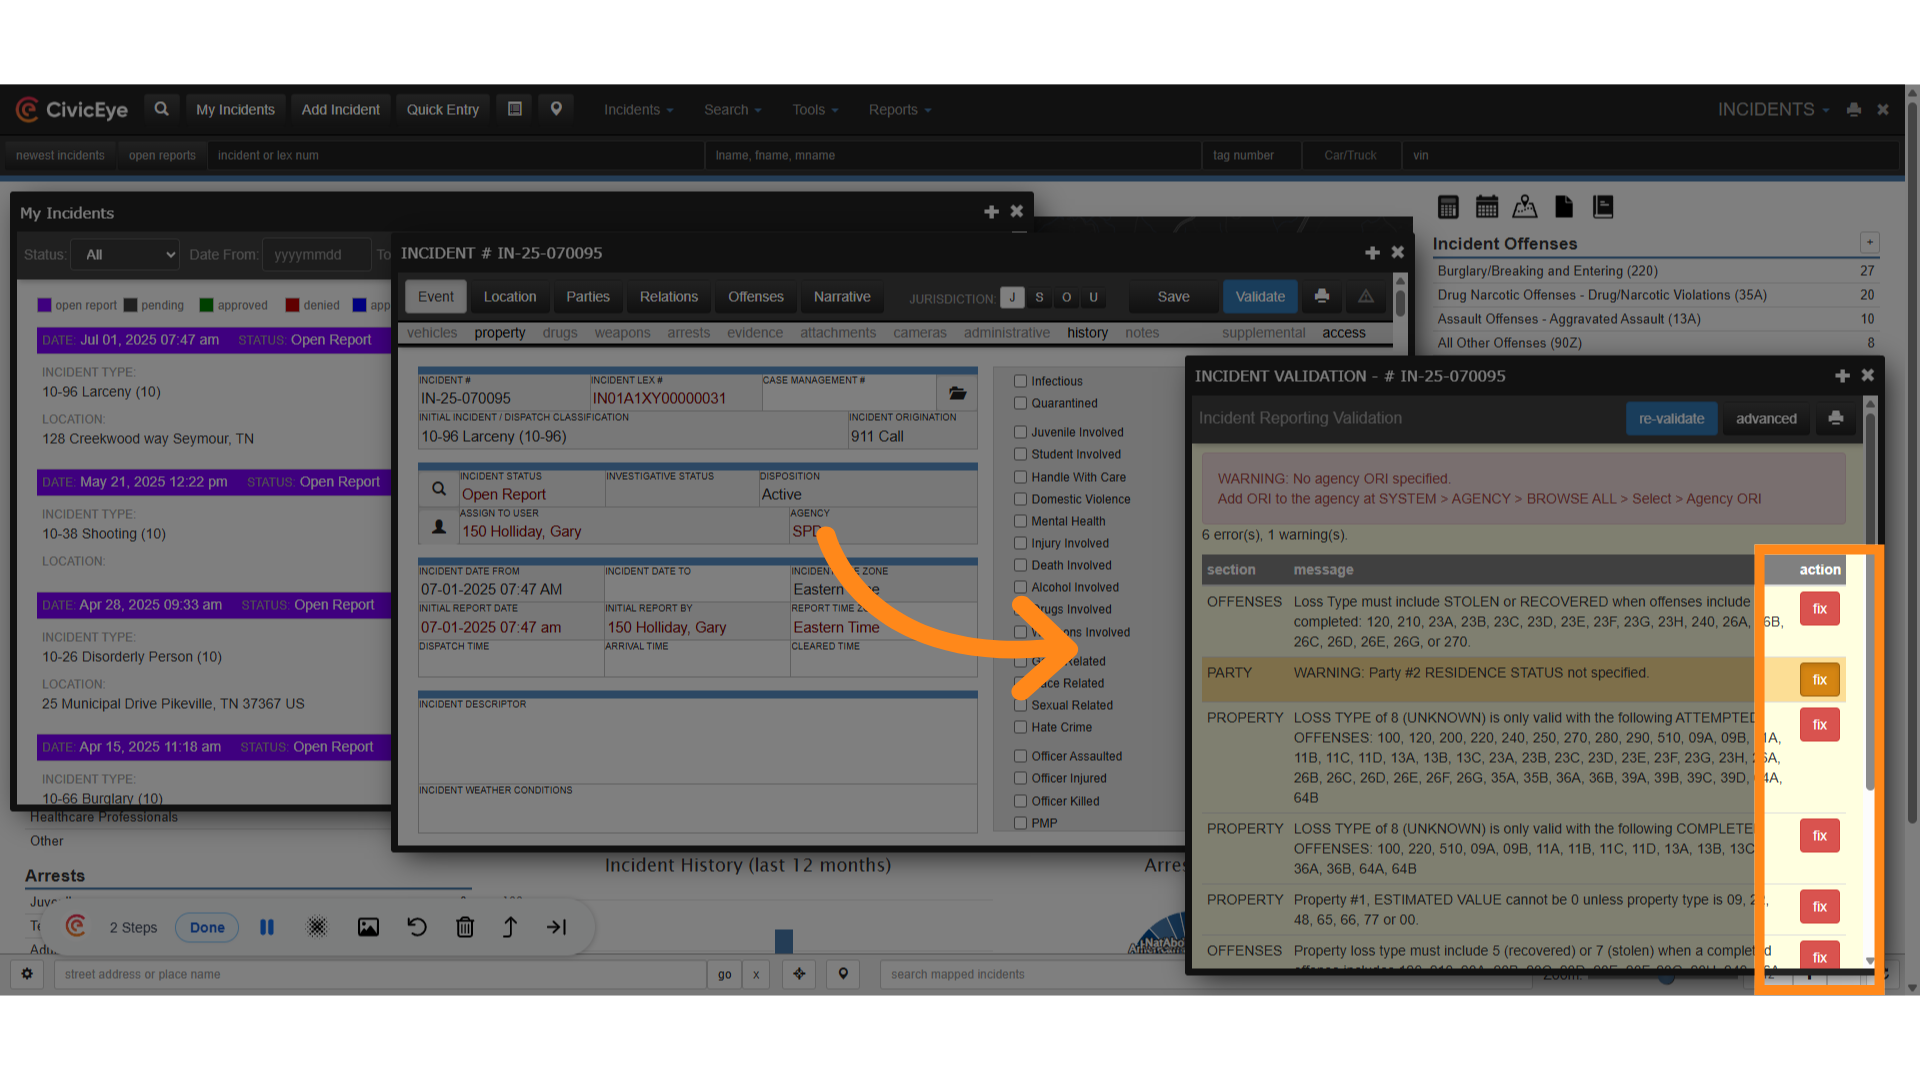
2. Incident Report
Select the appropriate incident report. NIBRS validation can be performed while the user is documenting the investigation, or during the supervisory review process.
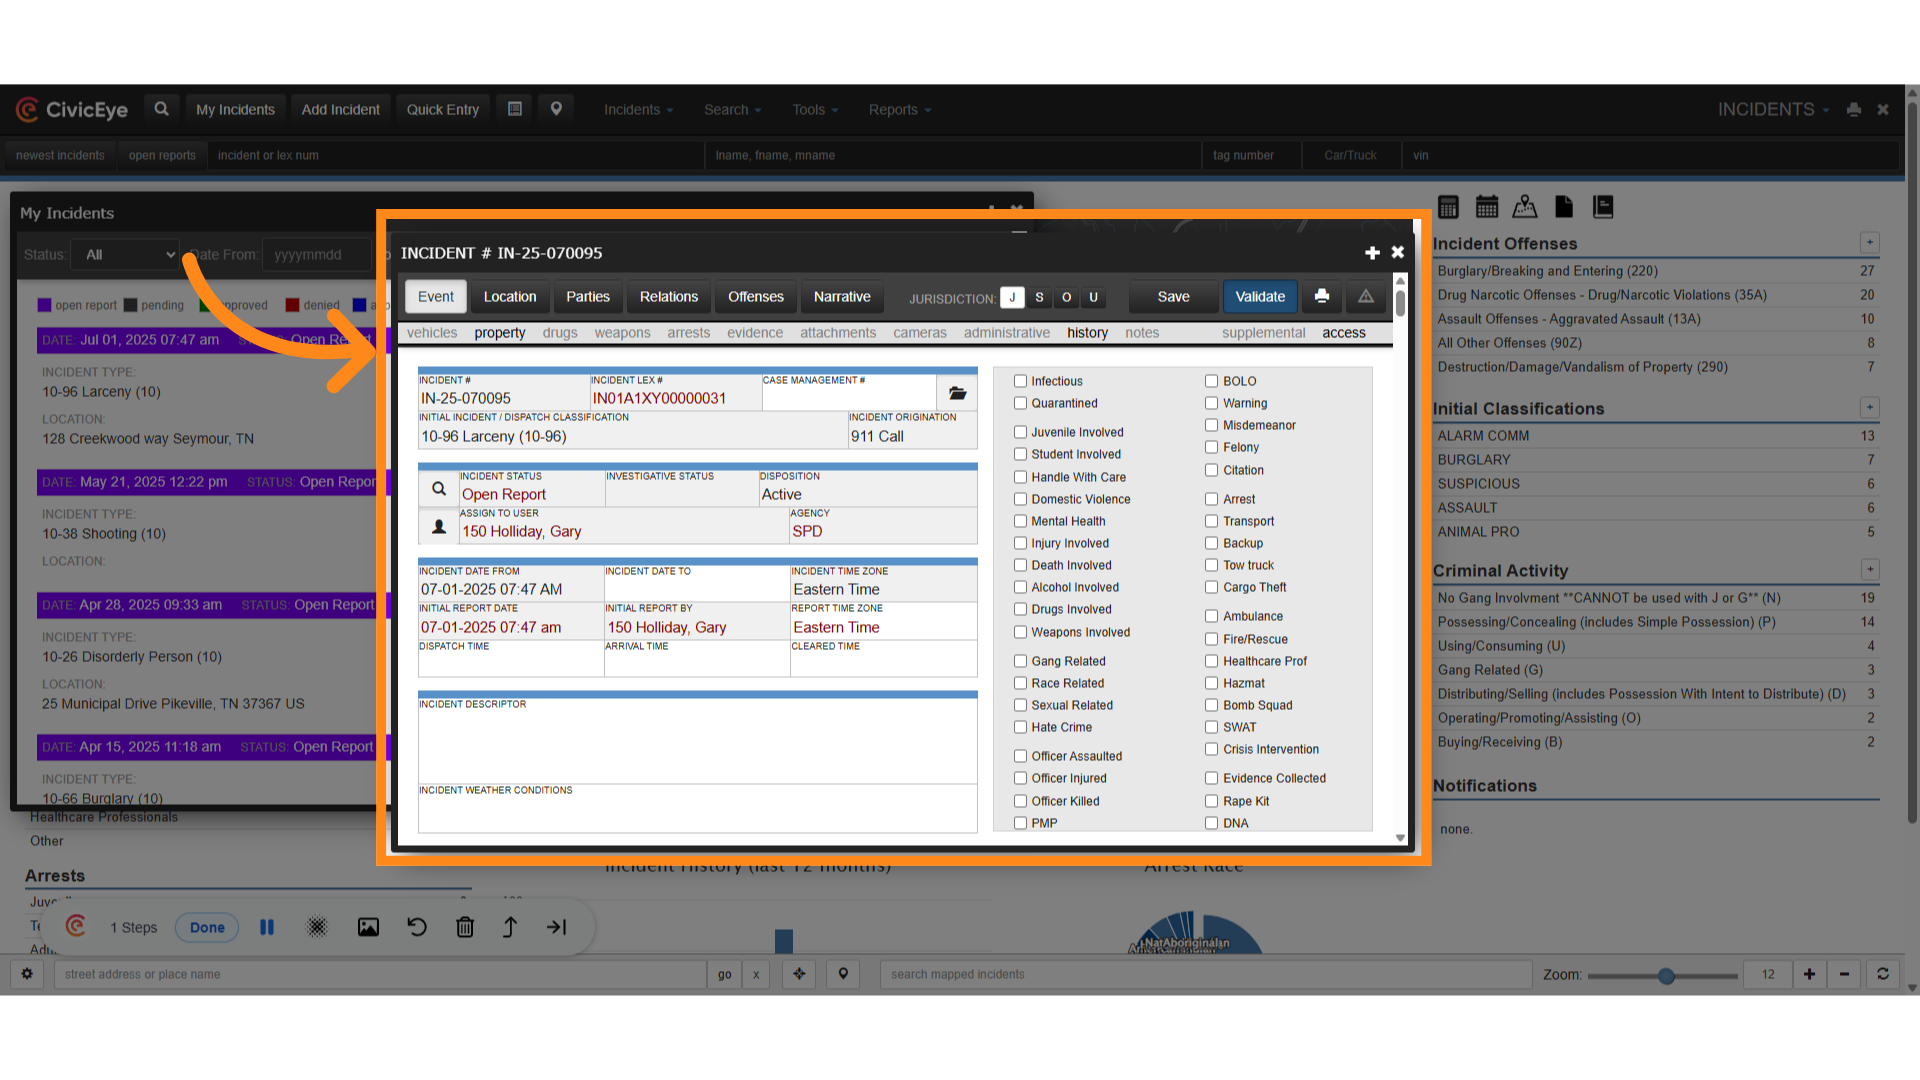
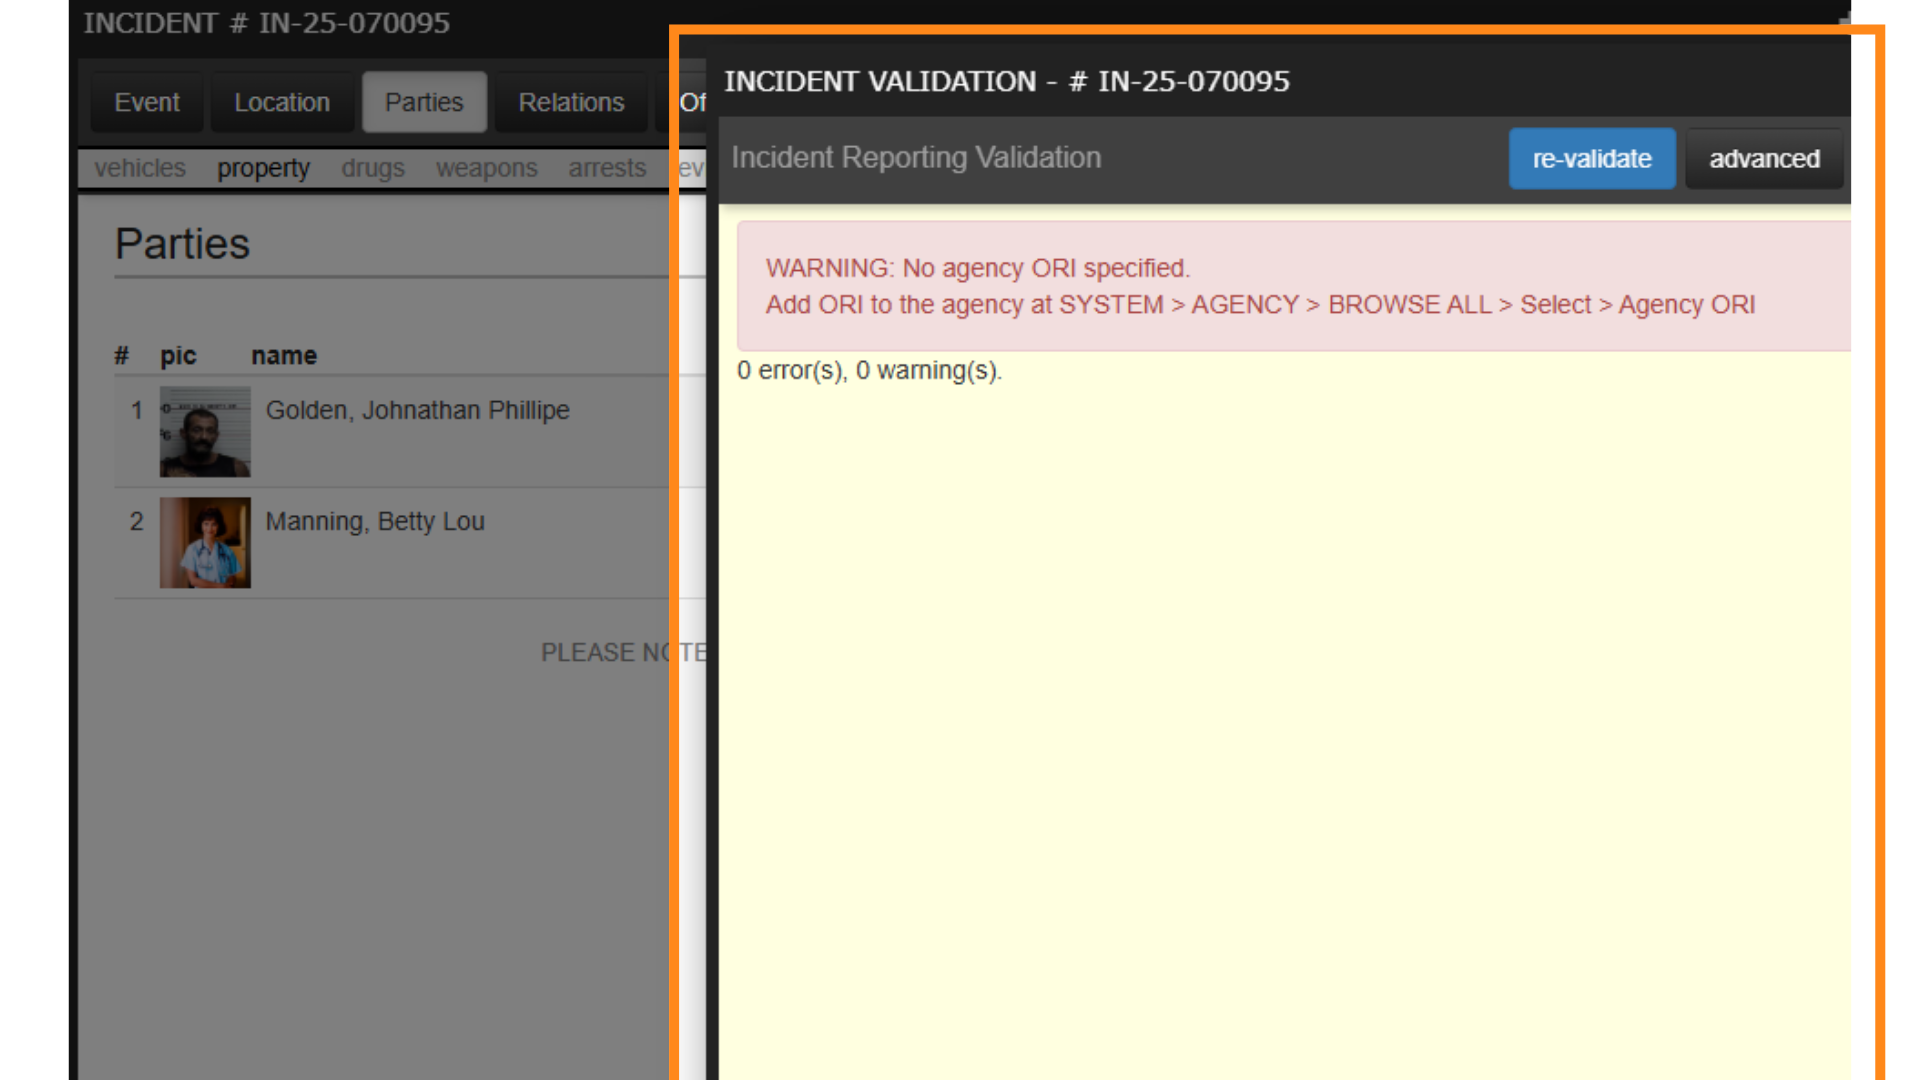
3. Click "Validate"
Click the validate tab. This will initiate the NIBRS validation process.
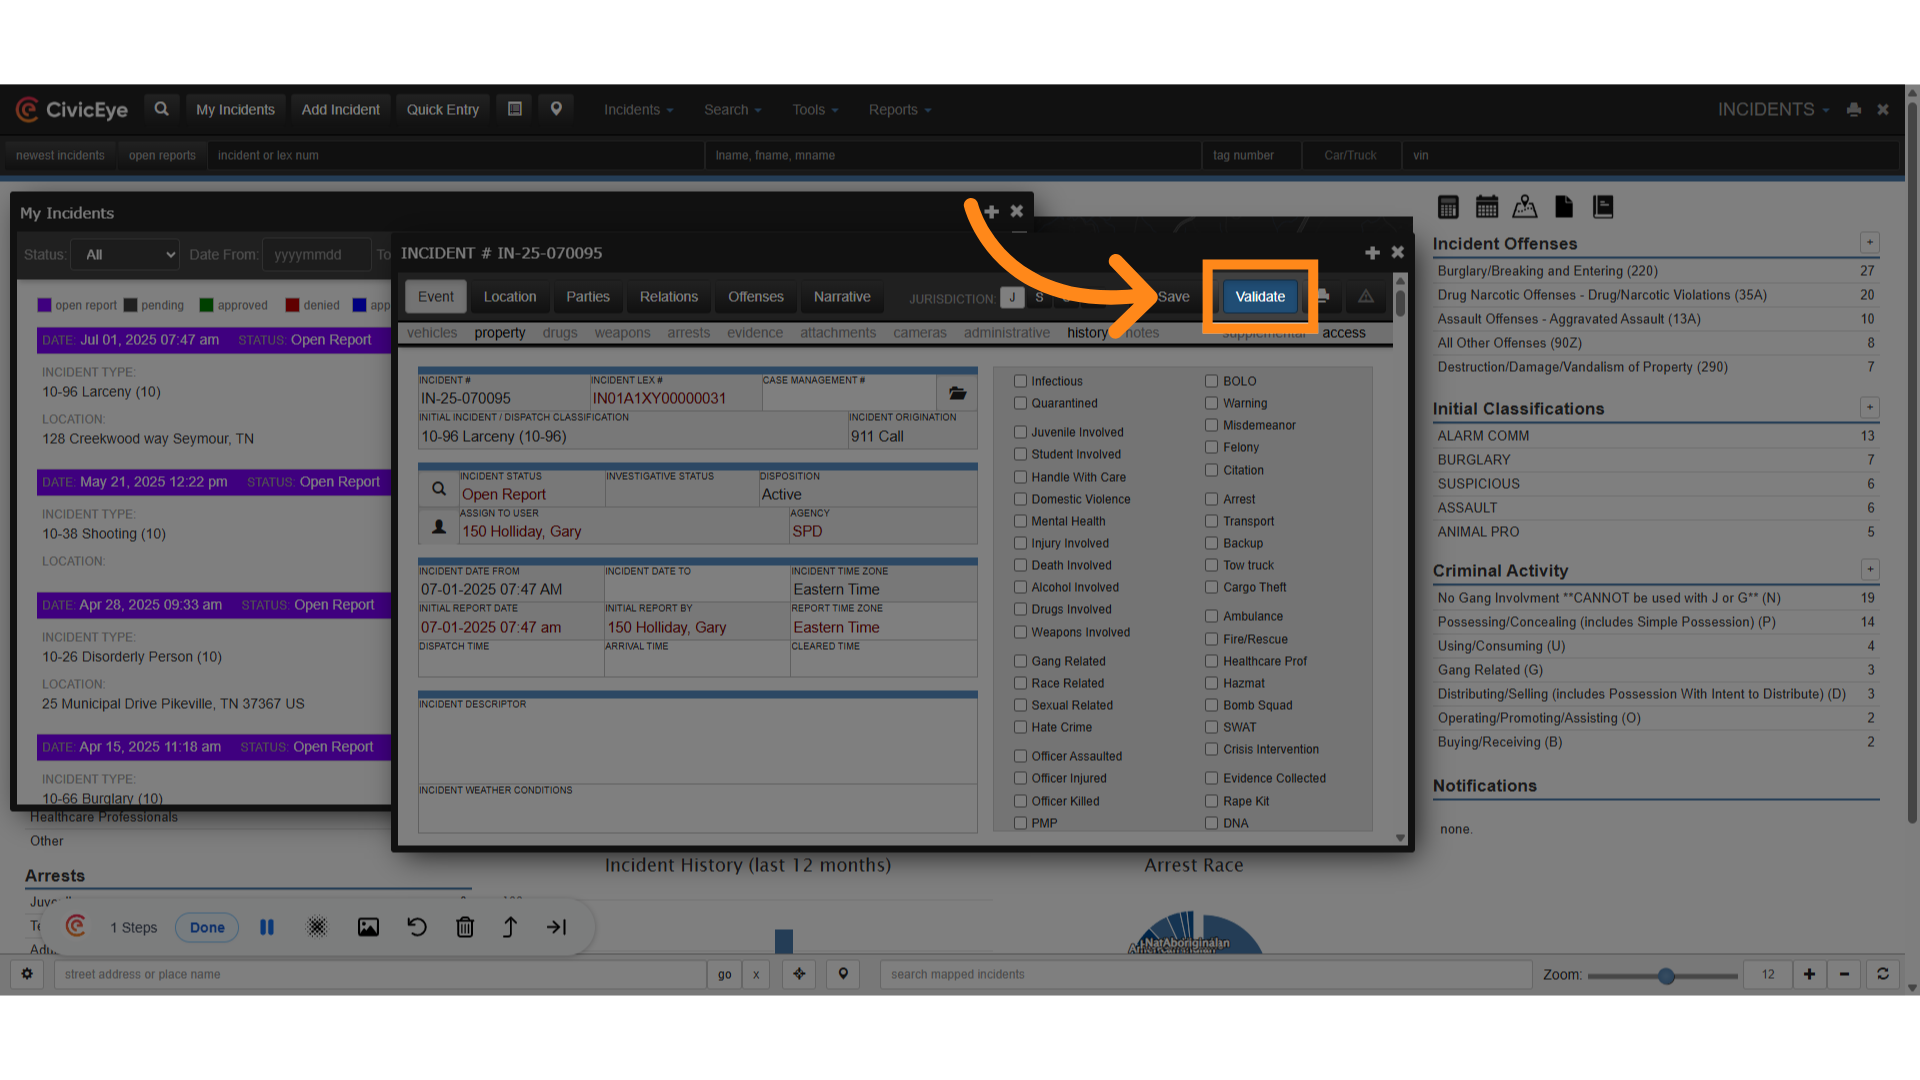
4. Warnings and Errors
The validation window is now displaying NIBRS warnings and errors within the incident report. Warnings will display a yellow fix button, while NIBRS errors will display a red "fix" button.
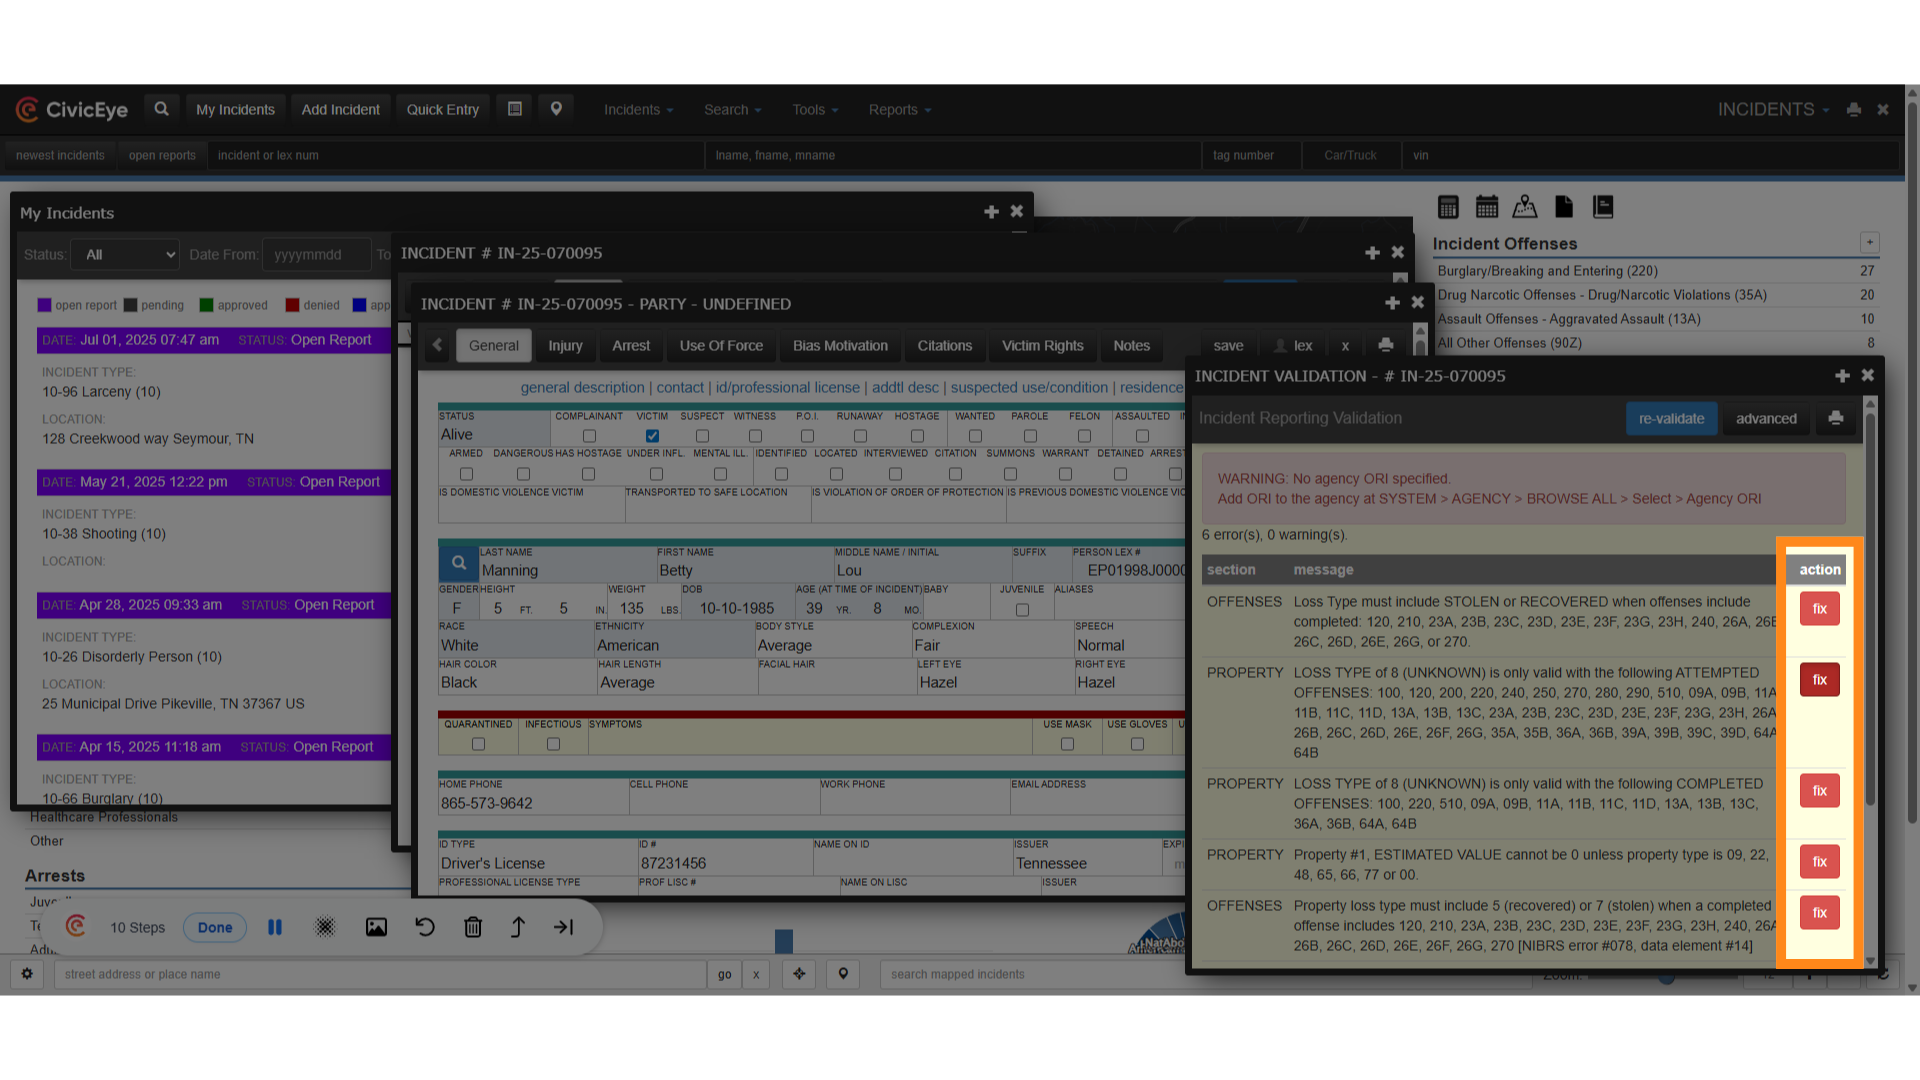
5. Select the warning button.
From the red and yellow fix buttons in the validation tool, select the yellow fix button. Selecting the button will take the user to the issue in the report causing the warning.
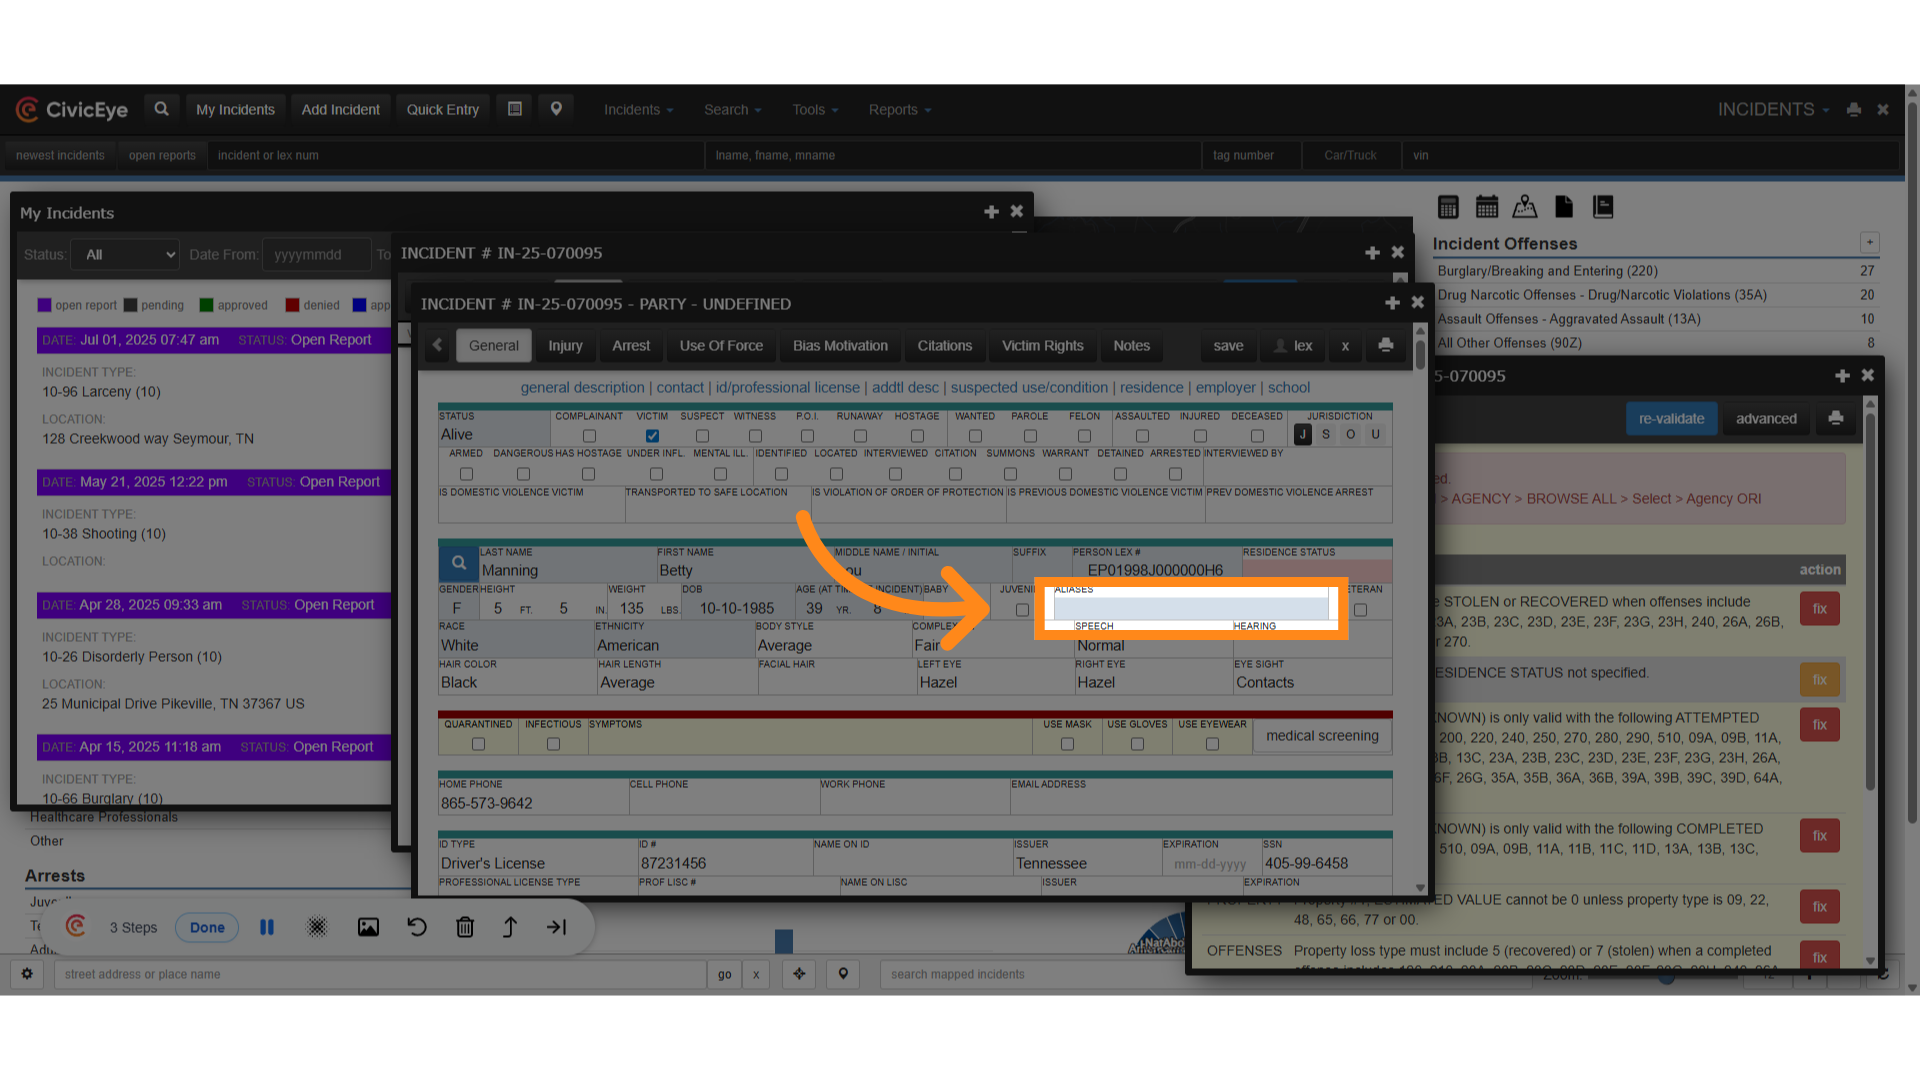
6. Warning
The indicated warning was lack of a resident status for party #2. By selecting the fix button, the system has taken us from the validation section to the spot in the report causing the warning.
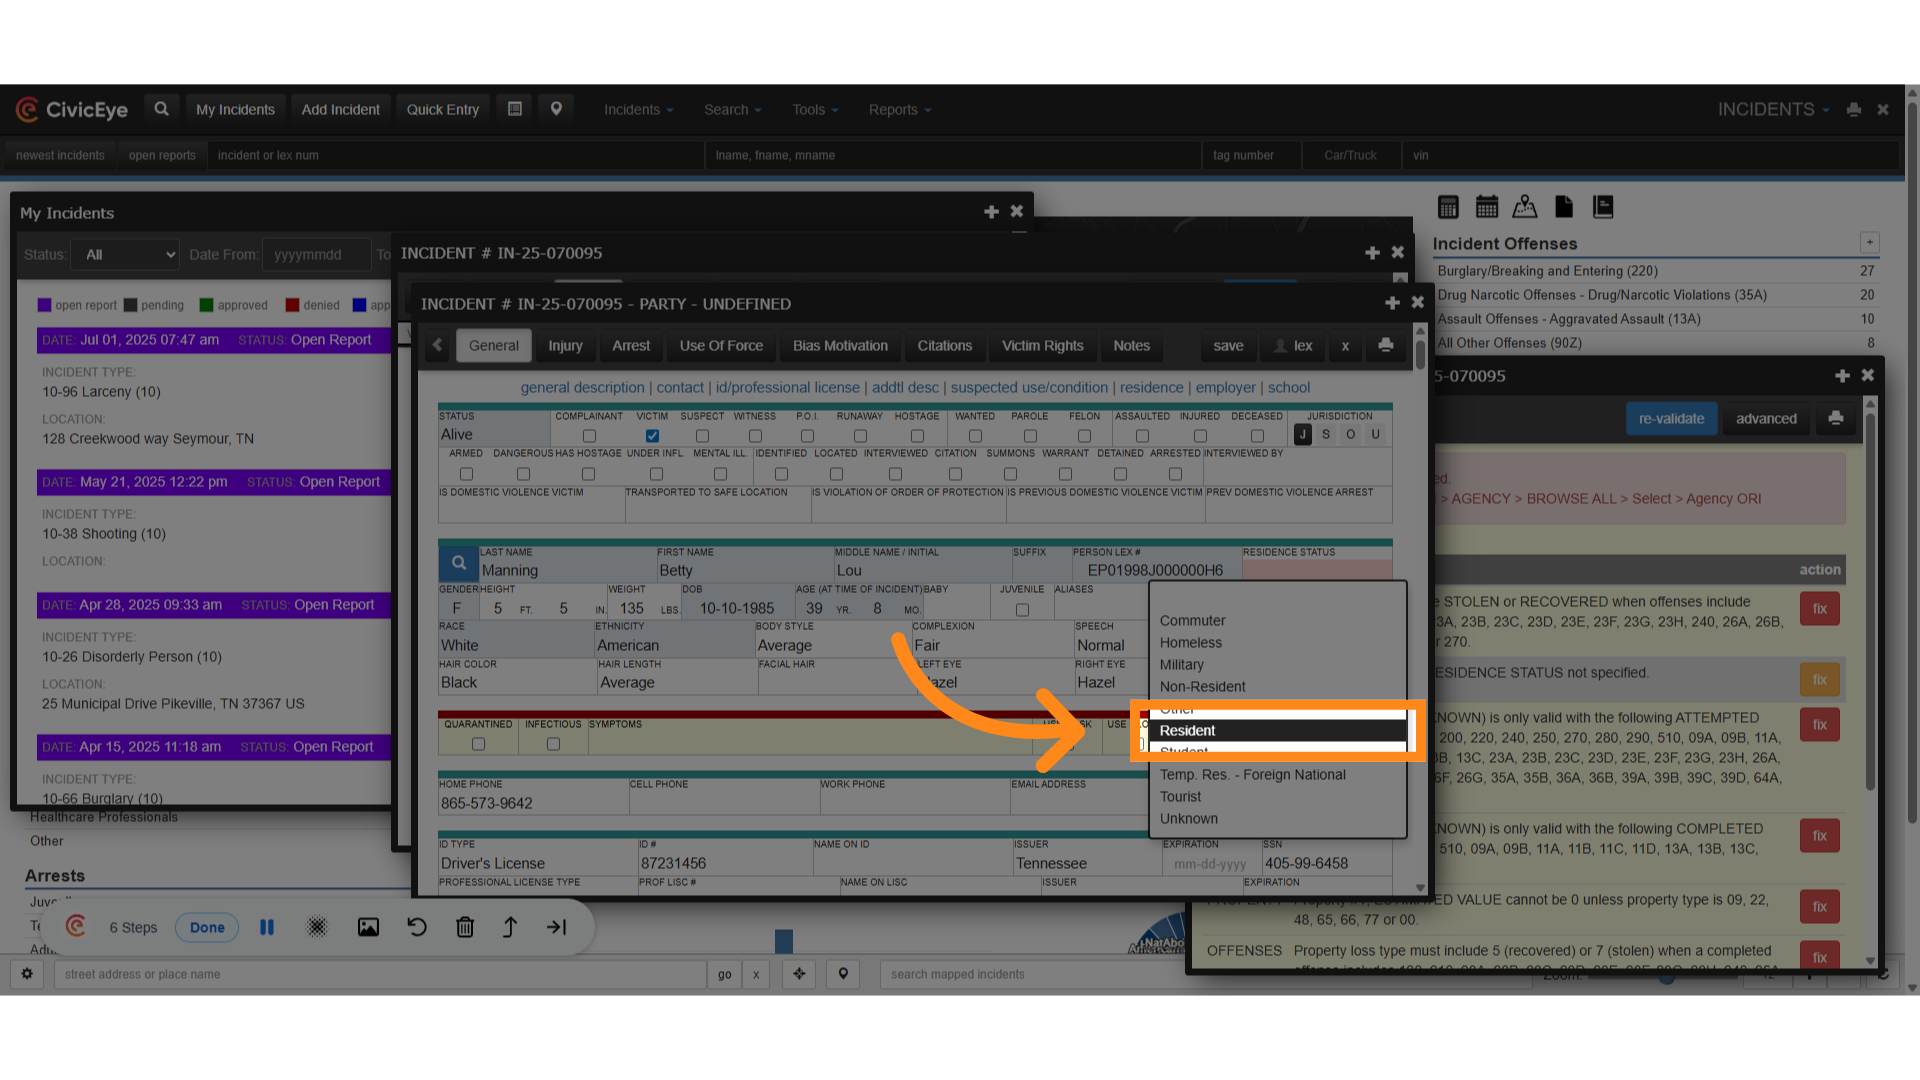
7. Click "Resident"
To correct the warning, we have selected resident, then save.
8. Re-validate
Now we will re-validate the report
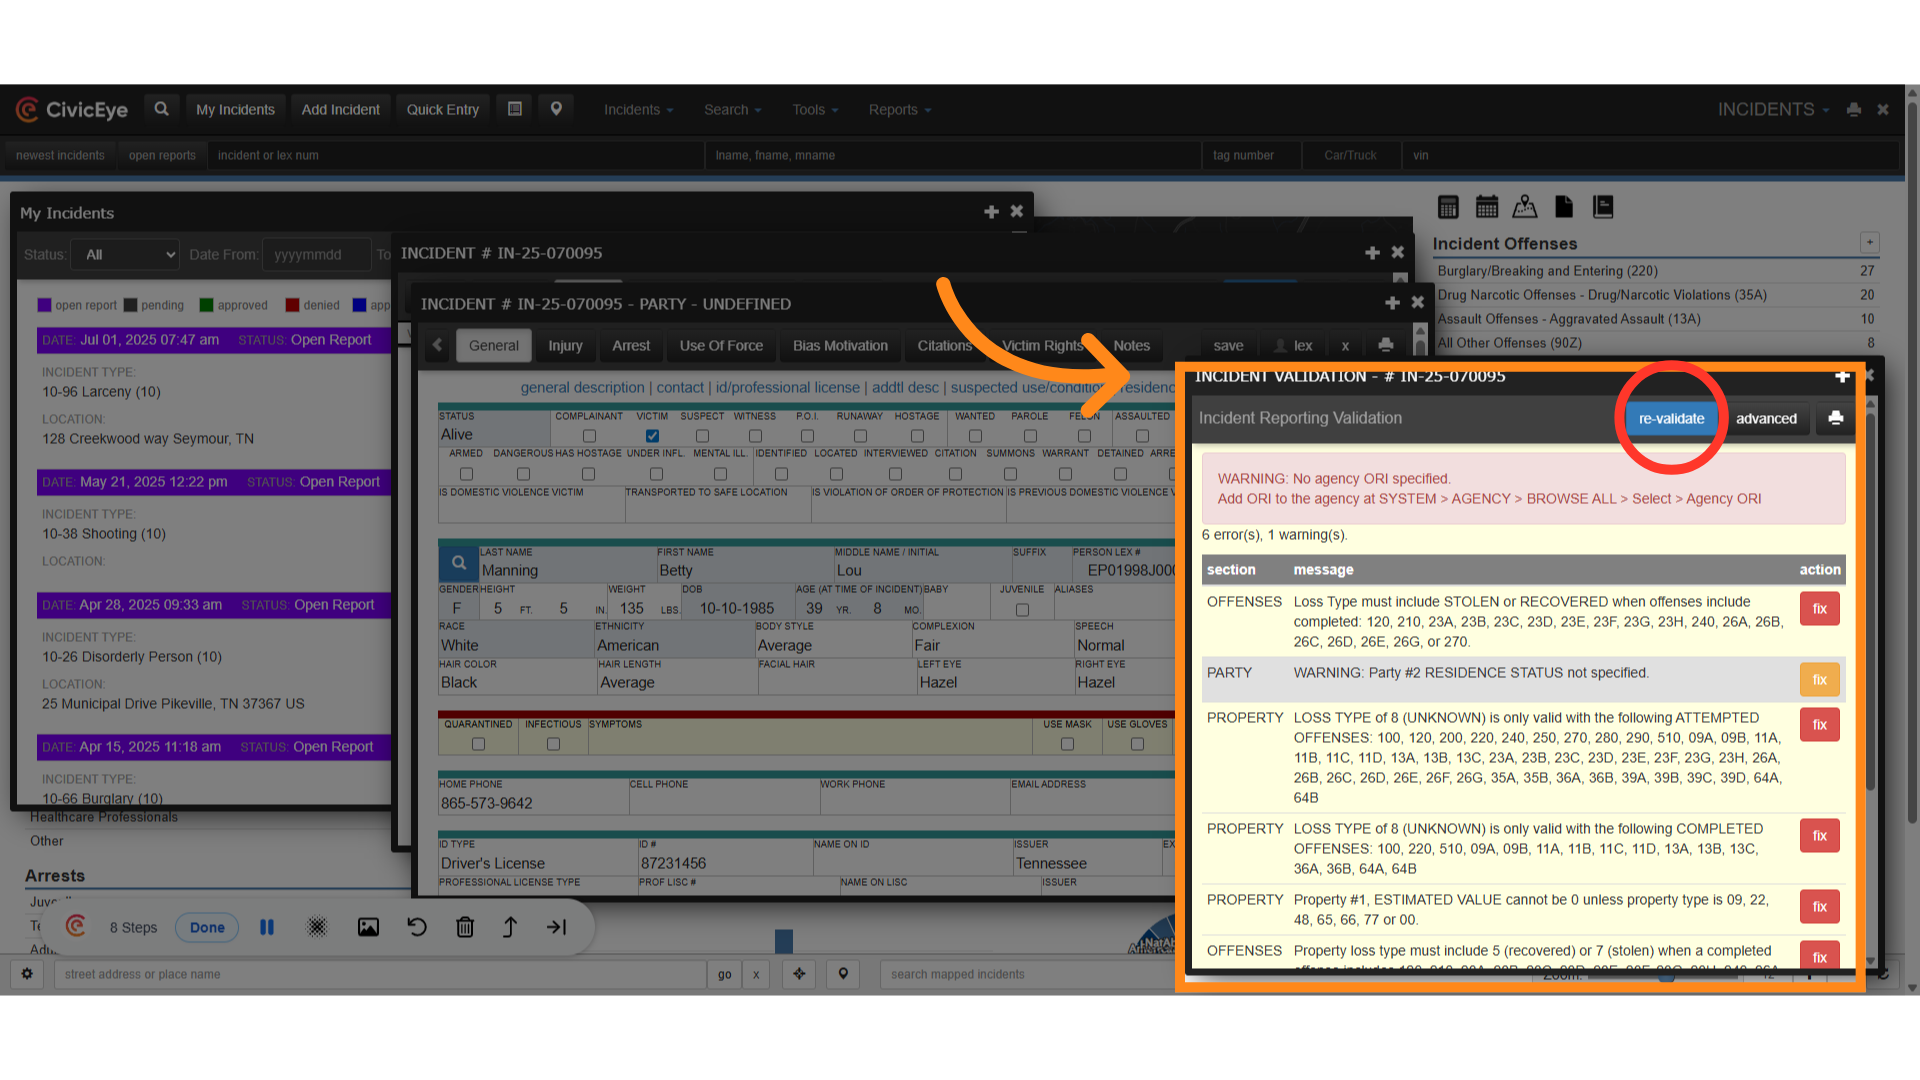
9. Check changes
By re-validating the report we see that the previous warning has been removed.
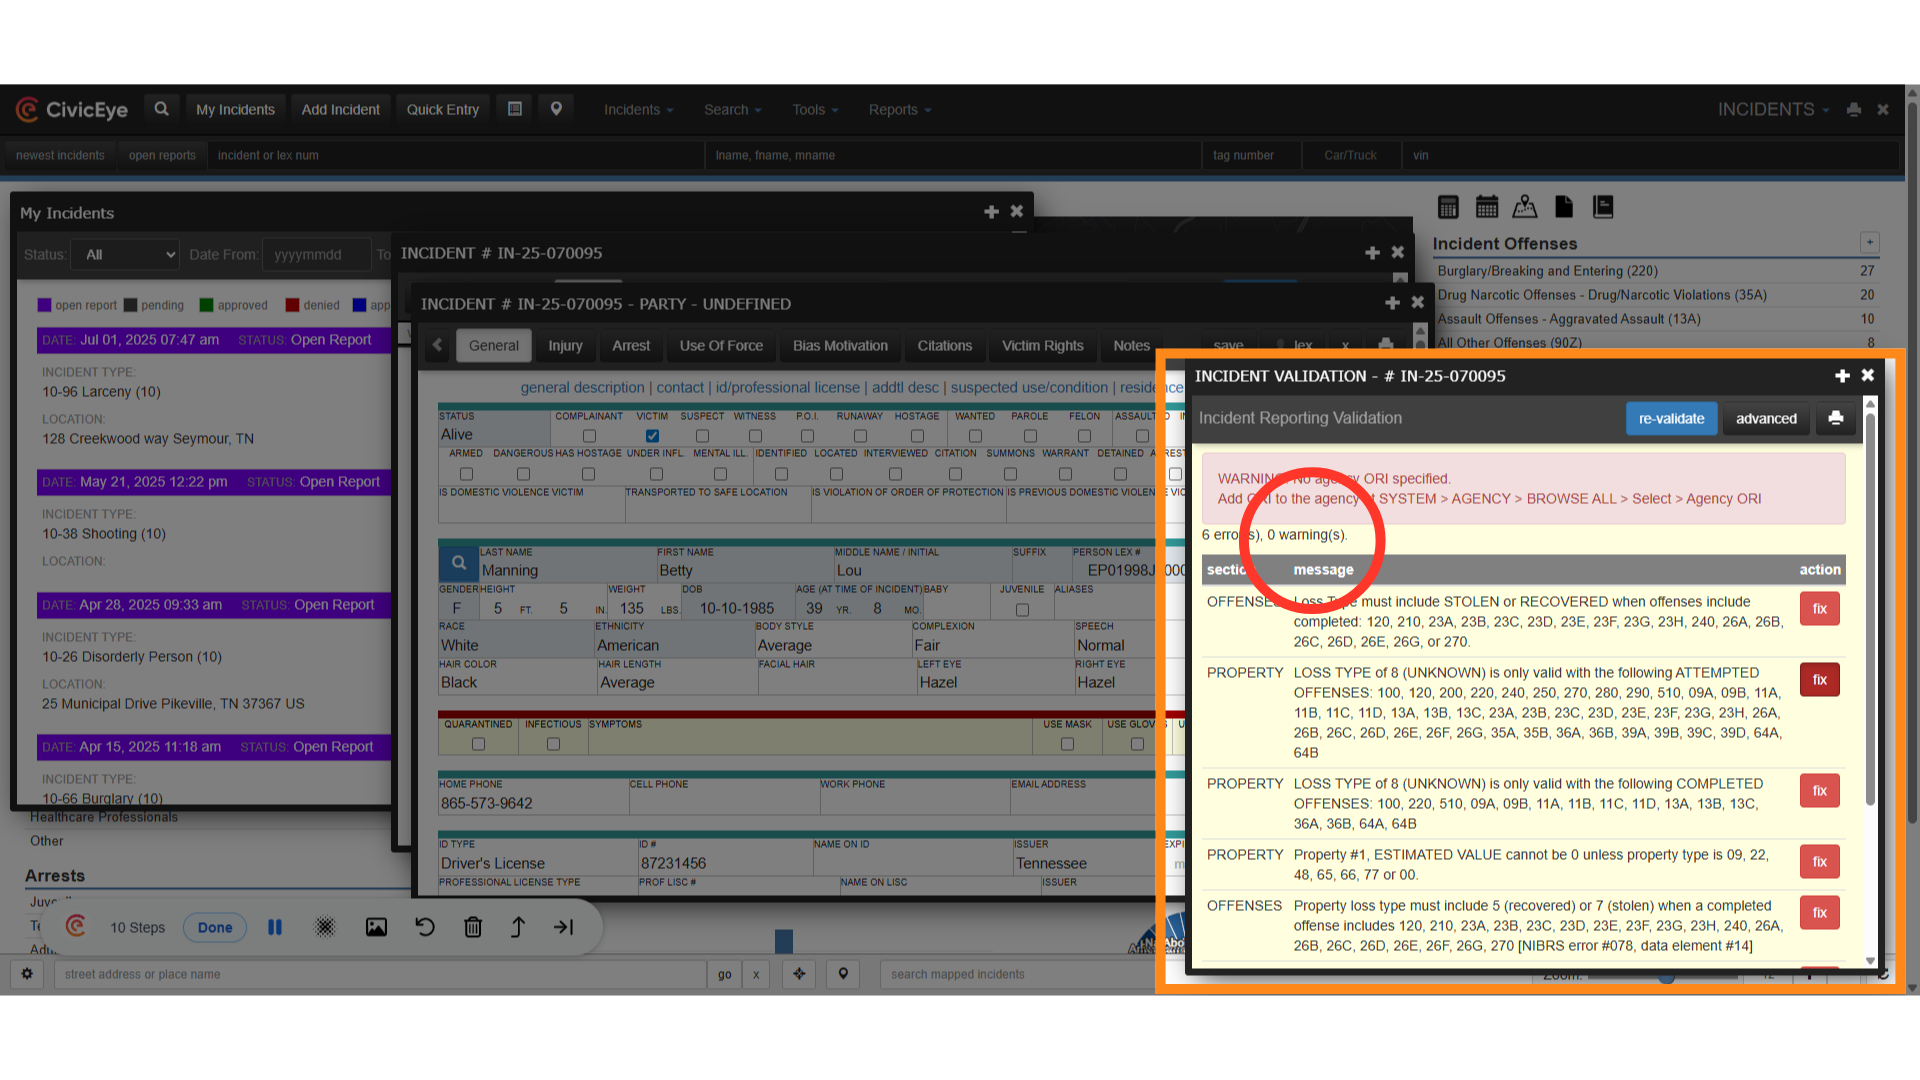
10. Remaining NIBRS errors
We now have a number of NIBRS errors remaining. To fix these we can select each of the red fix buttons to instantly navigate to the area of the report with the error.
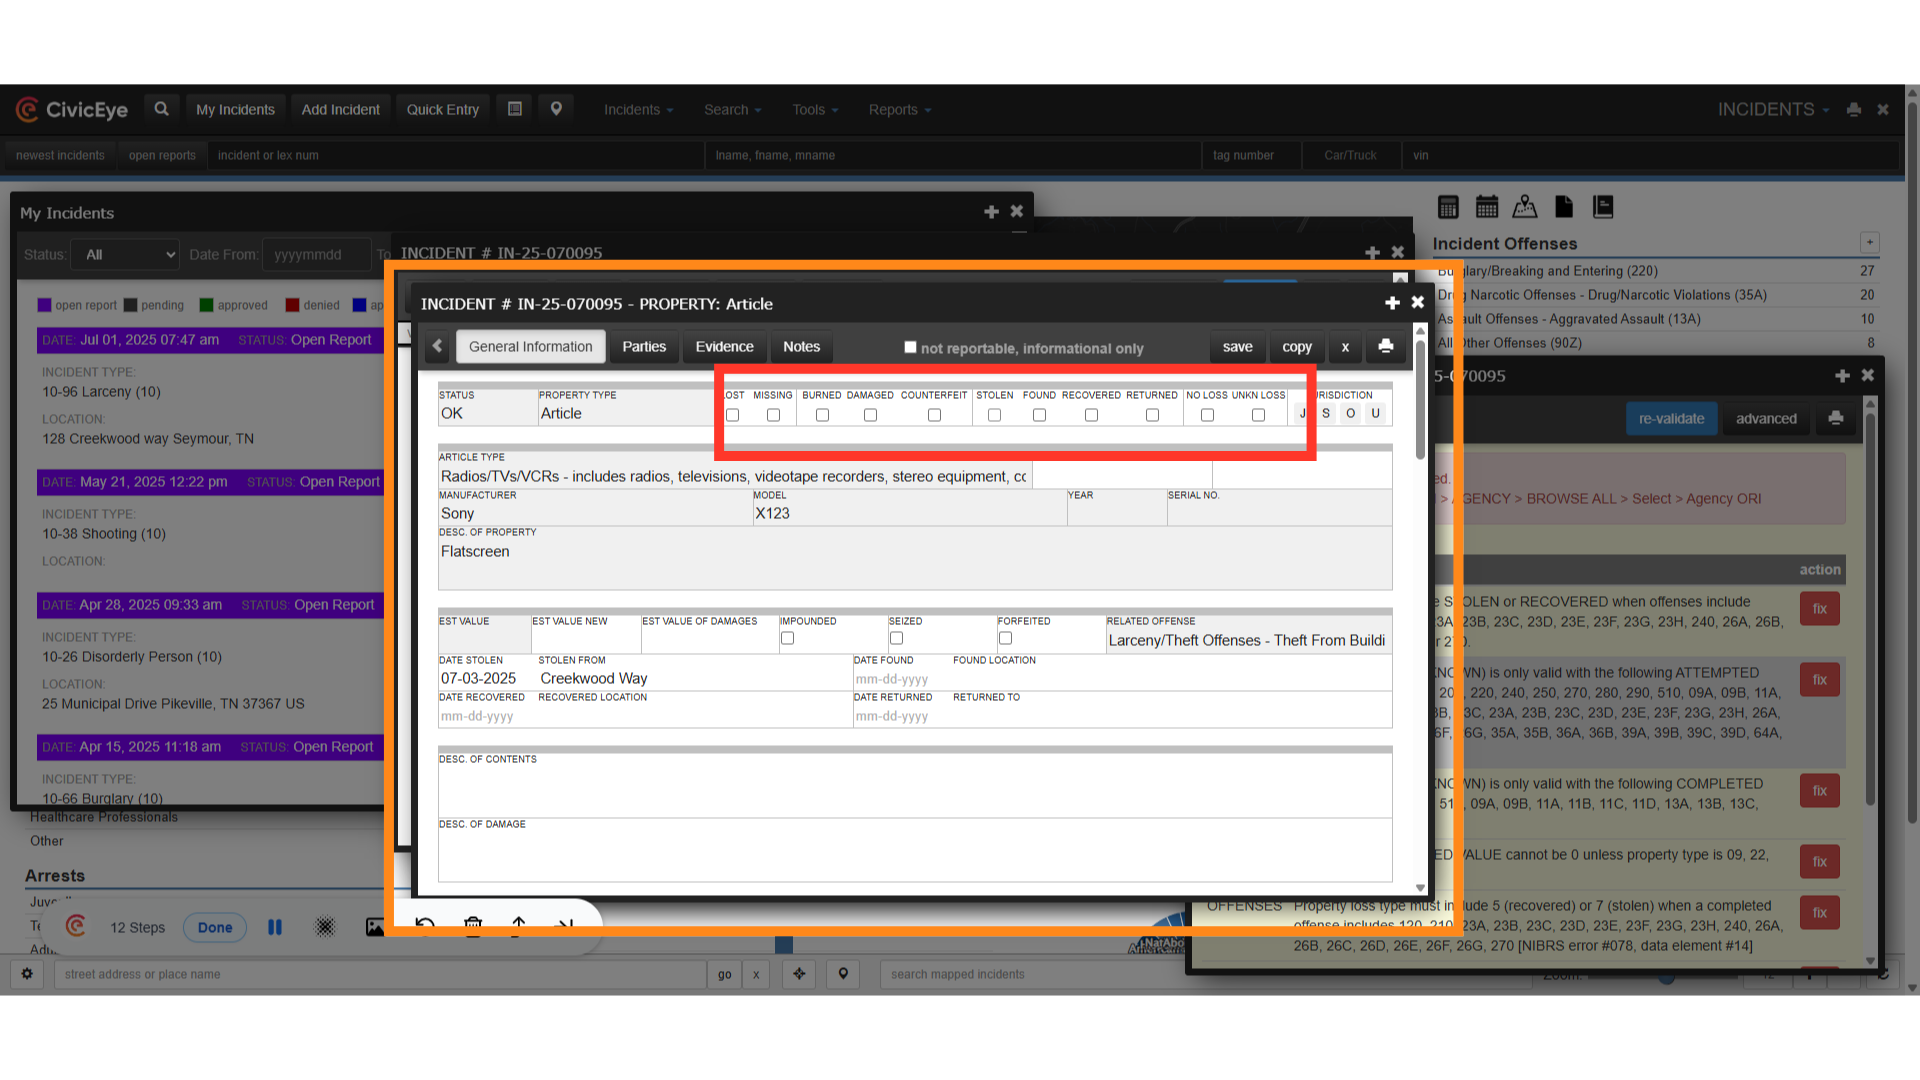
11. Property loss type
The indicated NIBRS errors all involved property loss types. By clicking the fix button, the validation tool ahs brought us to the property page in the report. Make the necessary changes to the report by selecting the proper loss type and selecting save.
12. Click "re-validate"
Next, re-validate the report to ensure our changes were effective in clearing the errors.
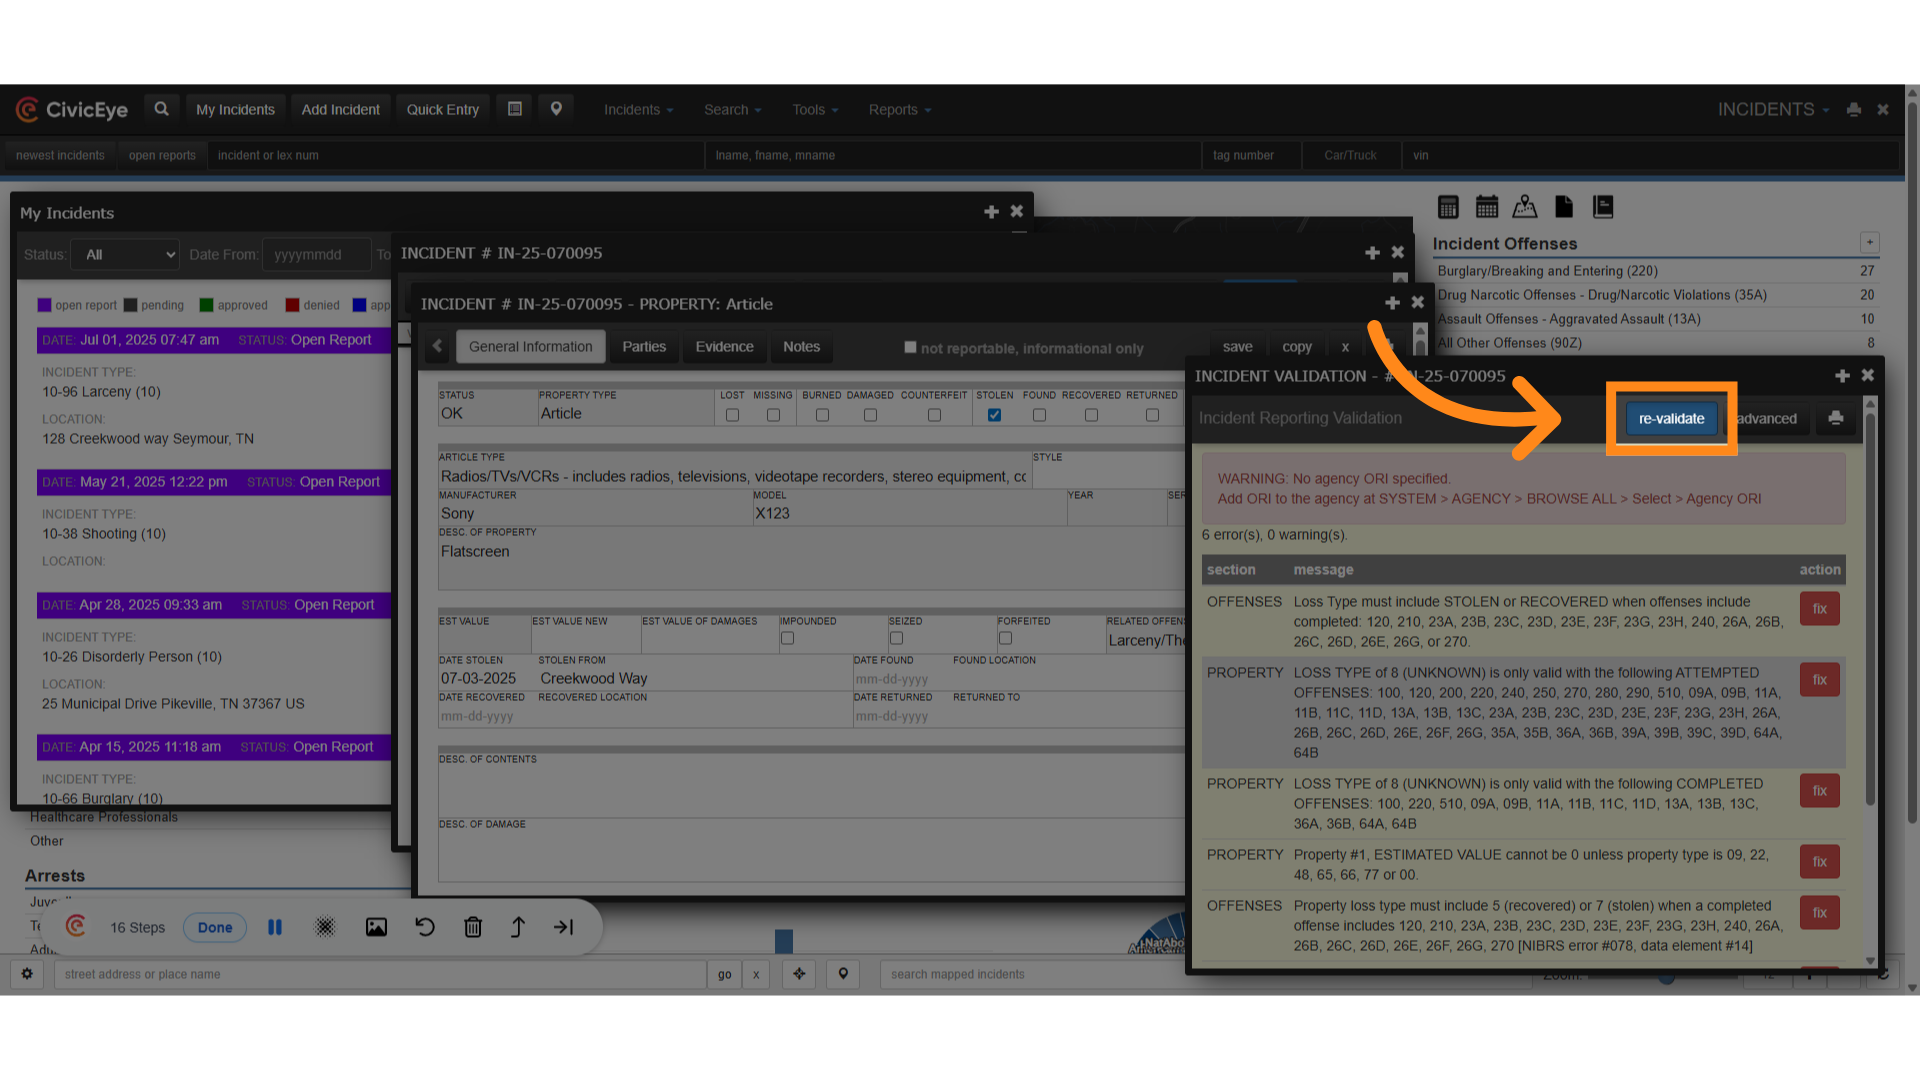
13. No Errors and No Warnings
Continue the previous steps to resolve warnings and errors until re-validation of the report shows no warnings and no errors. By using the CivicRMS validation tool we have identified and corrected the NIBRS issues.
Thank you for watching this CivicEye guide on NIBRS validation and the CivicRMS validation tool. For questions, please reach out to a CivicEye customer support representative at 877-778-5277 or email us at support@civiceye.com.