.png?width=250&height=99&name=CivicEye_Identity_Secondary%20(4).png)
How to Change the Defendant in a Case
This tutorial will provide instructions on changing the defendant associated with a case. By using system tools built into the CivicCase and CivicDocs application to change defendants, users can ensure that legal history, address information, relationships with other persons in the system, and many other data fields remain up to date - all without the need to manually update each piece of data.
How to Change the Defendant in a Case
How to Change a Defendant on a Case
This tutorial will provide instructions on changing the defendant associated with a case. By using system tools built into the CivicCase and CivicDocs application to change defendants, users can ensure that legal history, address information, relationships with other persons in the system, and many other data fields remain up to date - all without the need to manually update each piece of data.
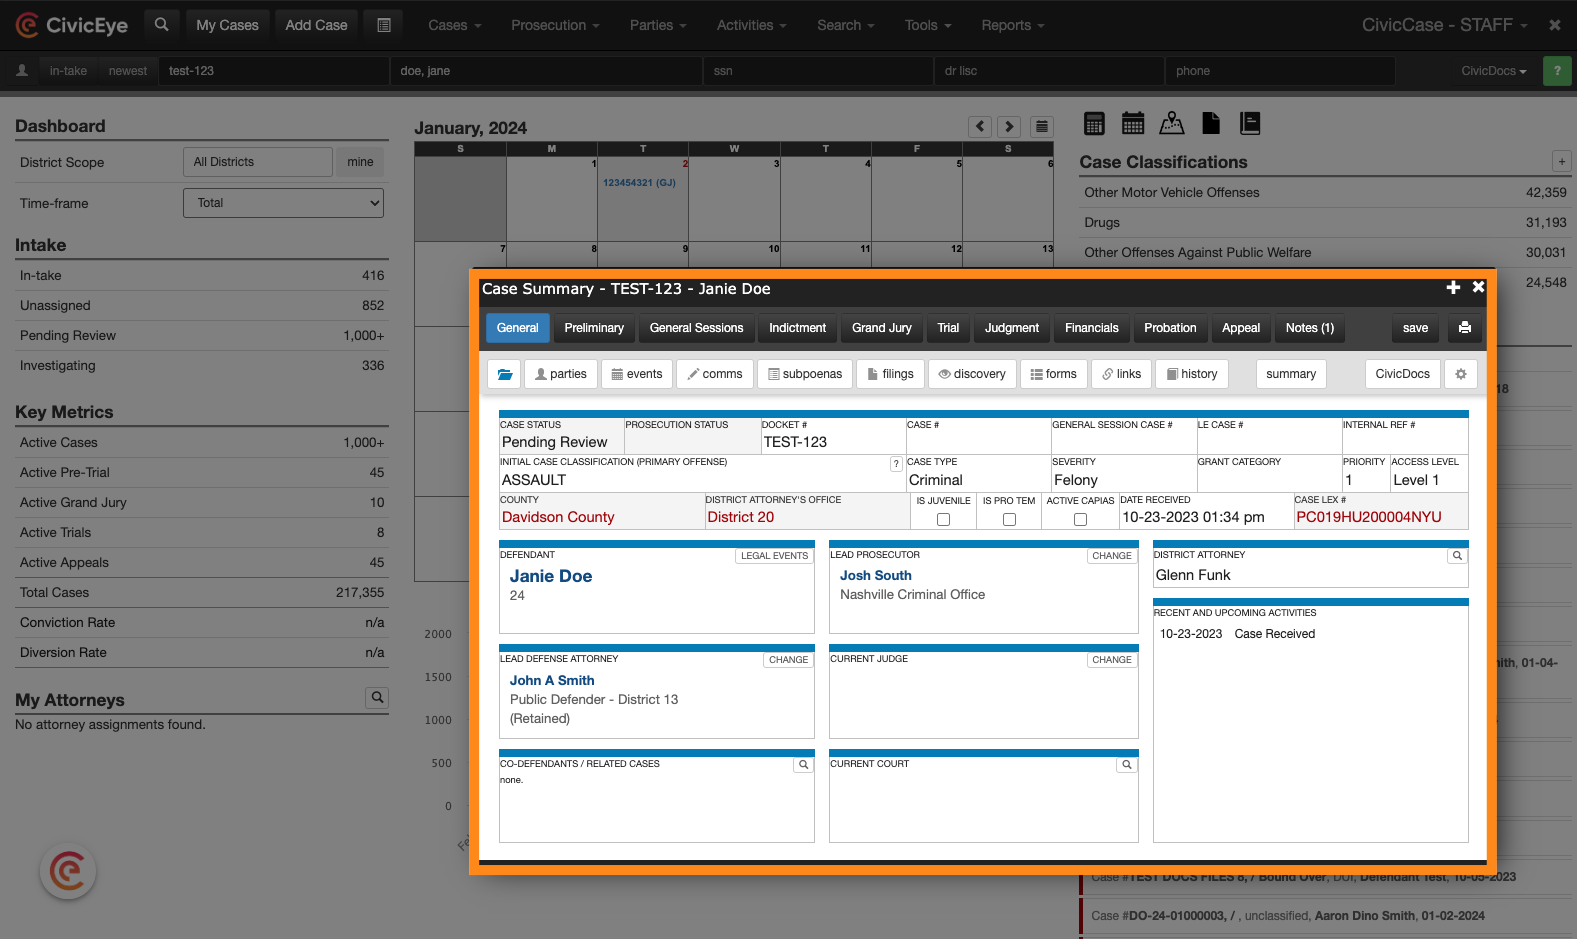
1. Locate a Case where the Defendant Needs Changed
Begin by opening a case where the defendant information needs to be changed. In most cases, this issue occurs when an incorrect defendant was added to the case when the case was originally created.
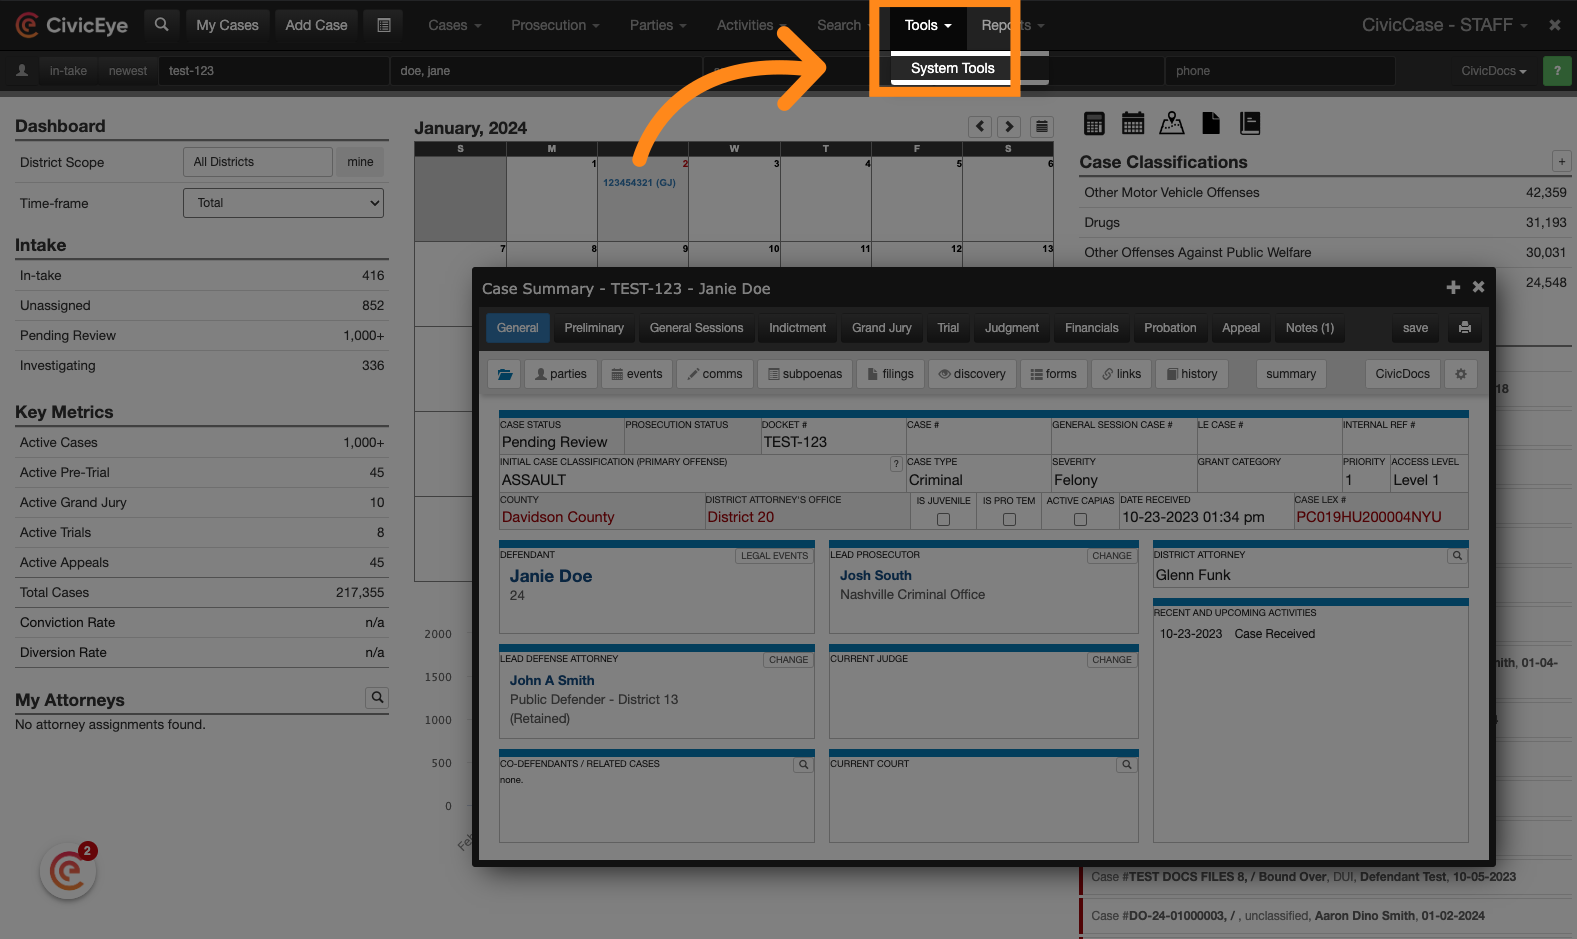
2. Open the Tools Menu
In the Tools Menu, open the System Tools screen. Please note that this tool is restricted to System Administrators only, and should not be granted to all staff due to the permanence of the changes associated with other System Tool functions, such as deleting cases. If you do not have access to the System Tools menu, please contact your CivicCase System Administrator, or CivicEye Technical Support.
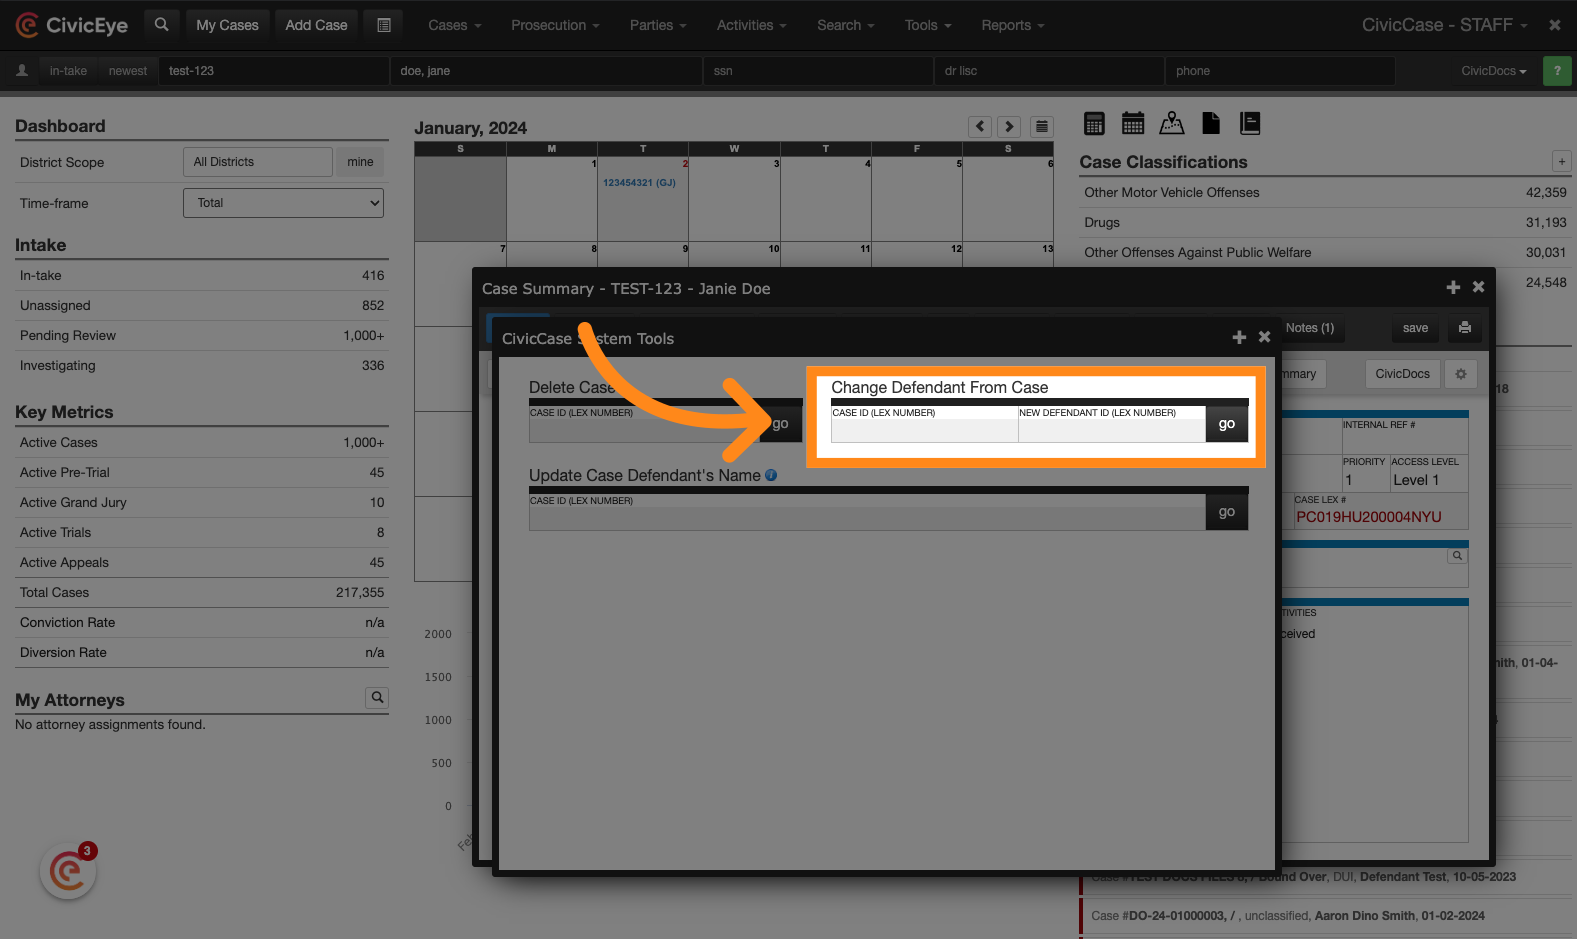
3. How to Change a Defendant
To change the defendant on an existing case we will need two pieces of data: The Lex ID for the original case with the incorrect defendant, and the person Lex ID for the new defendant that will be assigned to the case.
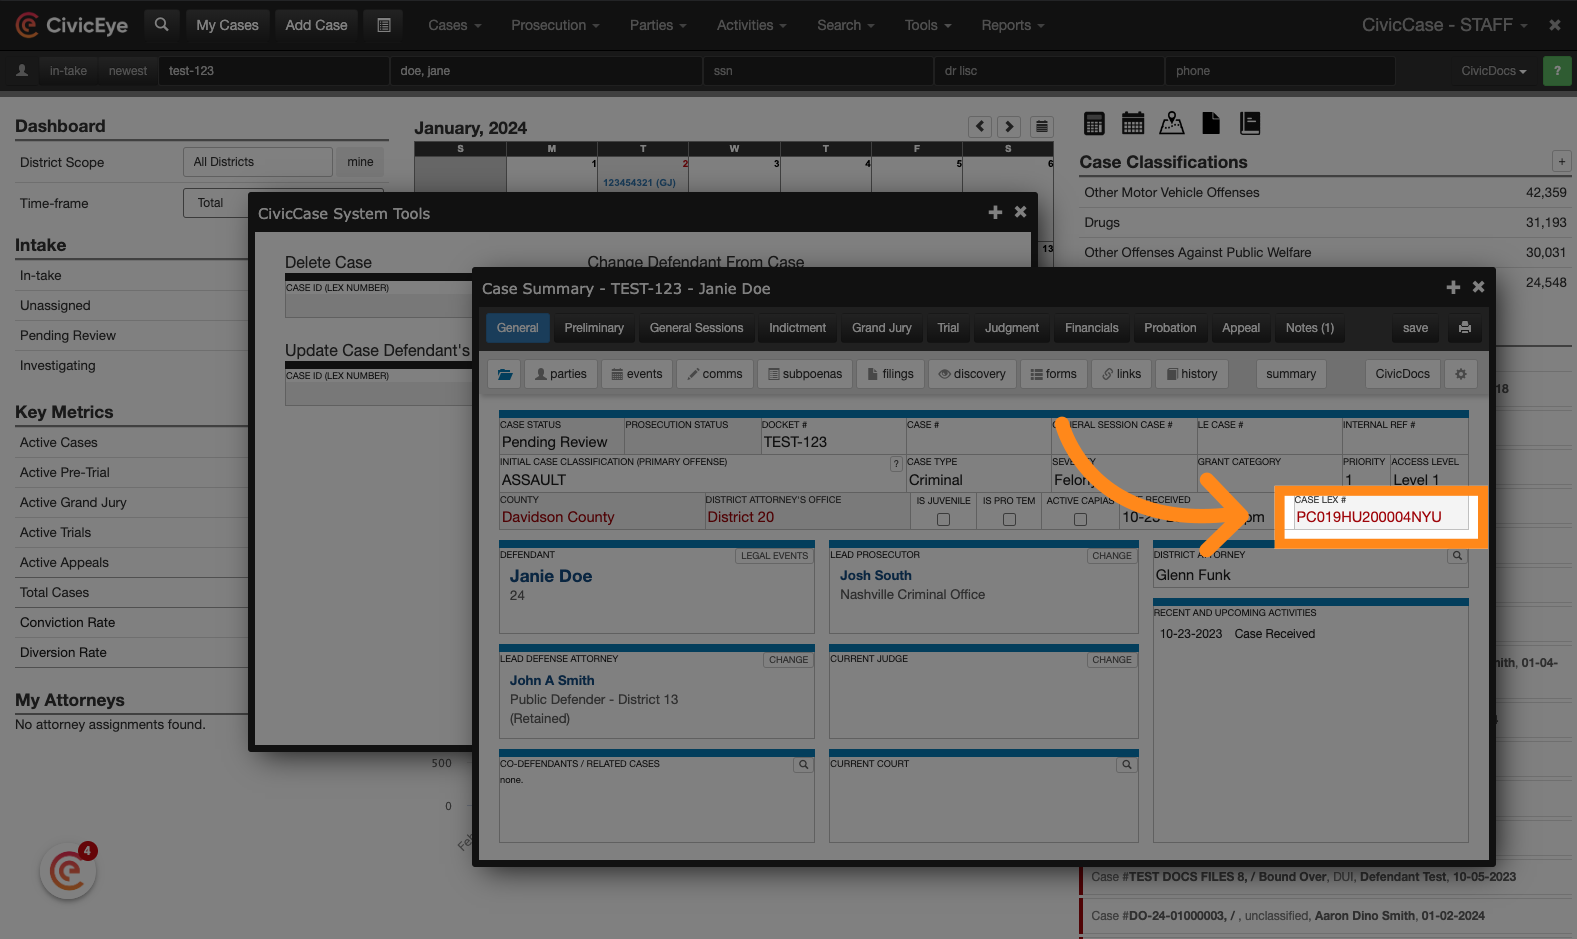
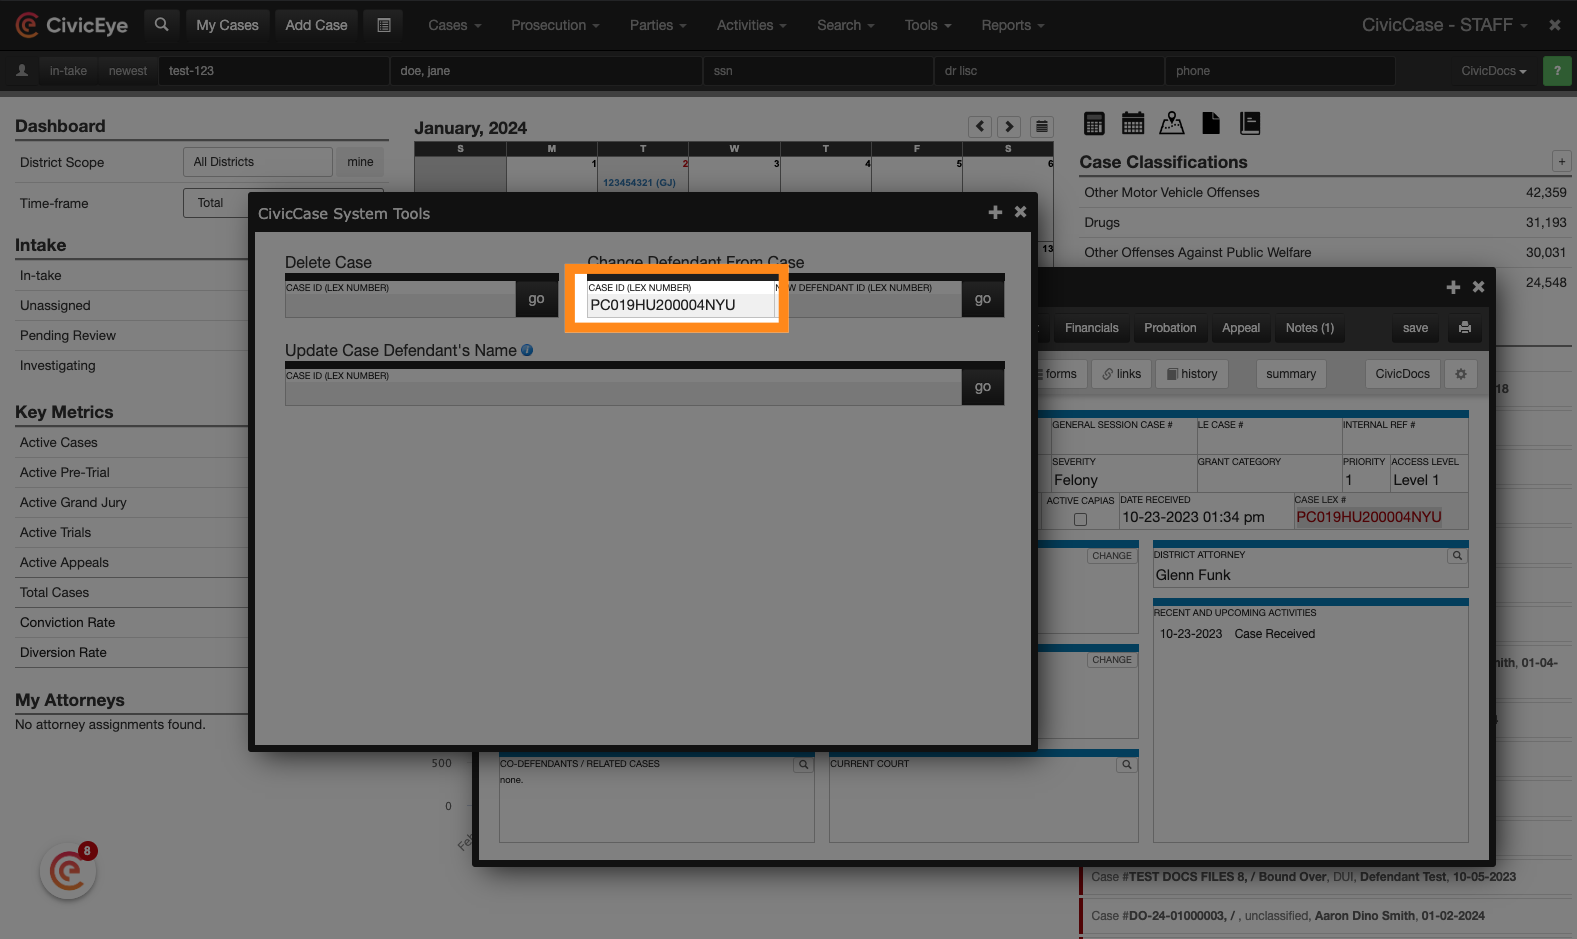
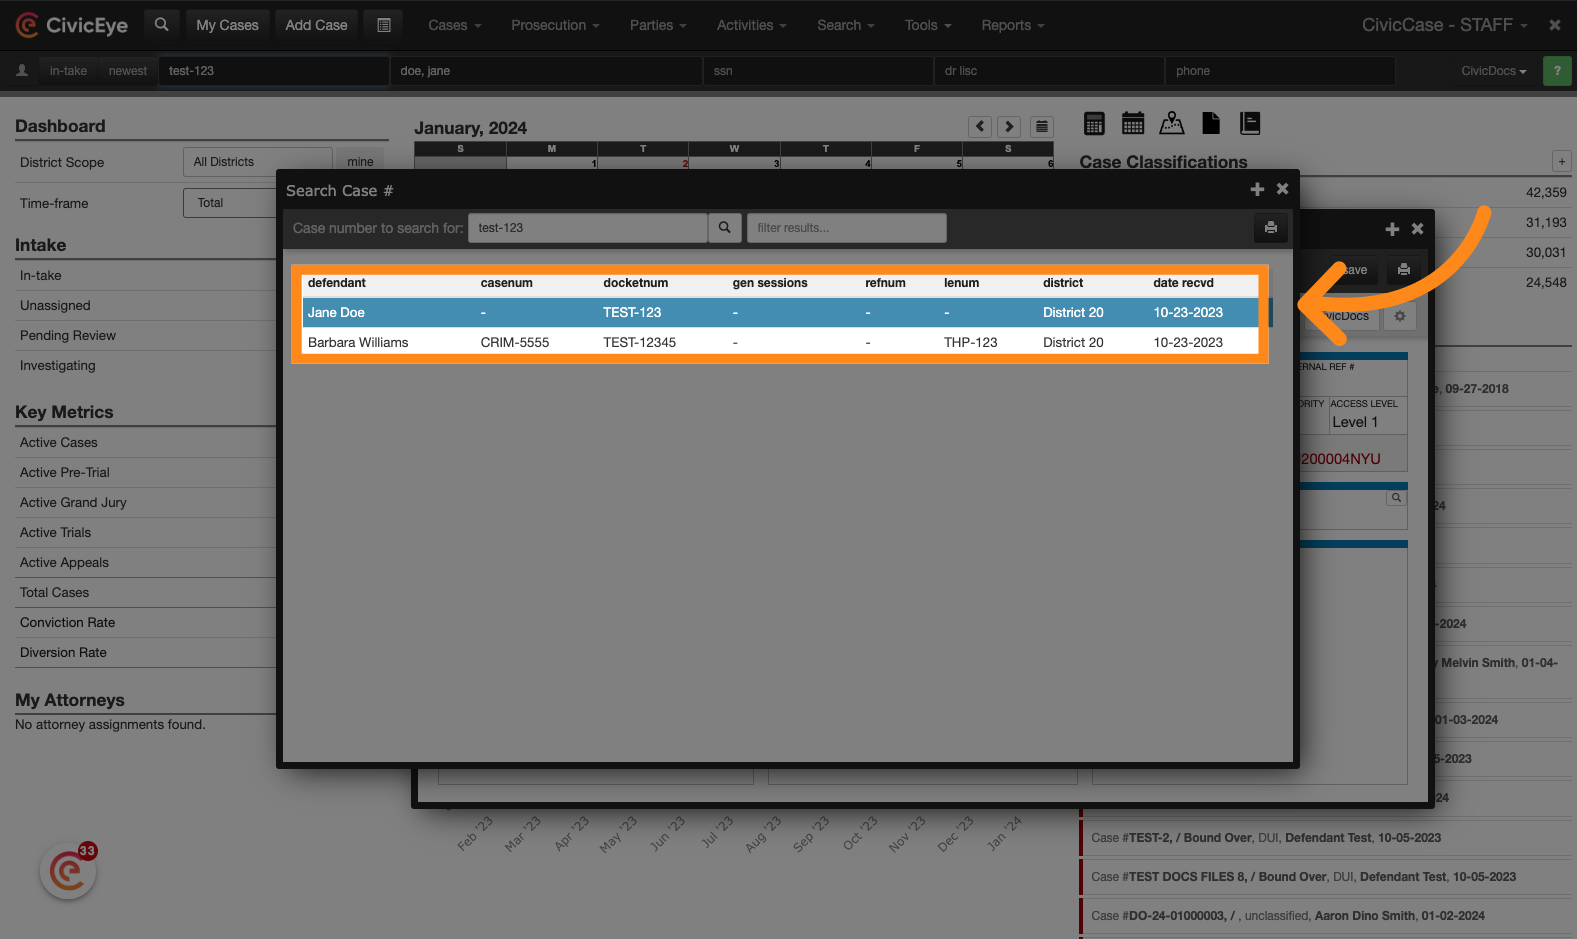
4. Locate the Case LEX ID Number
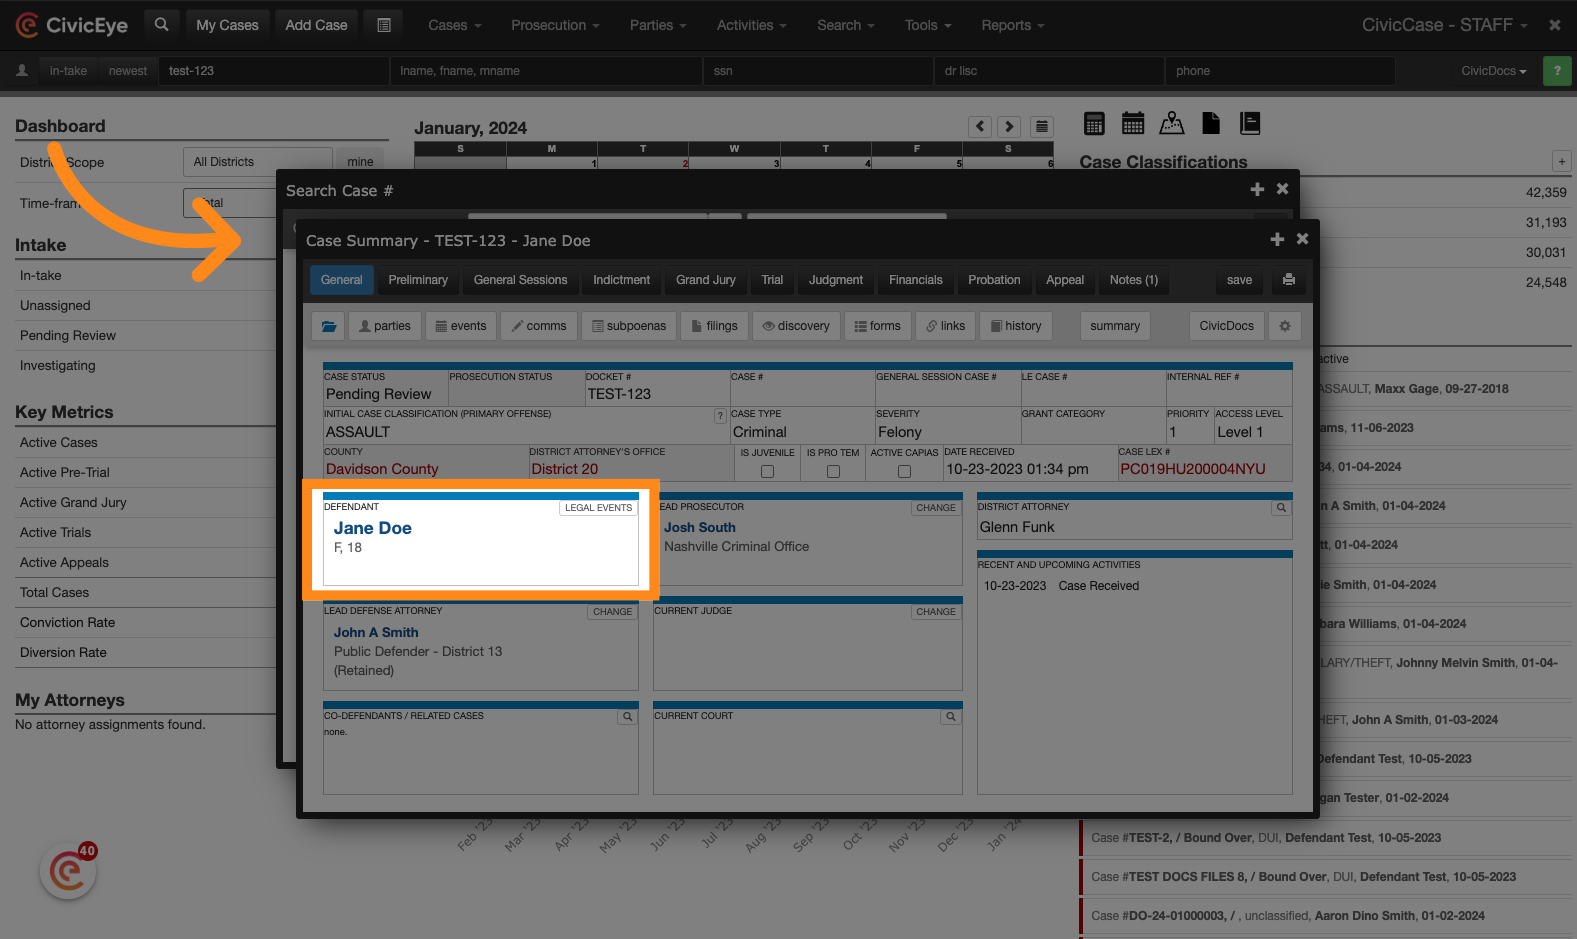
Begin by copying the Case Lex ID from the case that contains the incorrect defendant. The Case LEX ID can be found on the right-hand side of the General tab when viewing a case.
5. Enter the Case LEX ID to the System Tool screen
Paste, or key in the Case LEX ID number.
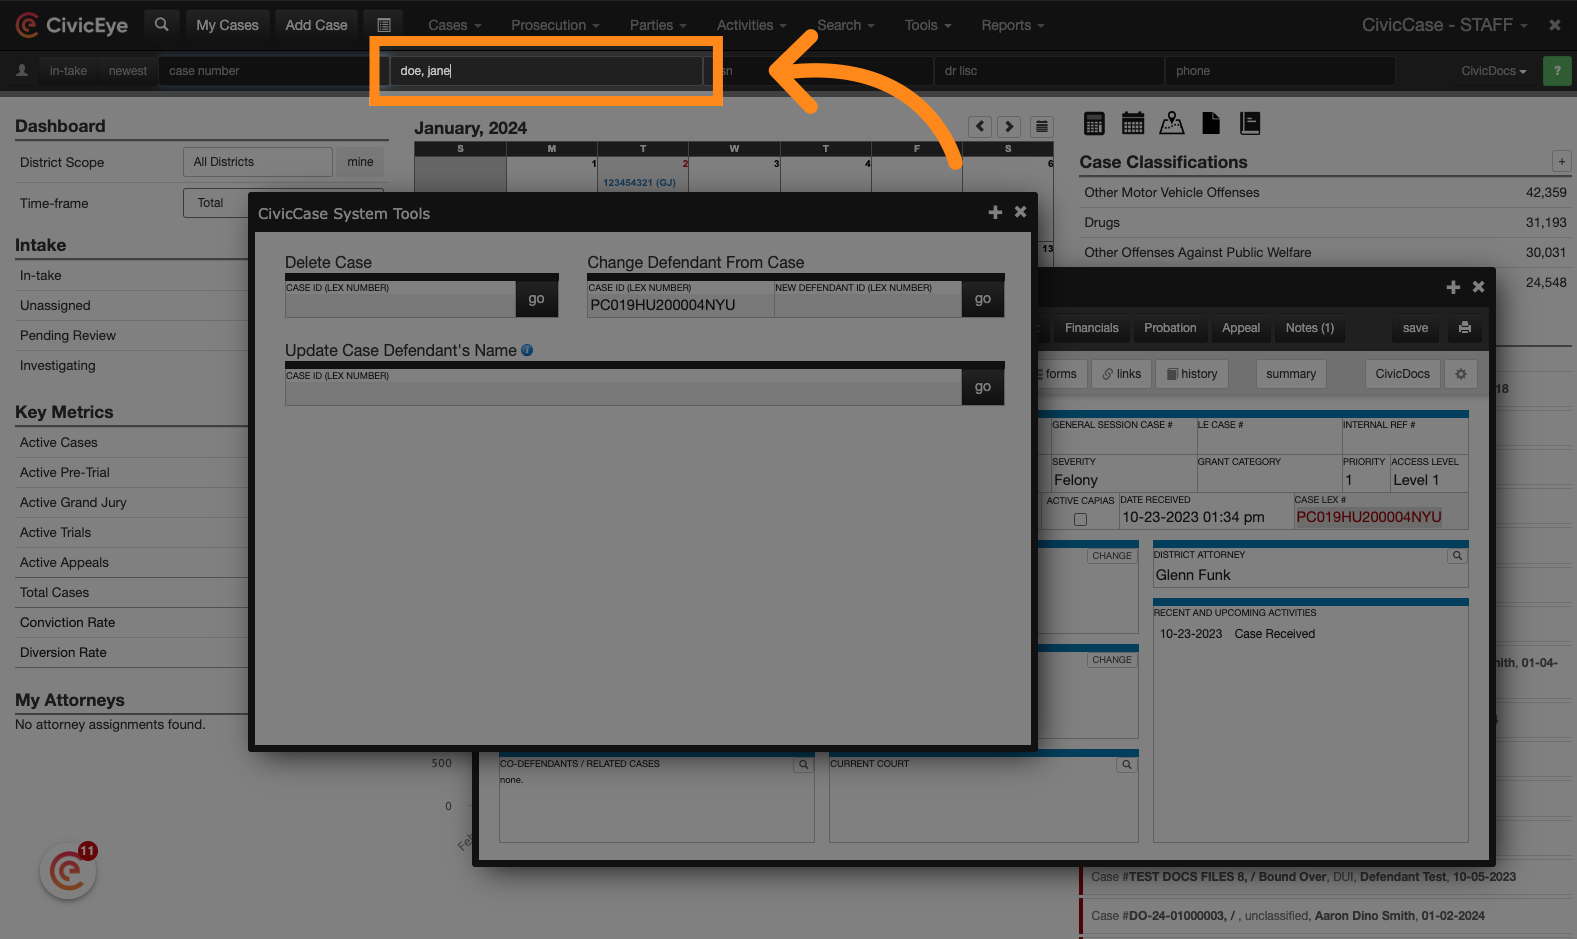
6. Locate the Person to replace the existing defendant
Next, search for the name of the new defendant that will replace the existing defendant on the case. In this example, we are searching "Doe, comma, Jane"
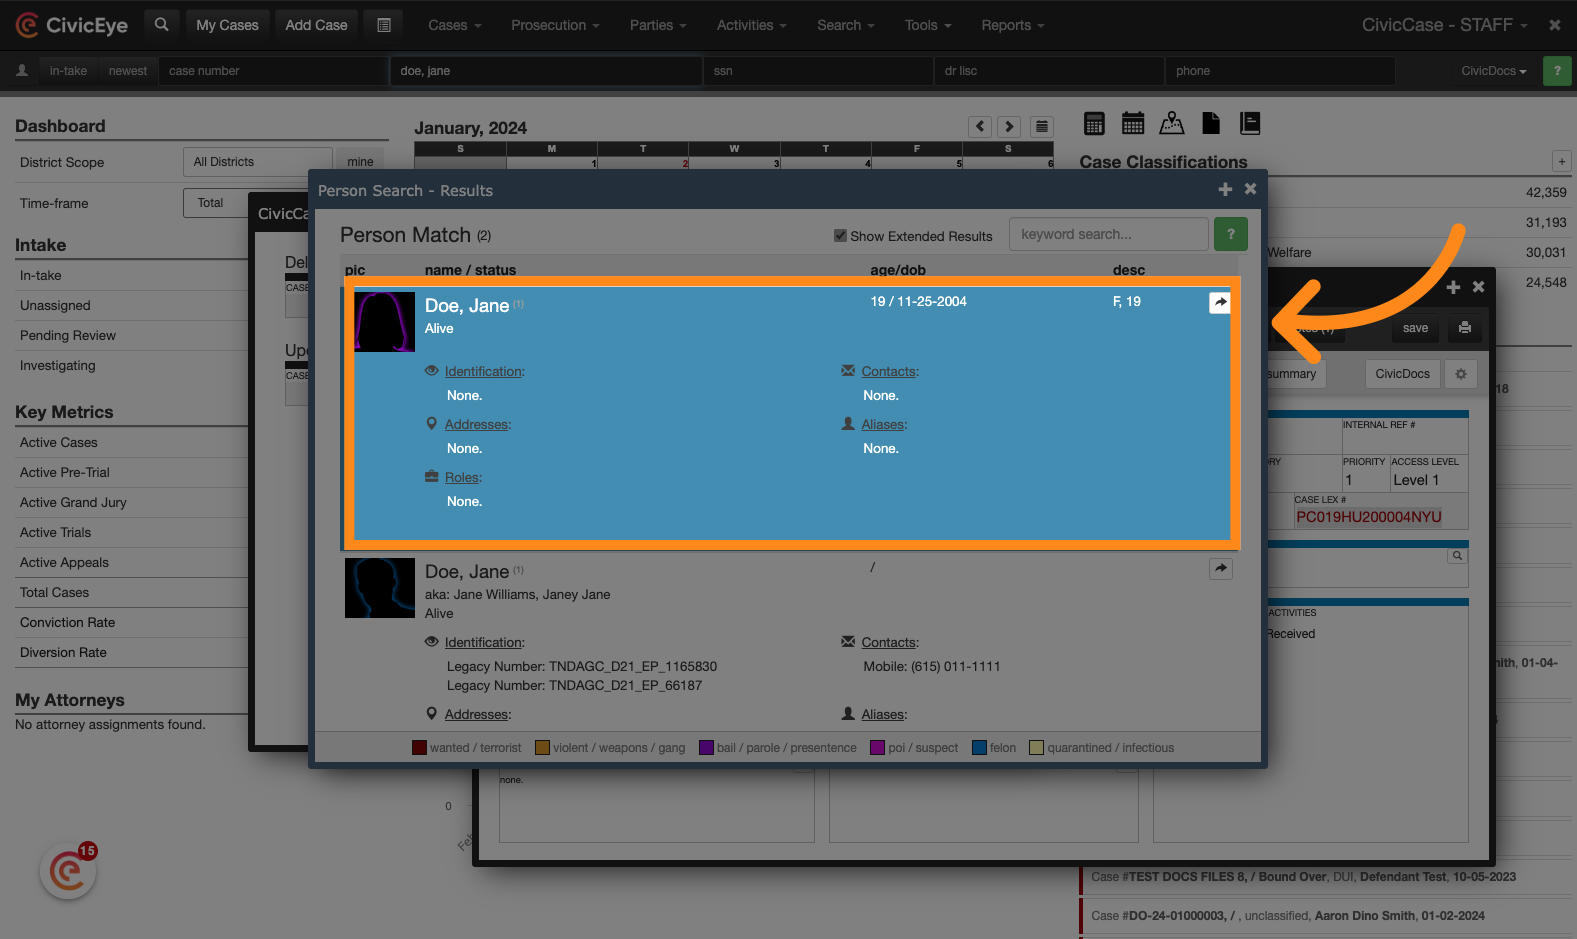
7. Locate the correct person search result
Review the search results from the person search screen, and click on the person record for the applicable new defendant to open the person record.
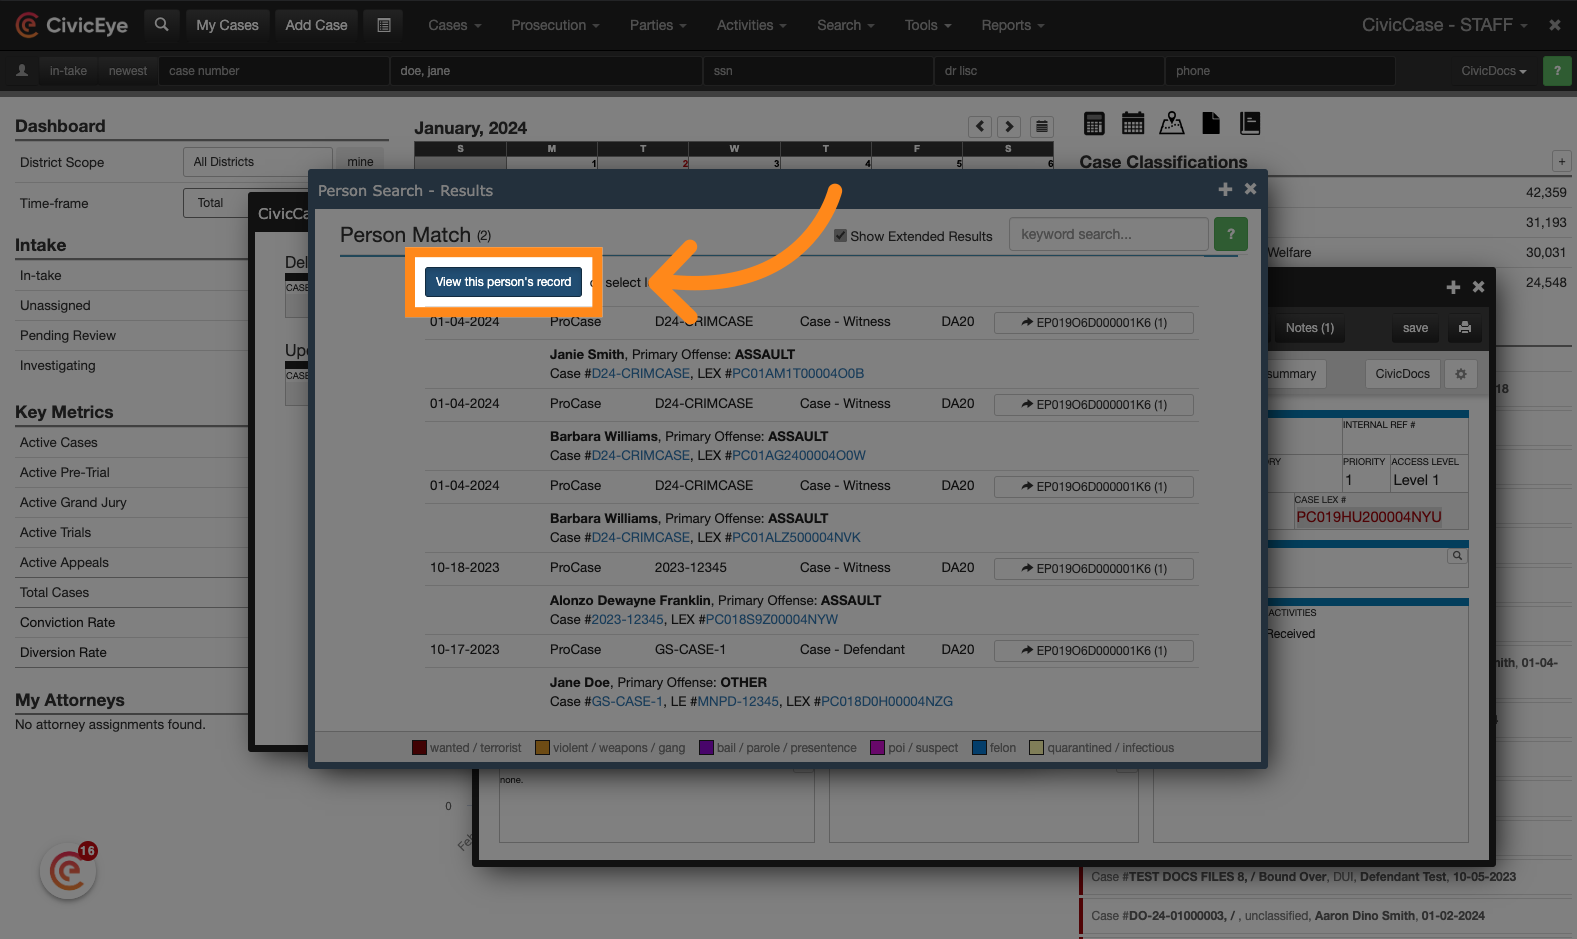
8. Open the Person Record
Click "View this person's record" to open the person record.
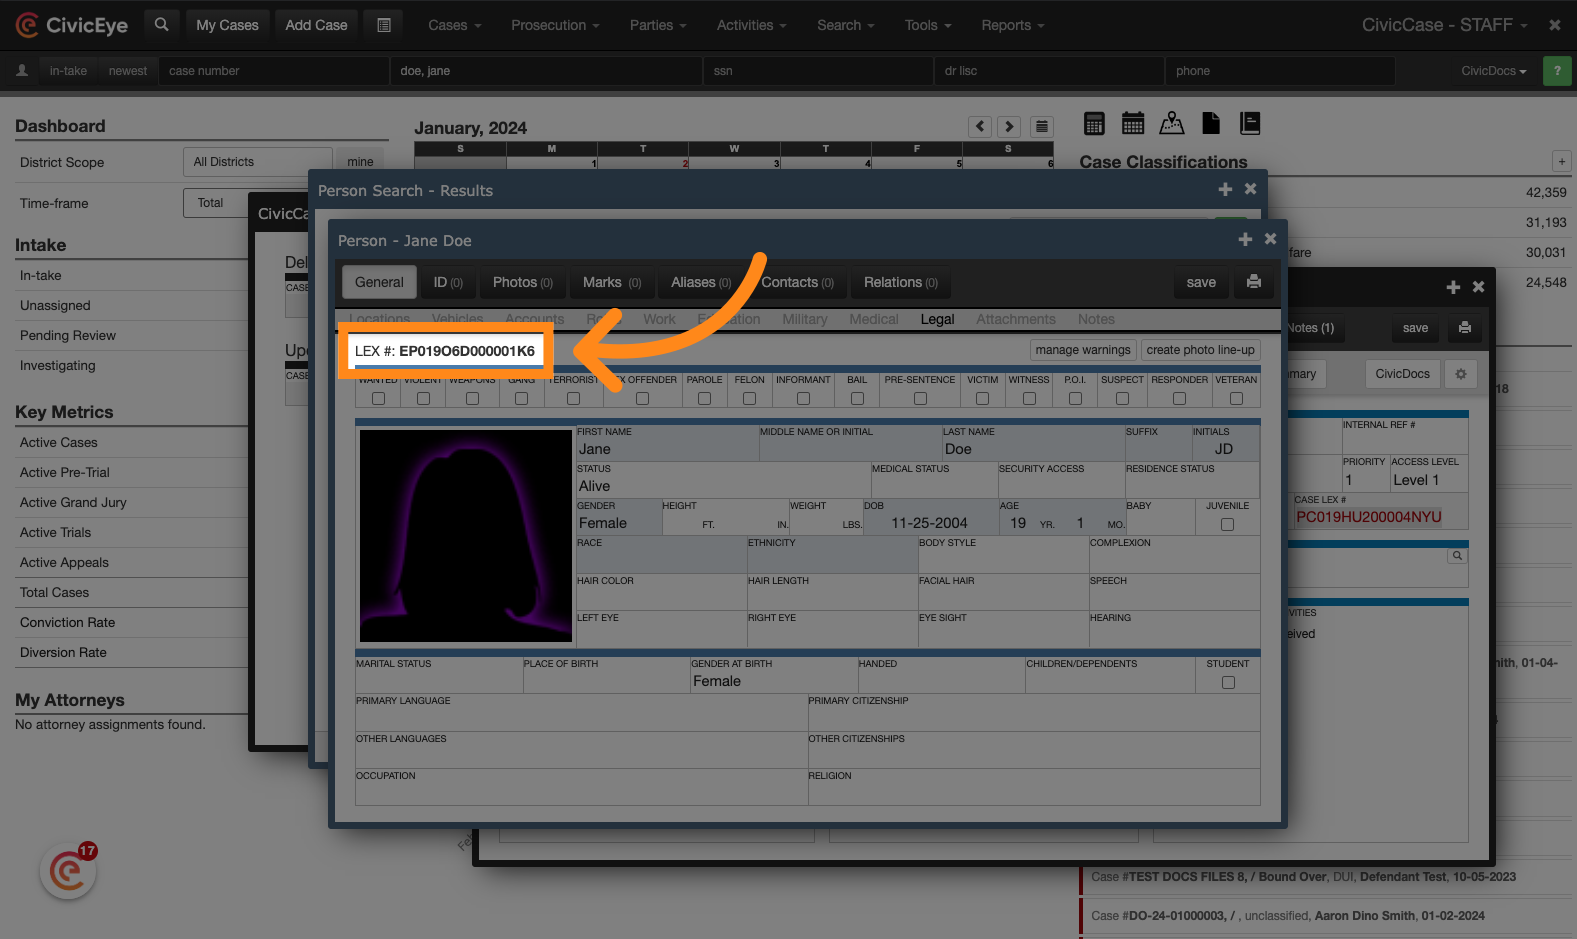
9. Copy the Person LEX ID Number
Copy the person Lex ID, located in the upper, left hand corner of the screen
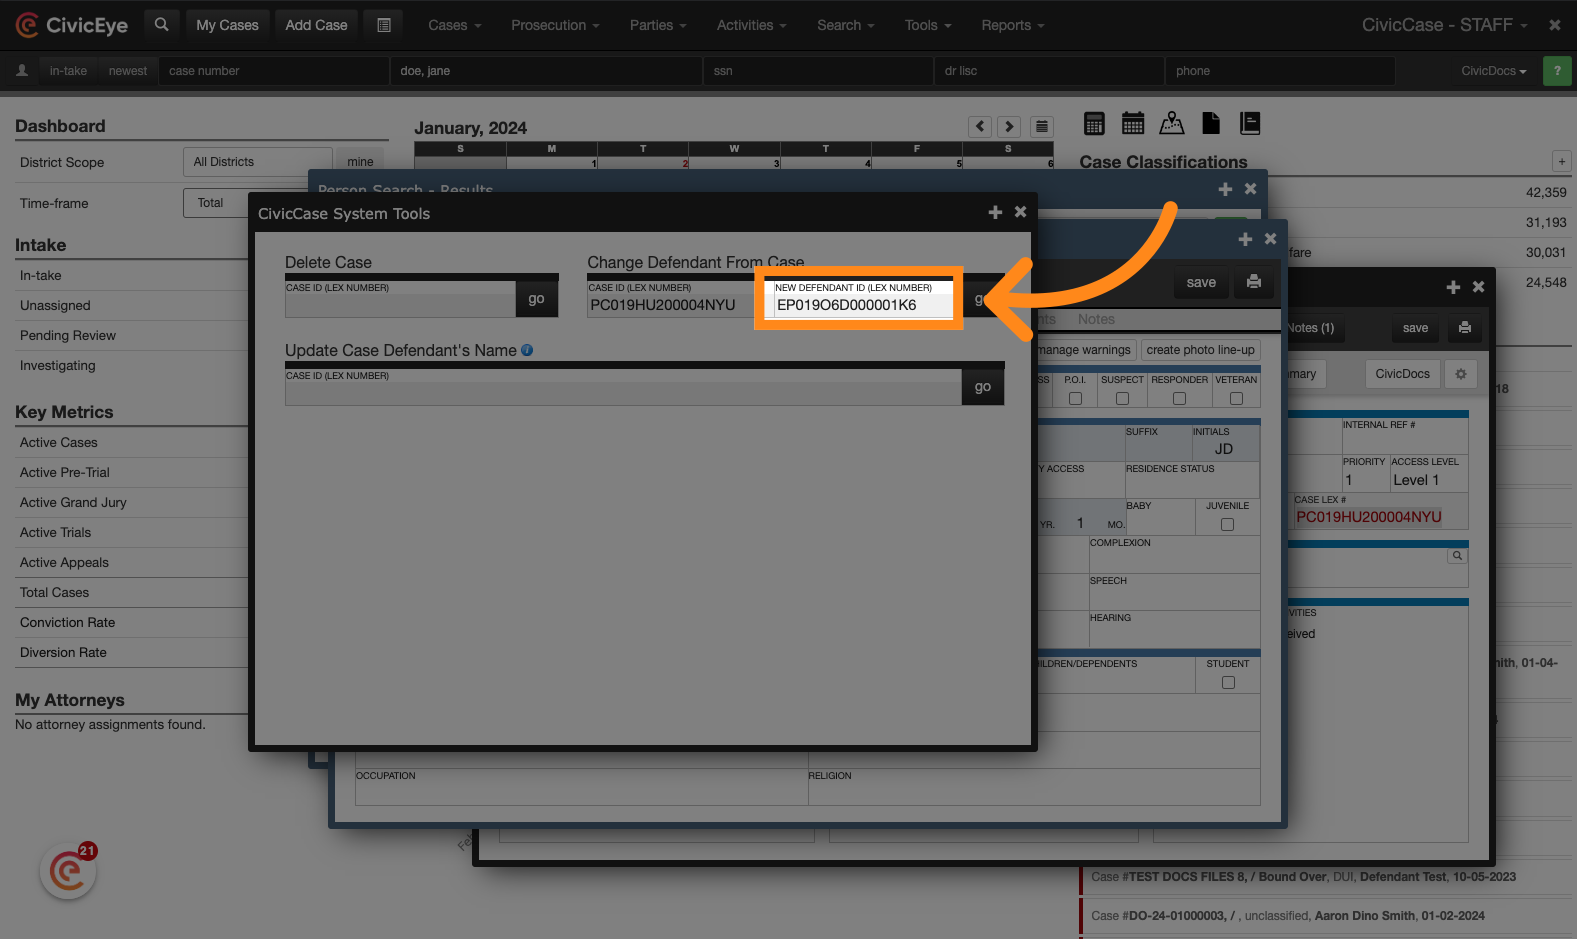
10. Enter the Person LEX ID into the System Tools Screen
Enter the Person LEX ID in the "New Defendant" field
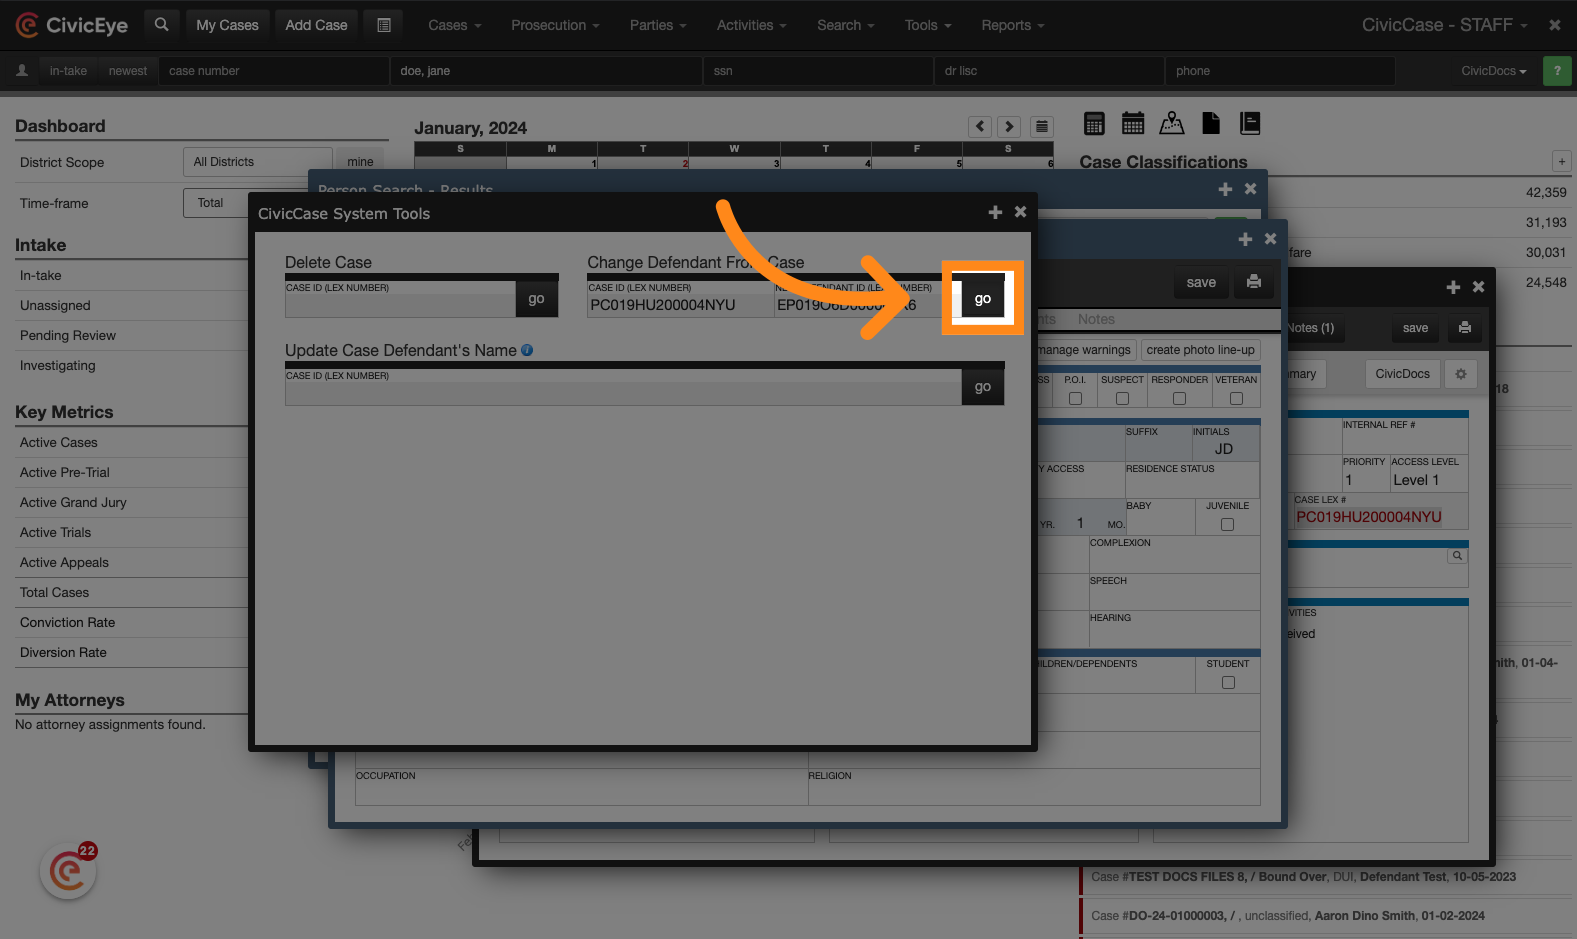
11. Click "go"
Click go to apply the changes and update the defendant associated with the case. After applying the change, close the open case windows and reopen the case to review the changes. Please note: if the case window is open when the system tool is used to change the defendant, the changes will not automatically display until the case is re-loaded.
12. Reopen the Case to view changes
Locate the case by using the search feature, and reopen the case to review the changes.
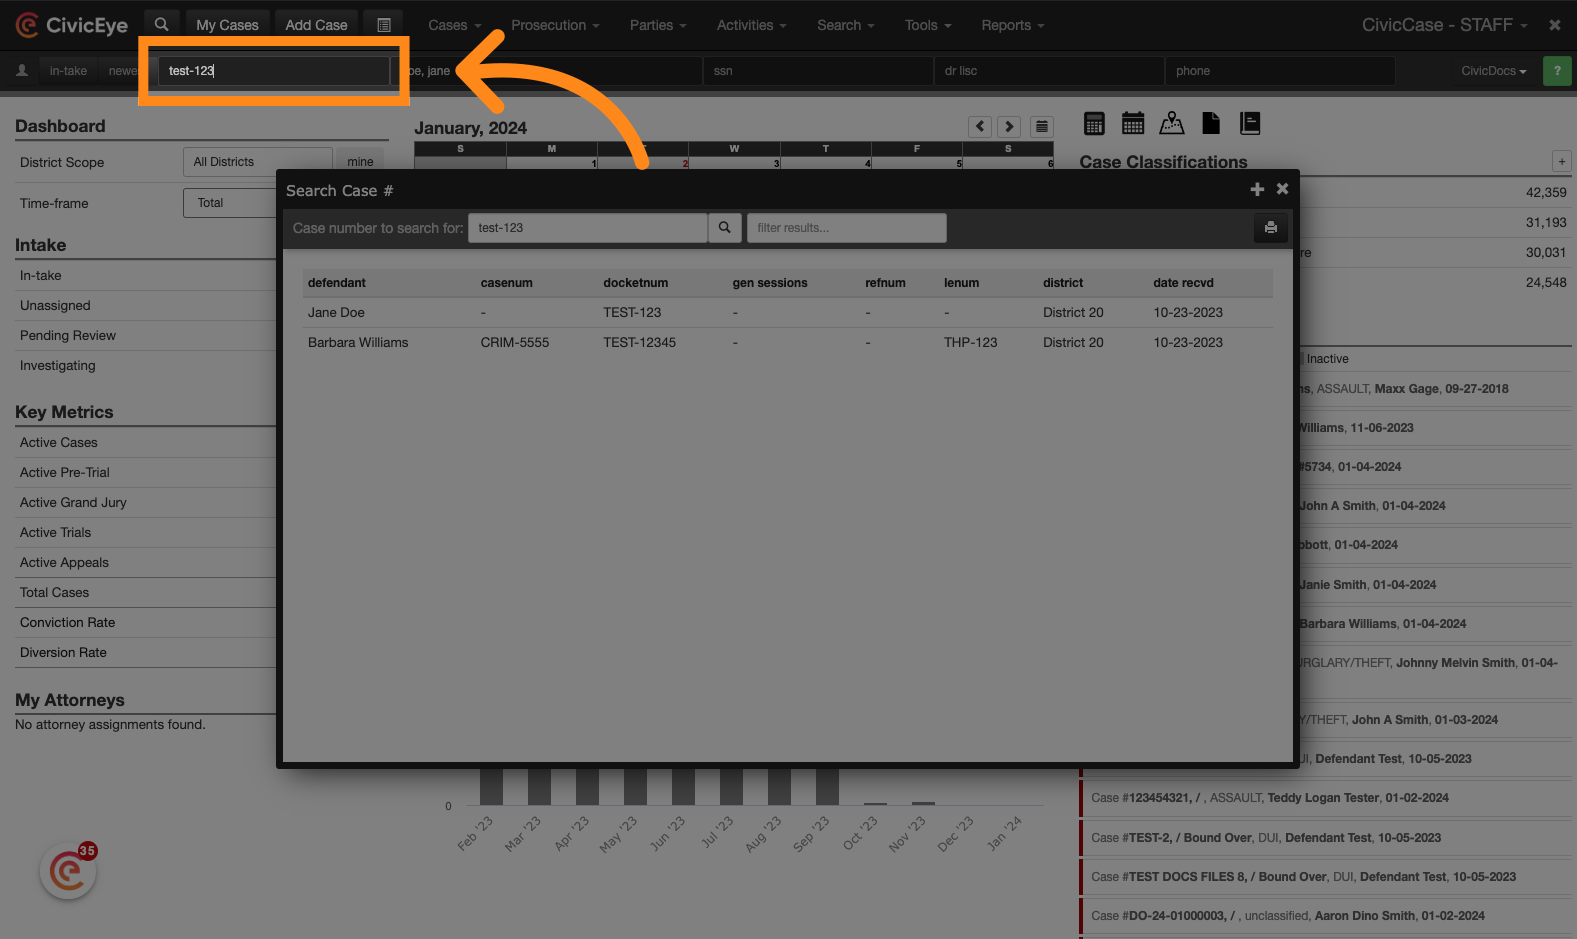
13. Open the correct case from the search results
14. Confirm the changes have been correctly applied
Upon reopening the case, the new defendant name will be reflected in the defendant field.
Thank you for your partnership with CivicEye! We hope you found this tutorial helpful. Click the link below to learn more about CivicEye's product offerings.