.png?width=250&height=99&name=CivicEye_Identity_Secondary%20(4).png)
How to Add Personnel
This article will show users how to add personnel to court, prosecution, or law enforcement agencies.
How to Add Personnel
This guide will show users how to add new personnel to prosecution or law enforcement agencies.
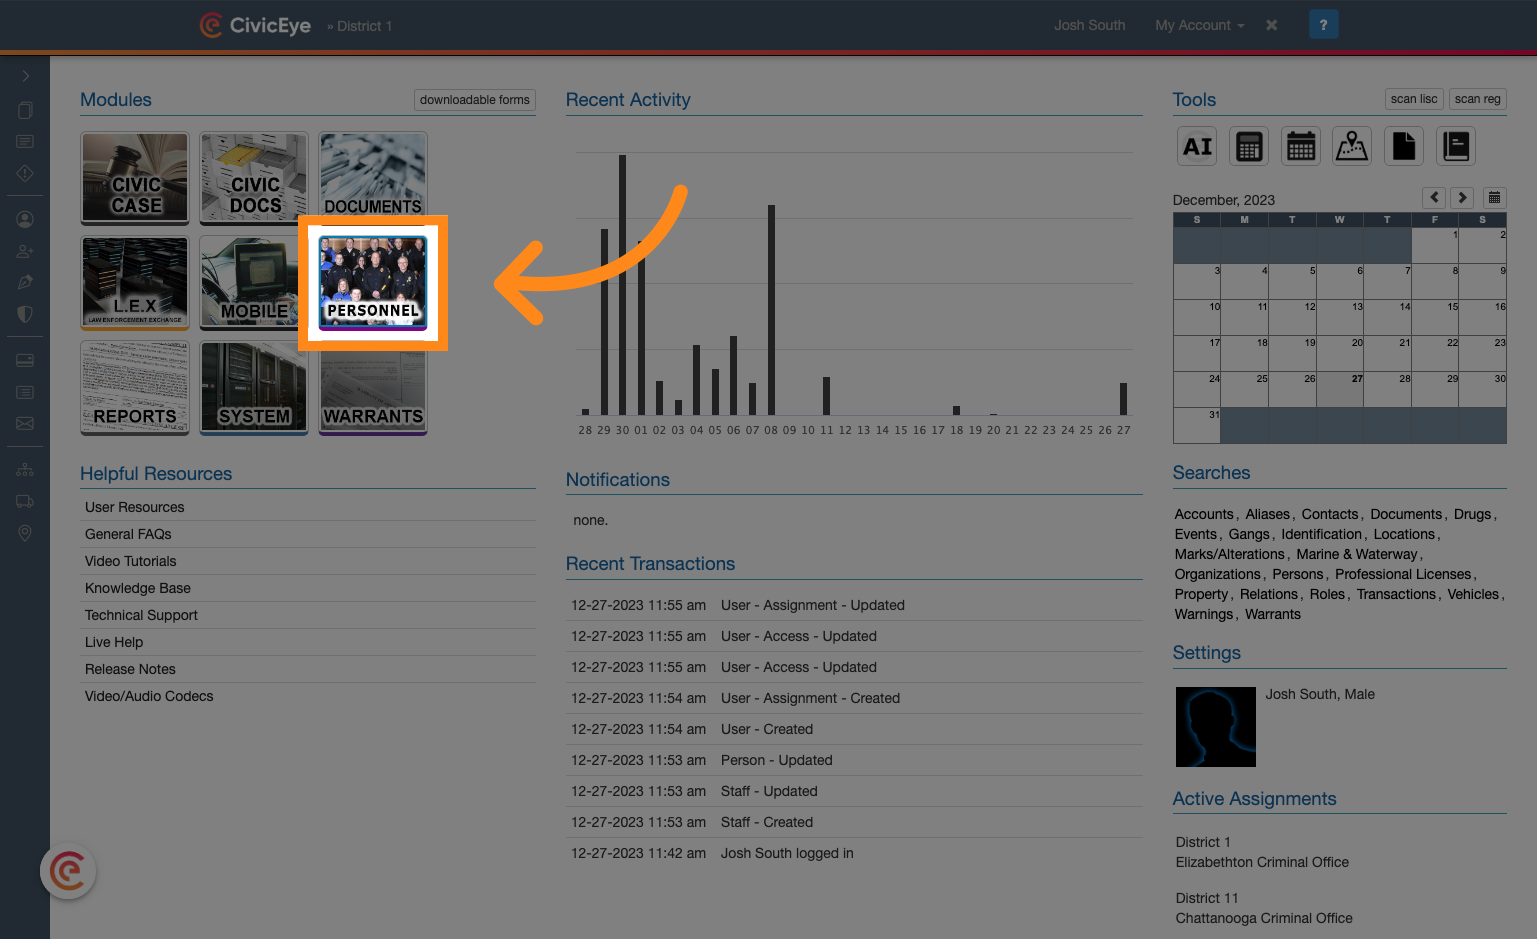
1. Open the Personnel Module
Navigate to the Personnel module by clicking the Personnel icon in the upper left hand corner. If you do not have access to the Personnel module, please contact your system administrator or CivicEye technical support.
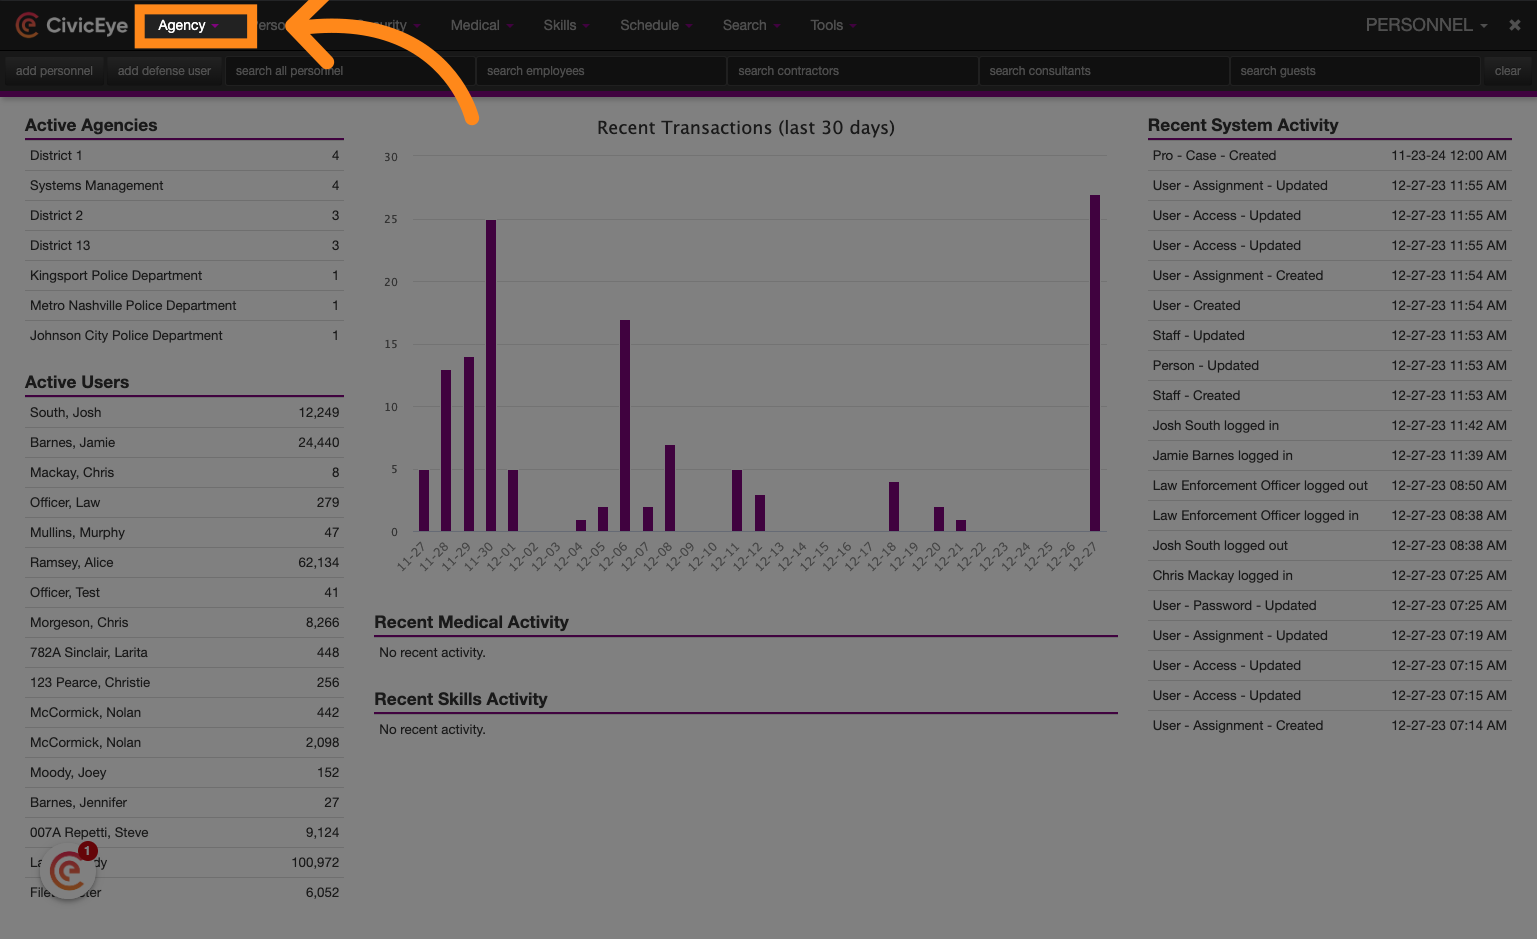
2. Check whether the user already exists
First, we will begin by verifying that the user is not already in the system. We will do this by locating the applicable agency, then reviewing all employees in the system. Click the Agency dropdown to begin.
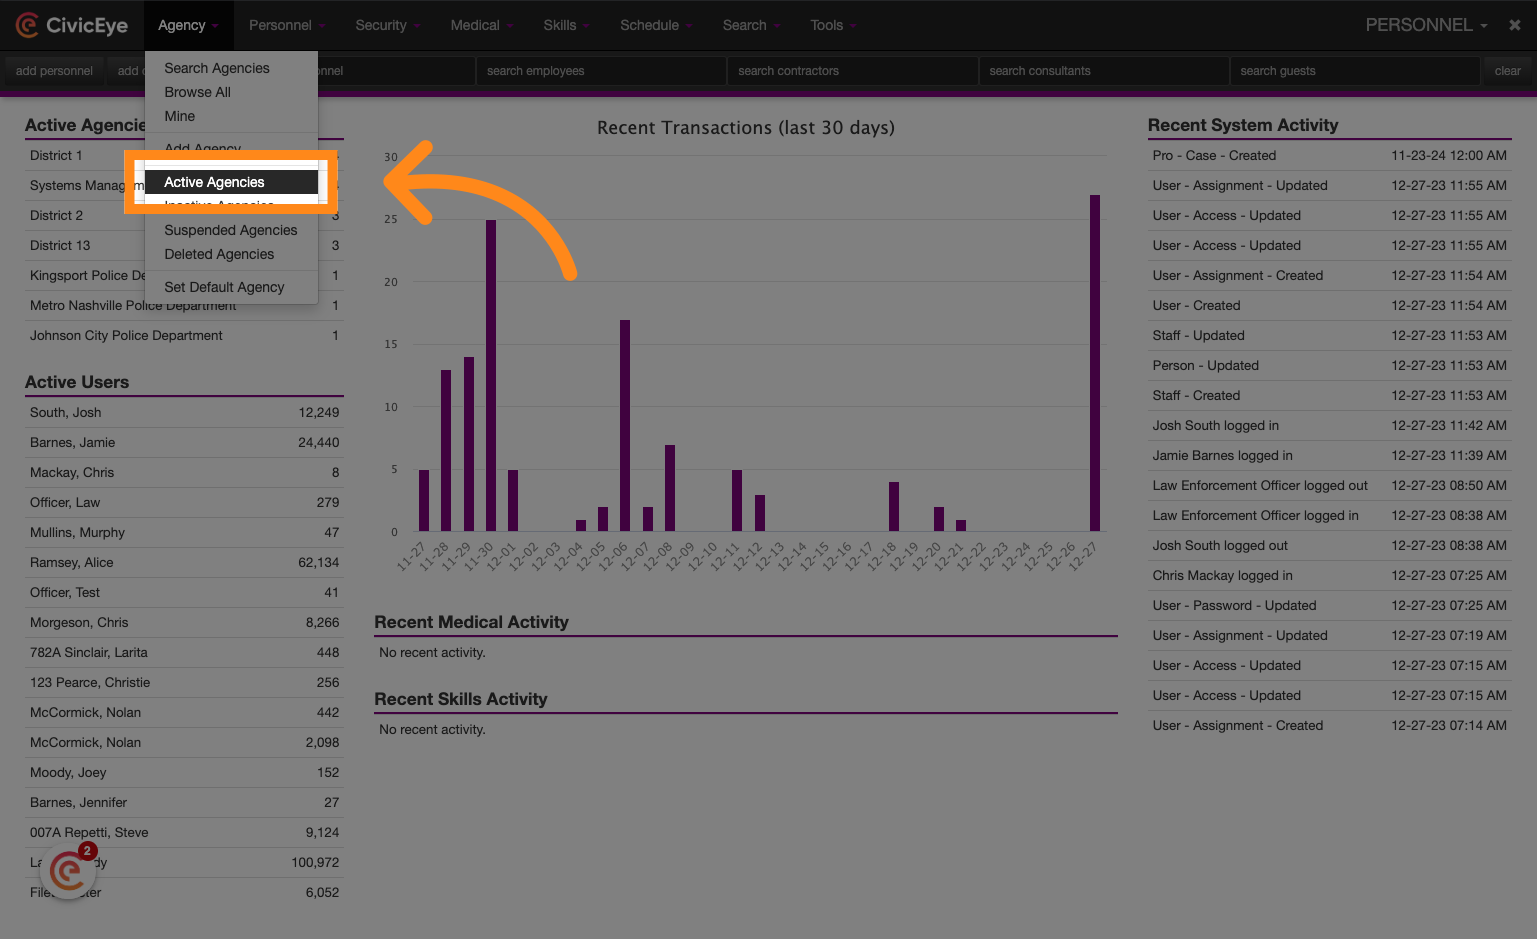
3. Click "Active Agencies"
Navigate to "Active Agencies" in the menu.
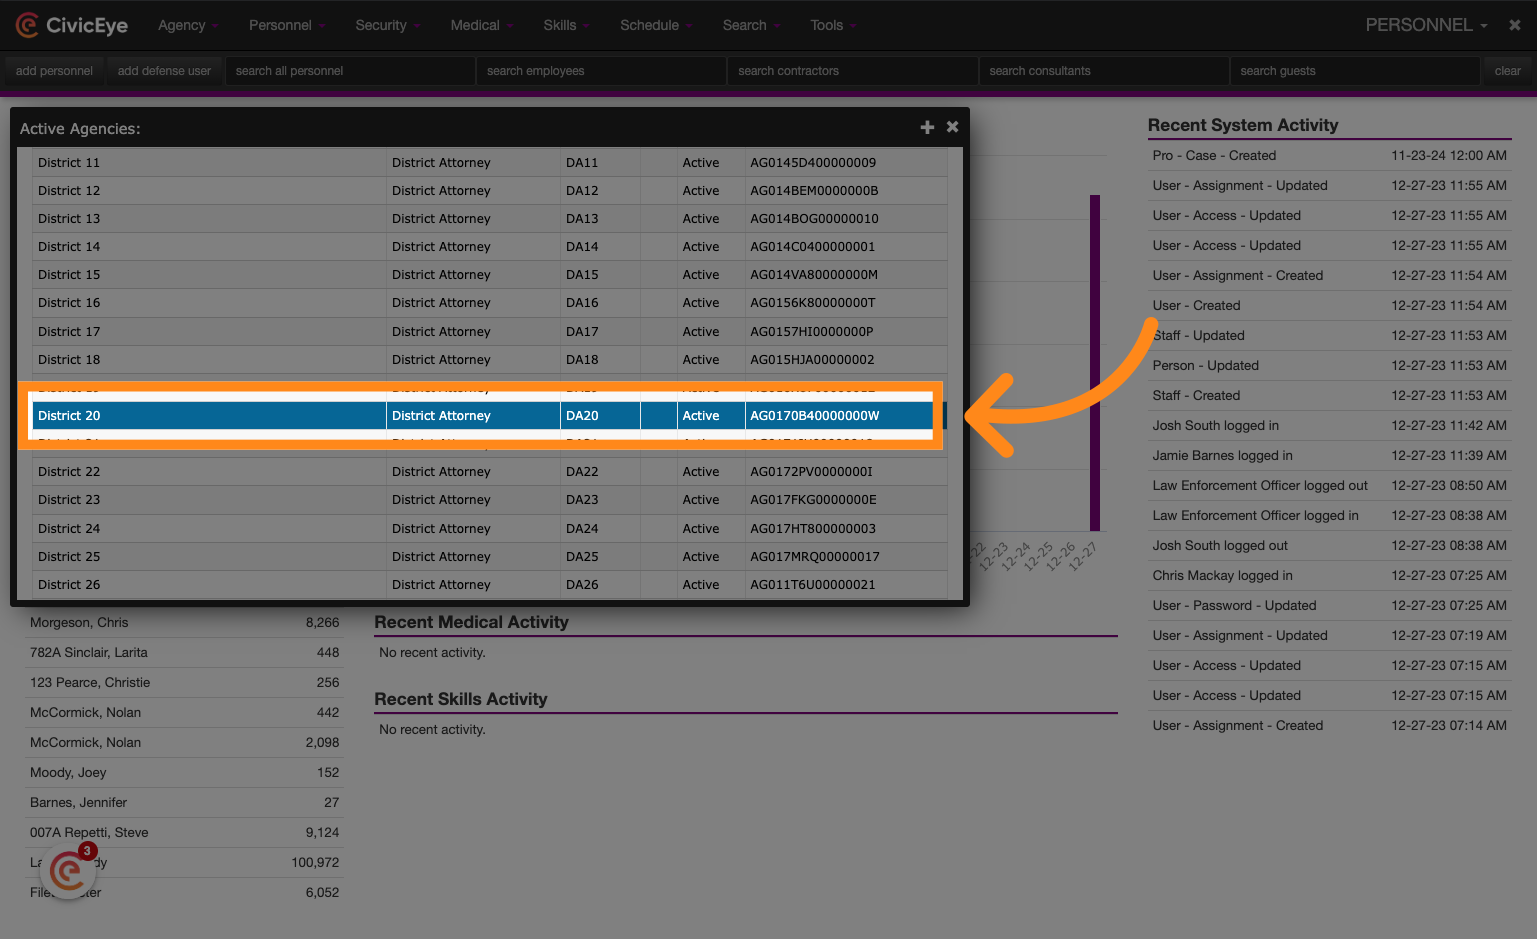
4. Locate your agency
Search or scroll through the list of agencies in the system and locate the applicable agency. Click on the agency to open the agency record.
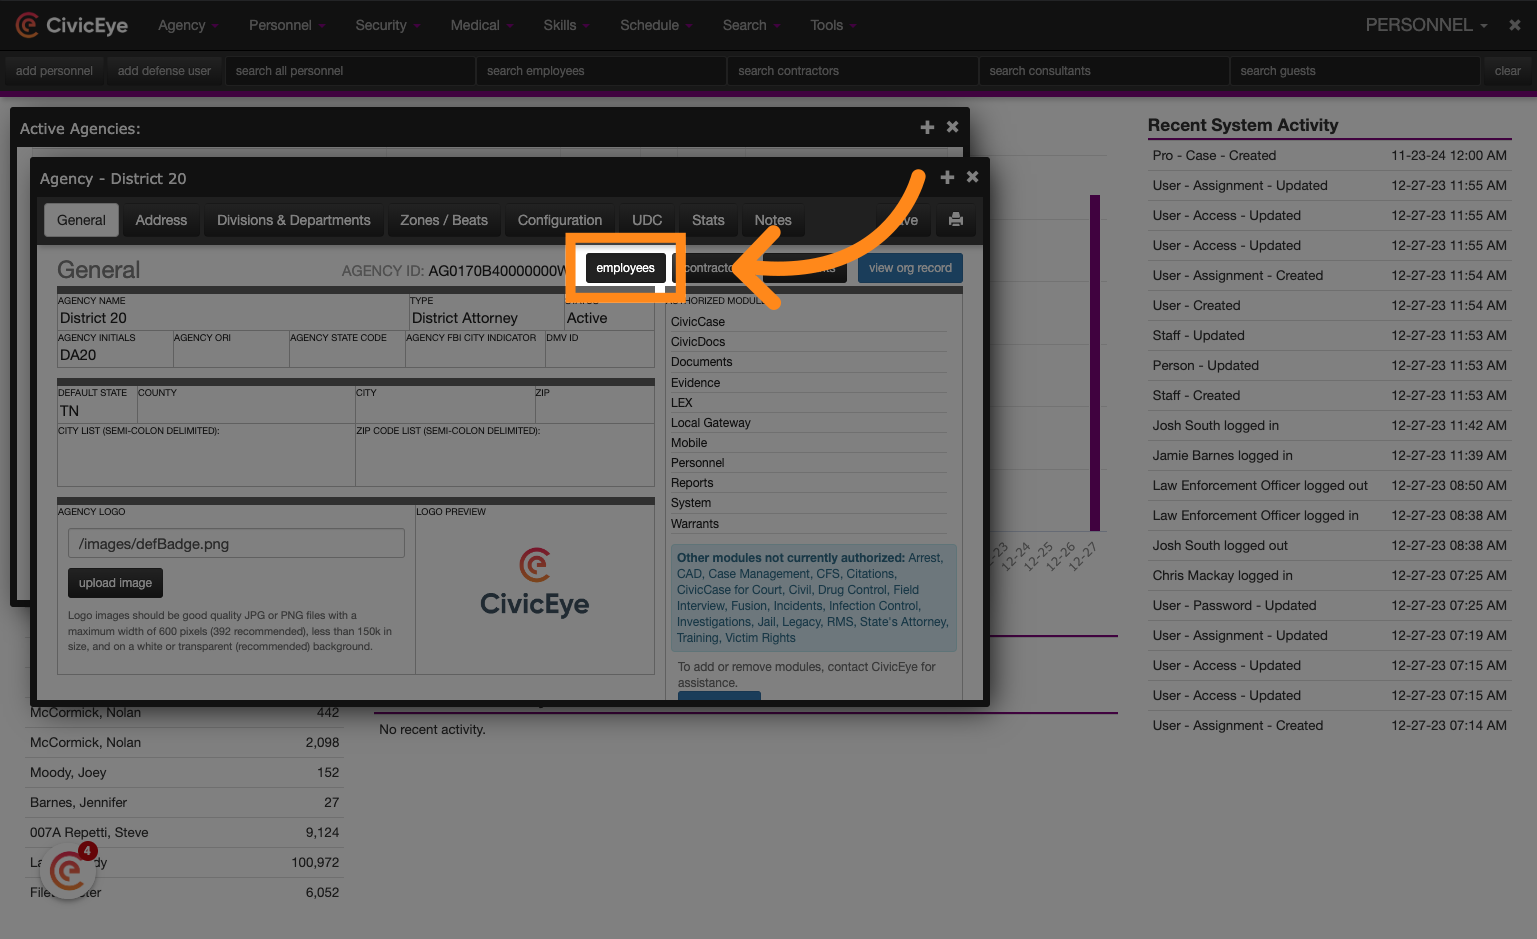
5. Click "employees"
Click on the employees button to view a list of all employees set up within the agency.
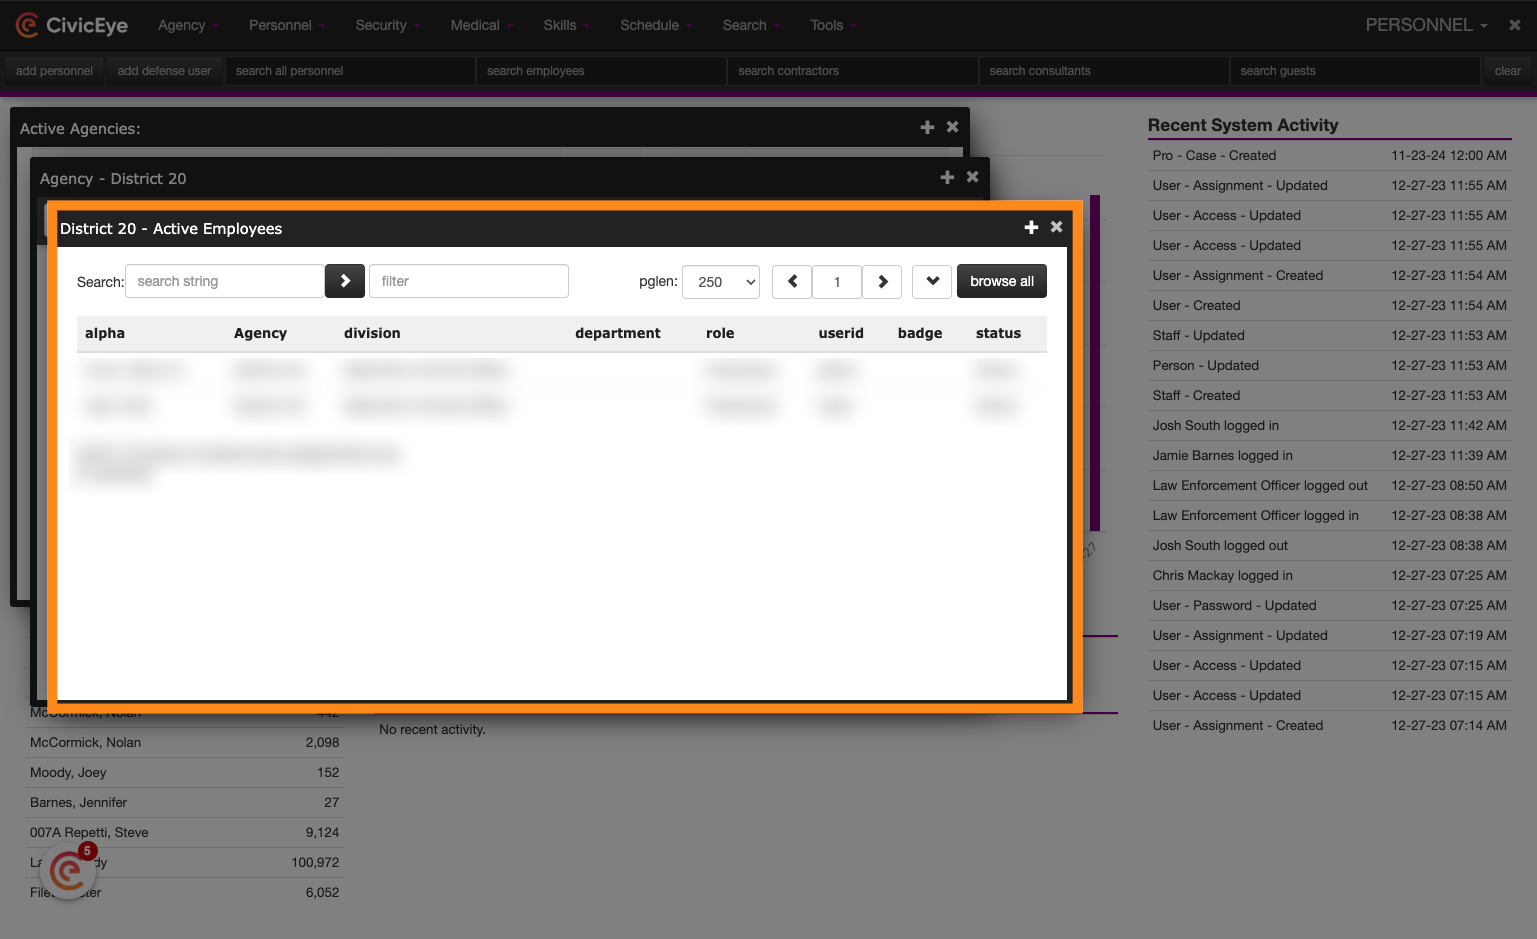
6. Review active employees
Review the list of active employees for the agency and confirm whether the new user is already in the system. If the user is located, click on their name and reset the password if needed. Password reset instructions can be found in a separate tutorial video. To continue, close the window by clicking the "X" in the upper, right-hand corner of the pop-up window.
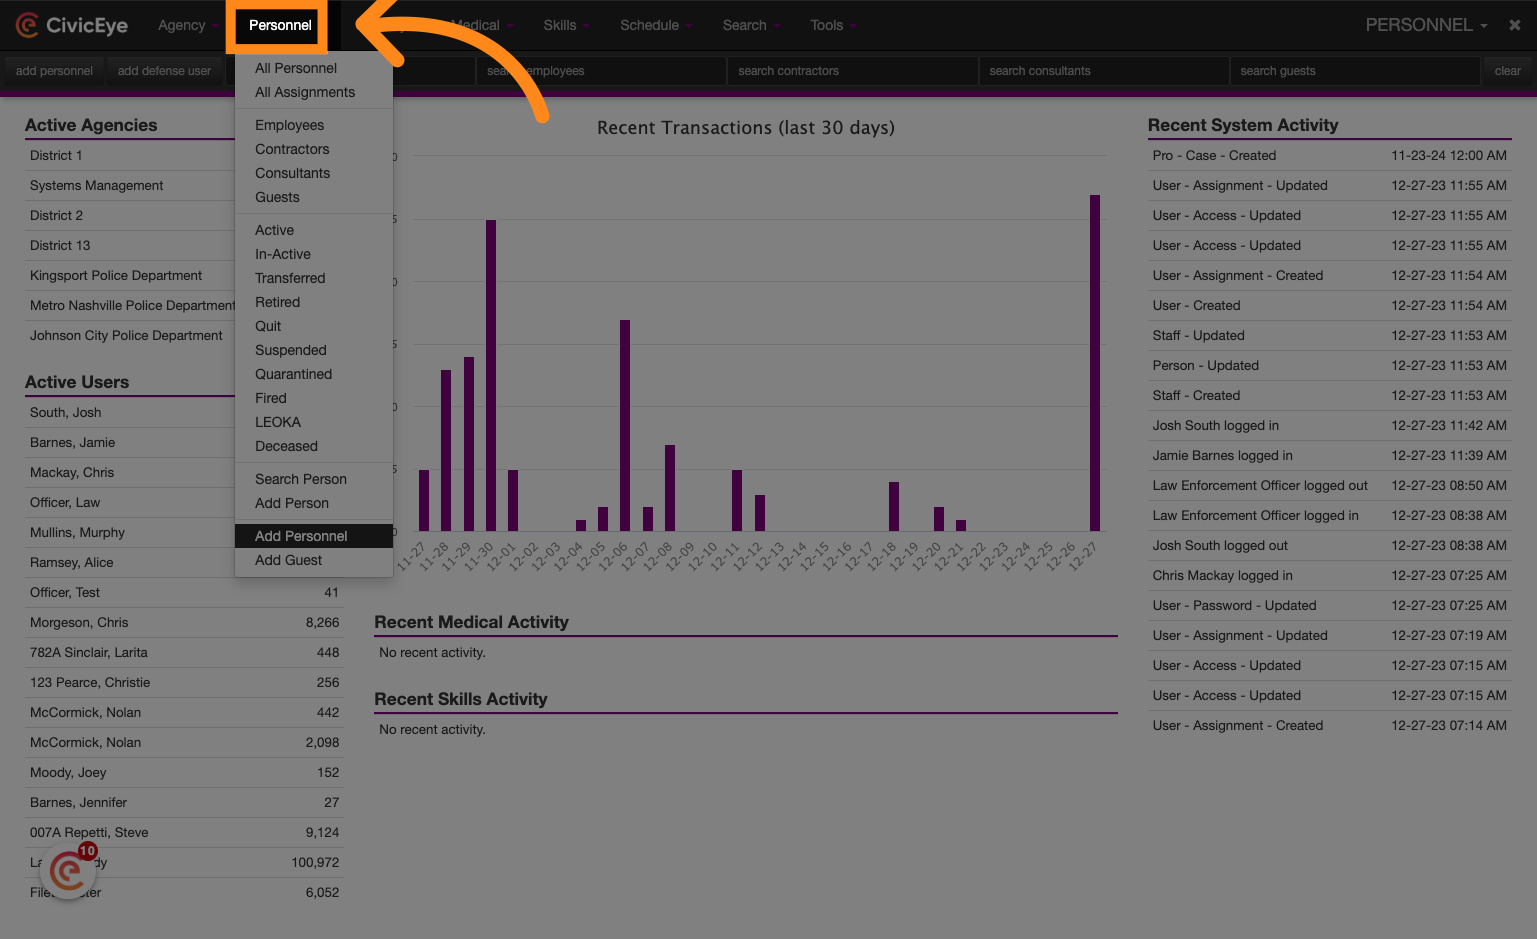
7. Navigate to the Personnel dropdown to begin adding a new personnel record
To begin adding a new Personnel record, open the Personnel drop-down and then choose "Add Personnel"
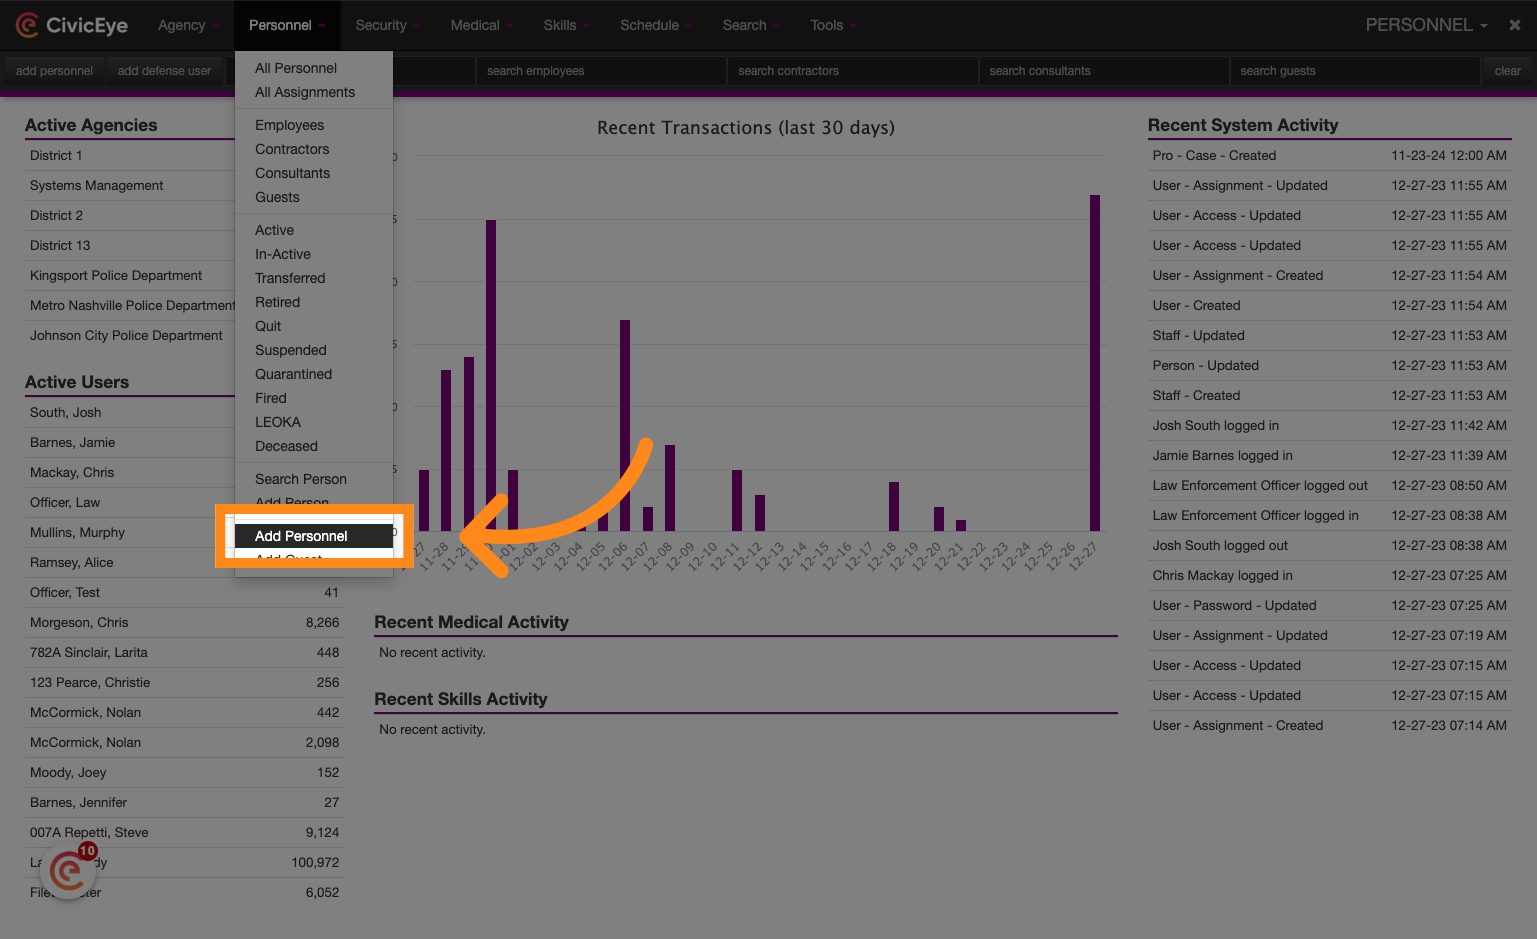
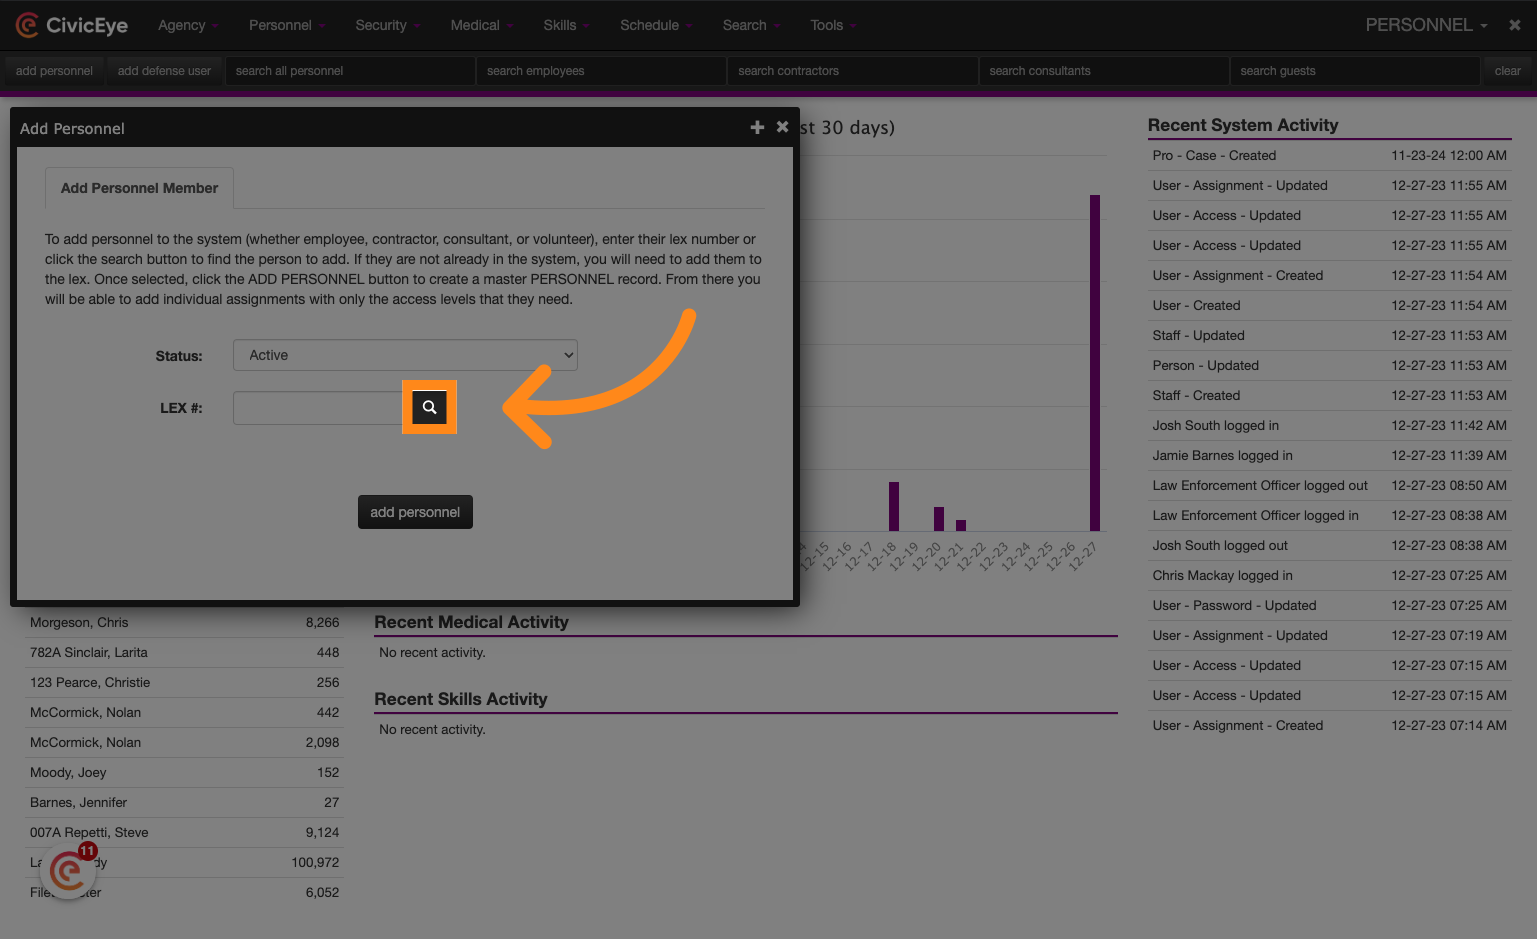
8. Click "Add Personnel"
Click on "Add Personnel" to add a new employee.
9. Conduct a person search
When adding Personnel, begin by searching for the person record.
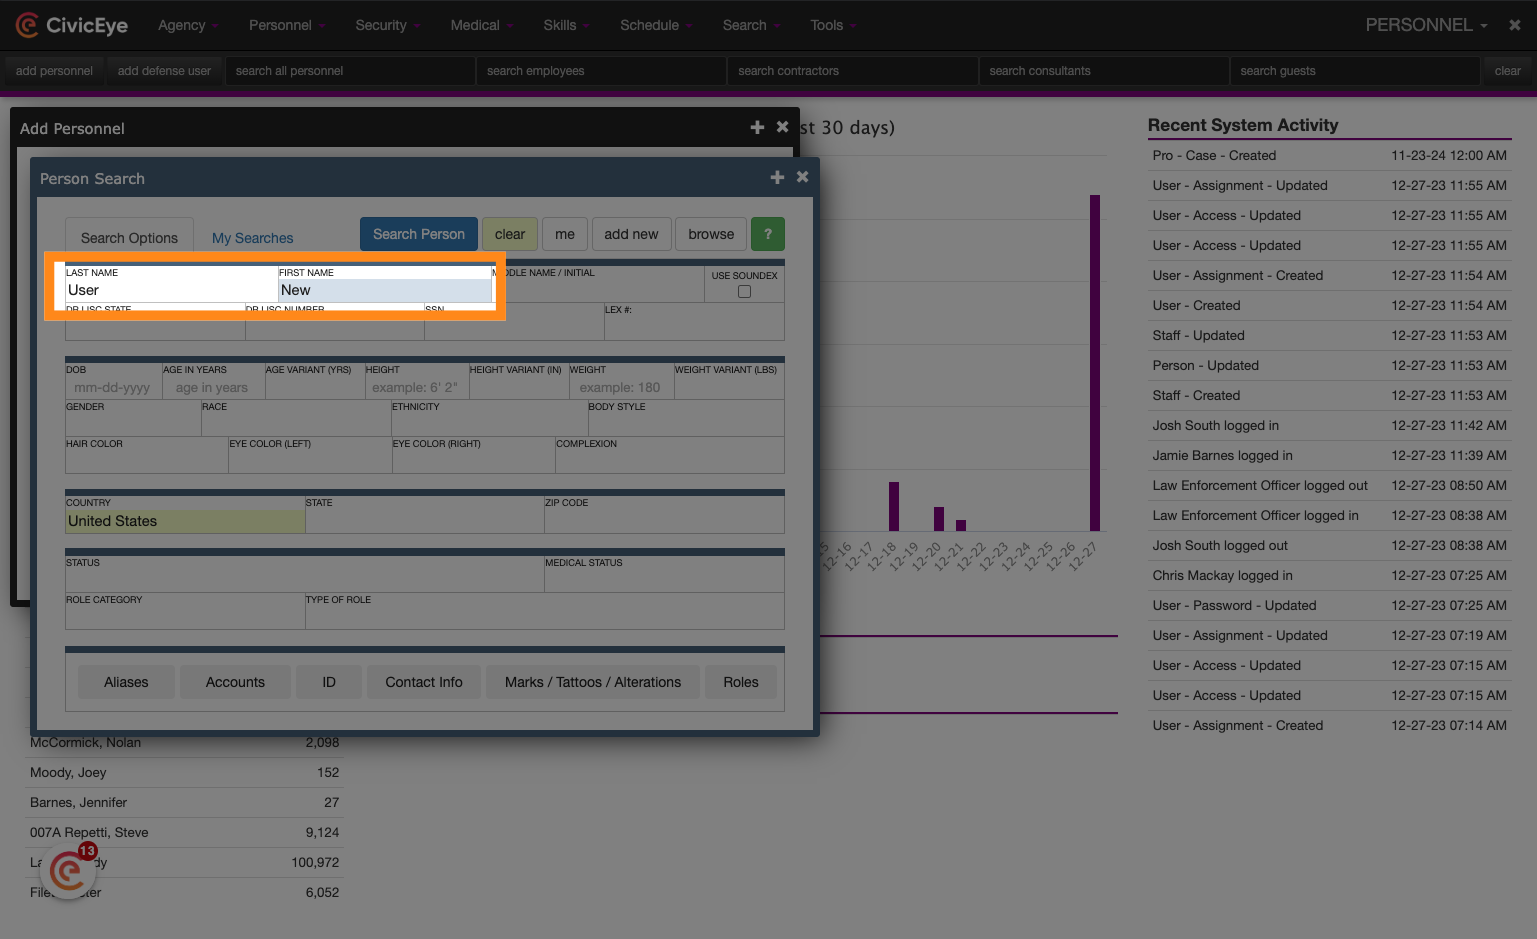
10. Enter person name information
Begin by entering a last name and first name, at a minimum. If additional information is available, it may be searched, but keep in mind that search results may vary if the search criteria is not contained within the system. Also consider spelling variations when searching names.
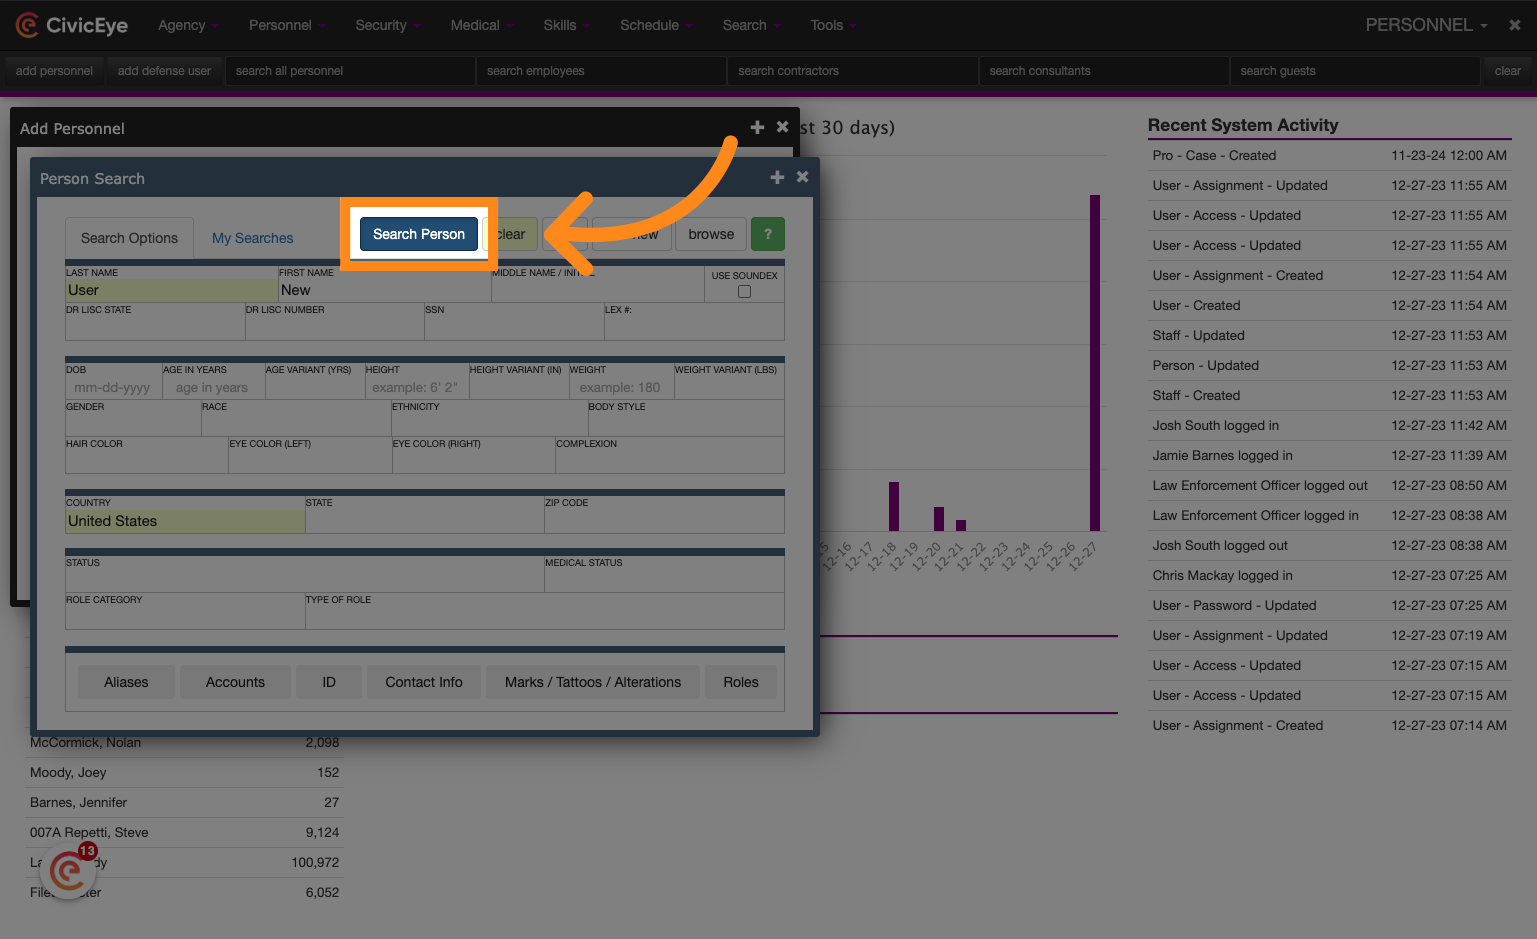
11. Click "Search Person"
Click on "Search Person" to find the person you want to add.
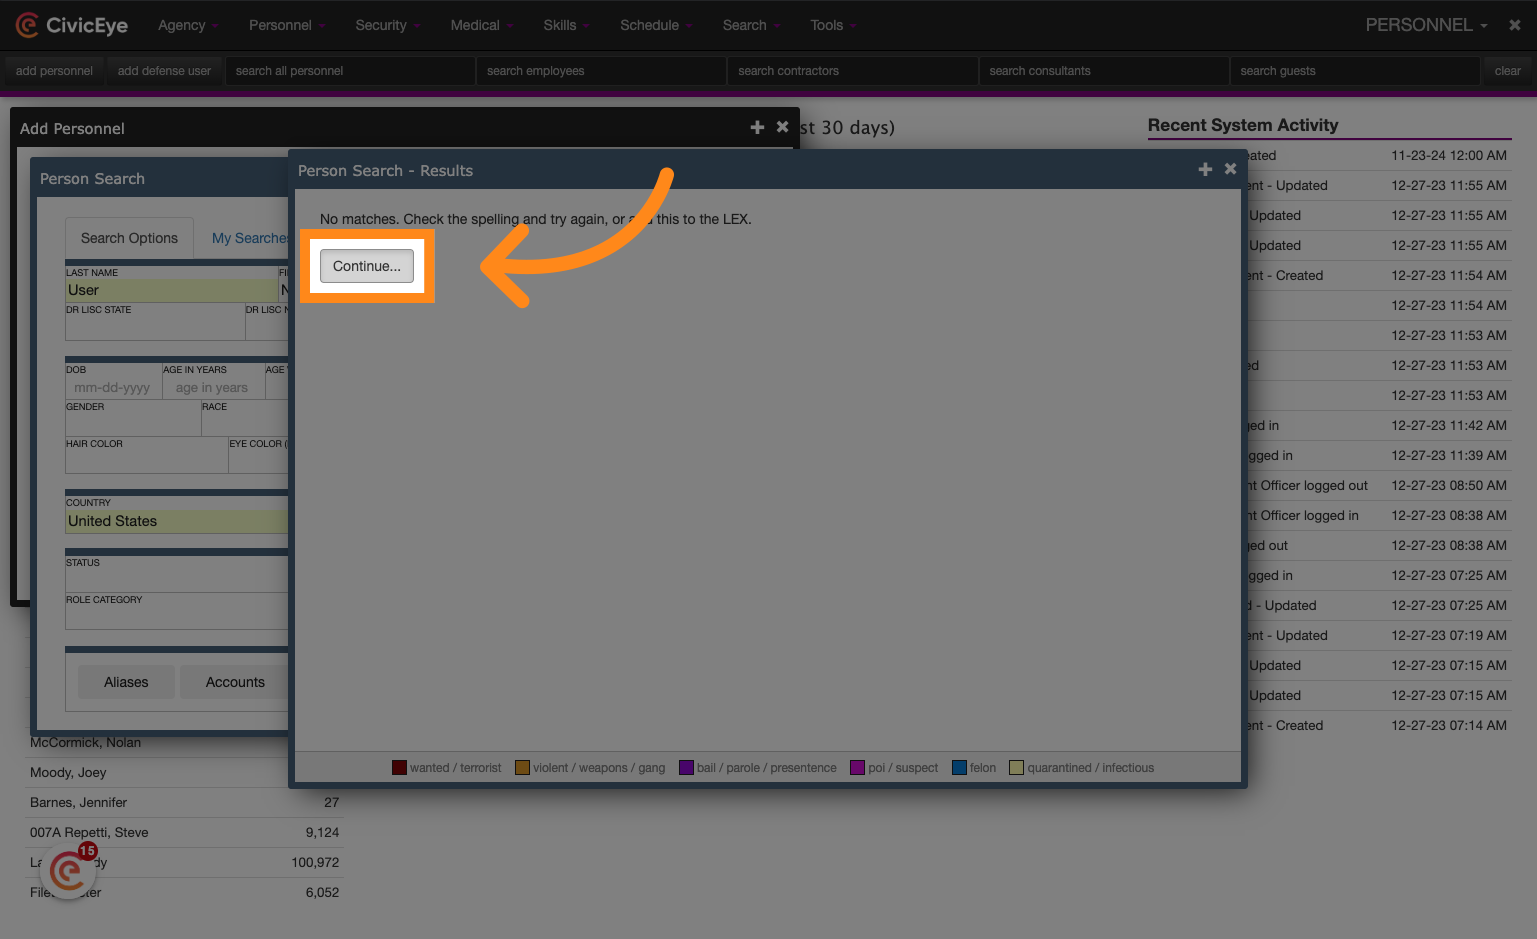
12. If no results found, proceed to adding a new person record
If the person is not already in the system, the search results will indicate "no matches found". Press the continue button to begin the process of entering a new person record.
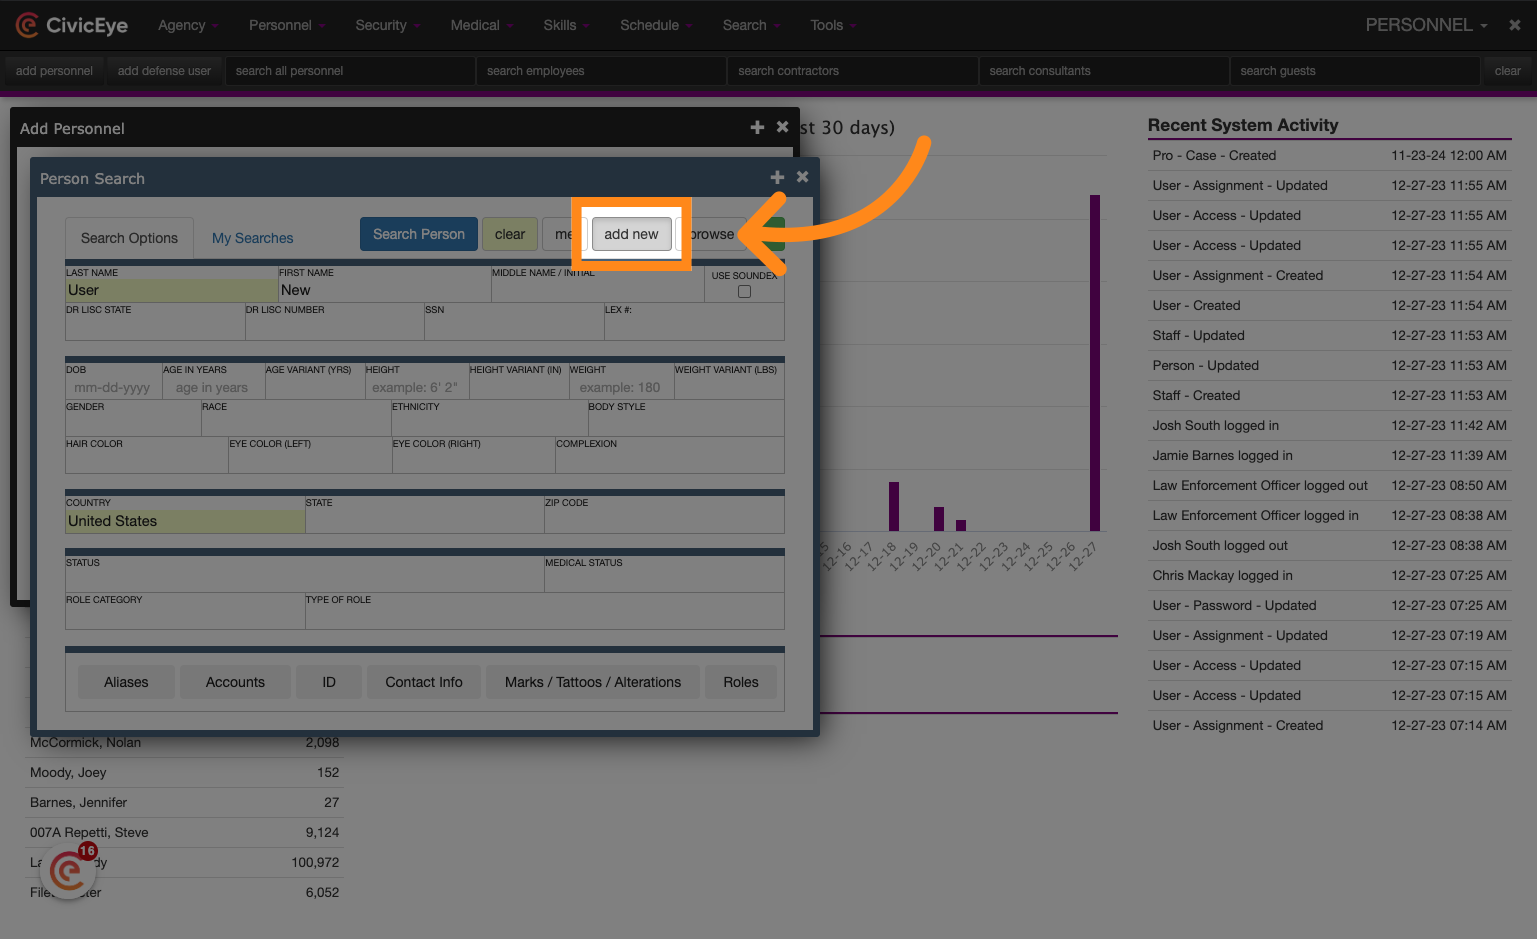
13. Click "add new"
Click "add new" to create a new person record.
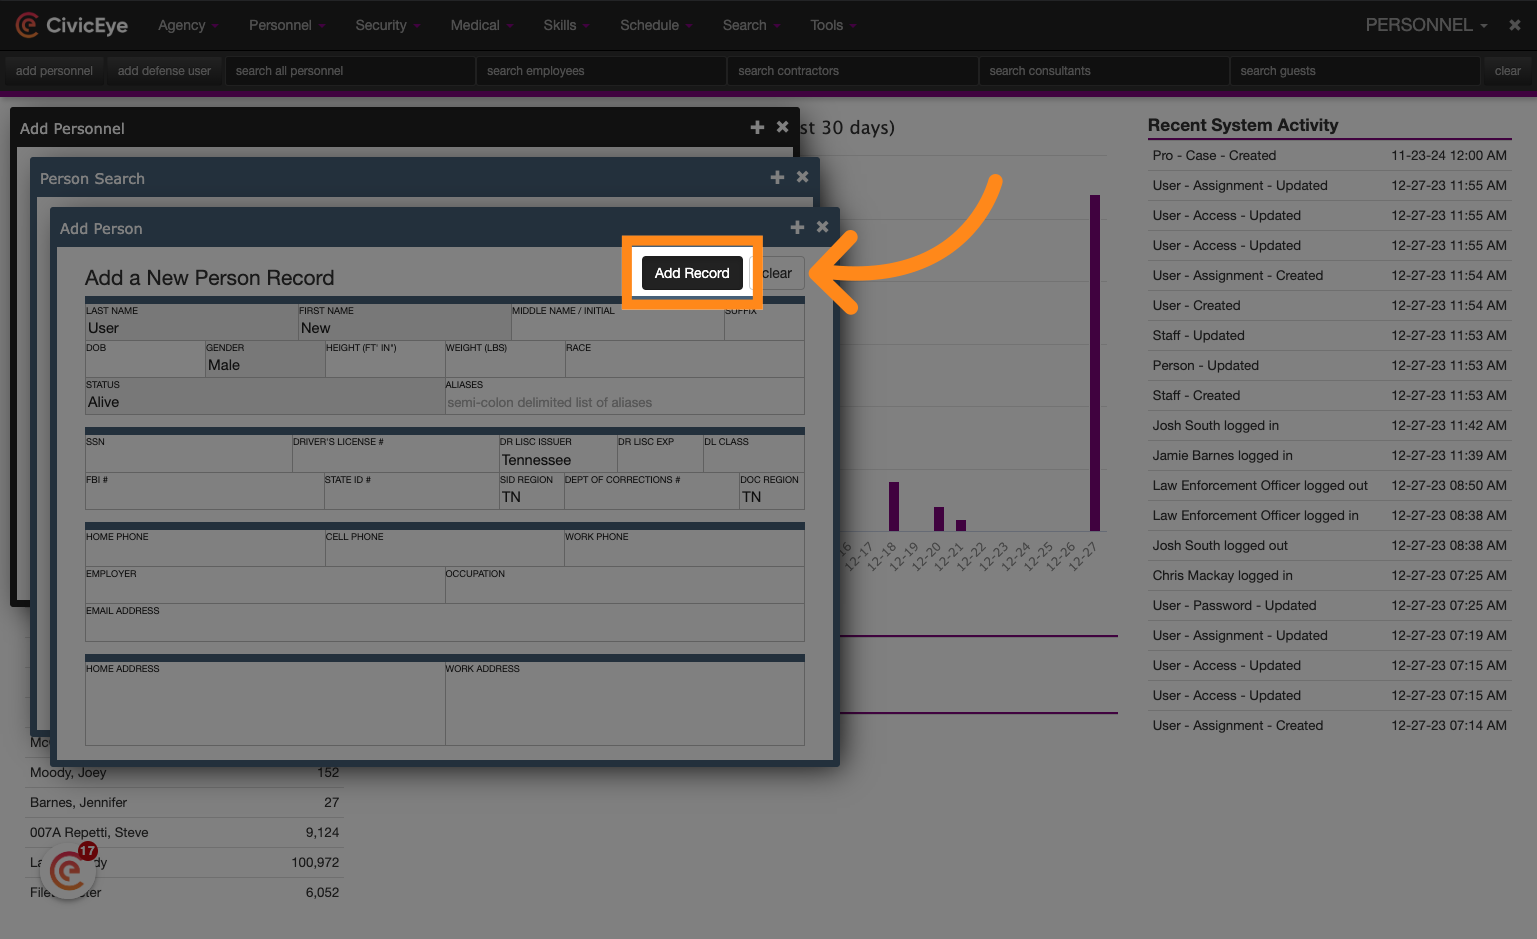
14. Click "Add Record"
Add any additional information that might be available to the person record and then press the "add record" button to create the new person entry.
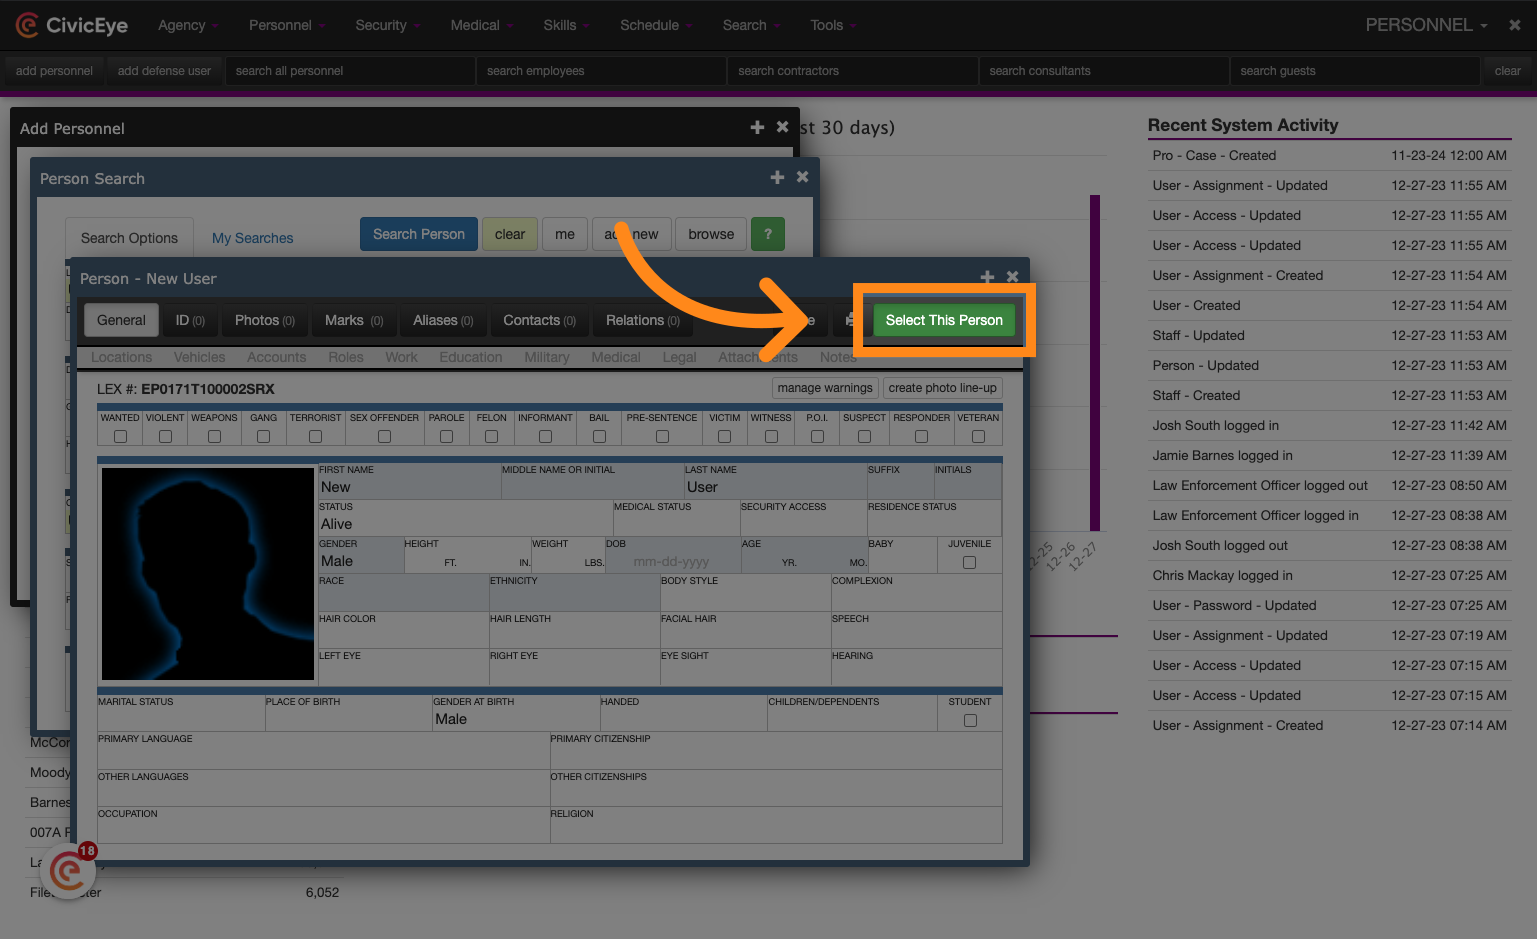
15. Click "Select This Person"
Press "select this person" to associate the person record with the new personnel record in the system.
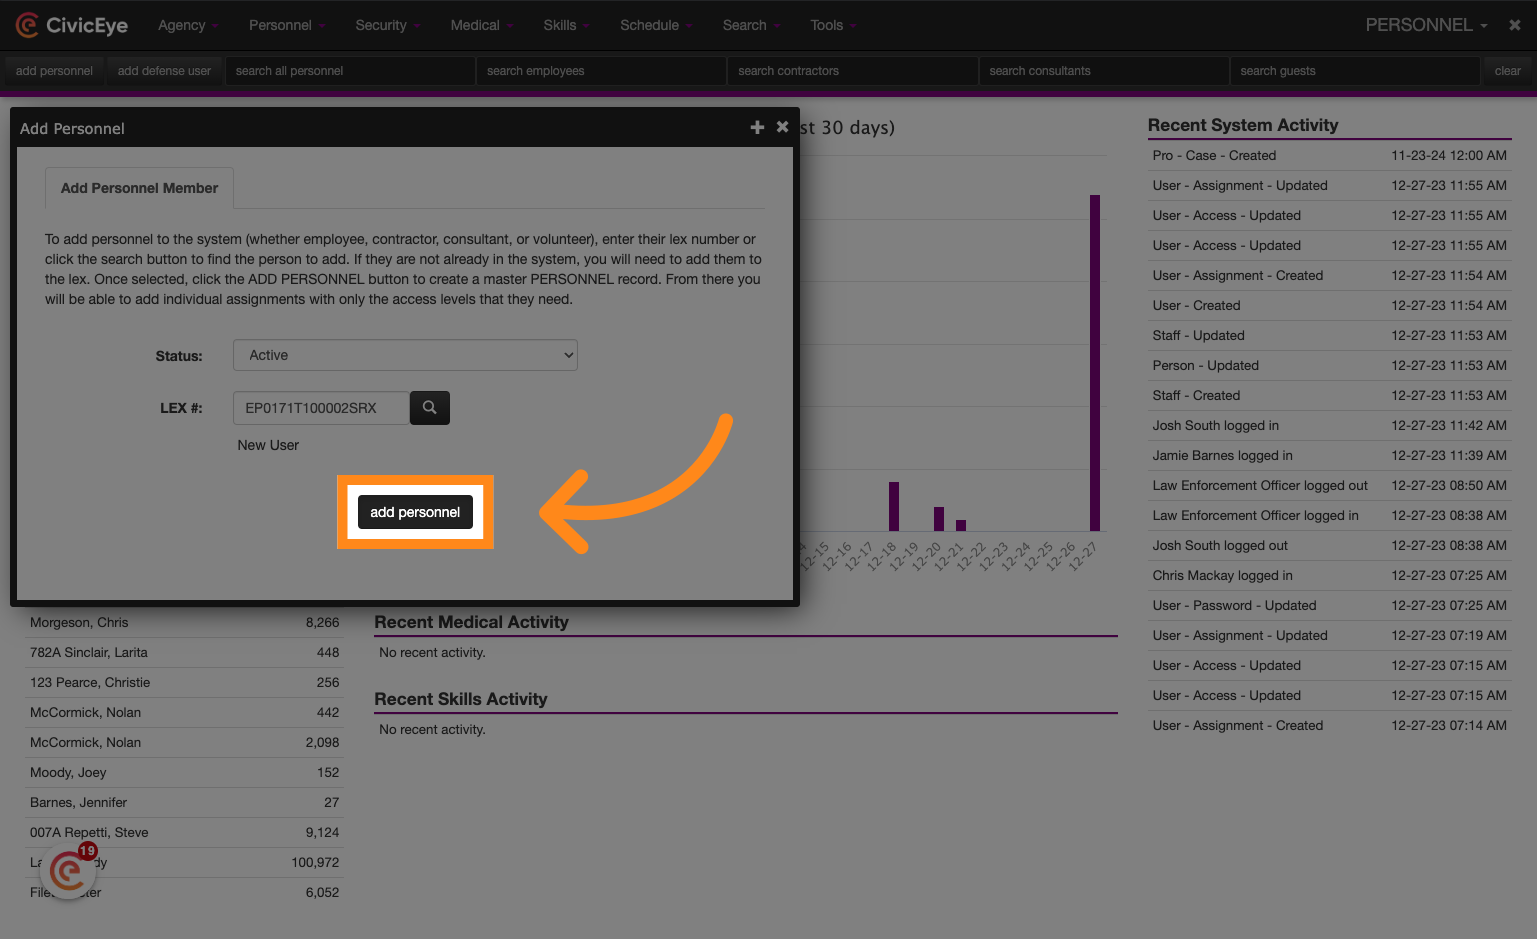
16. Click "add personnel"
Click "add personnel" to continue.
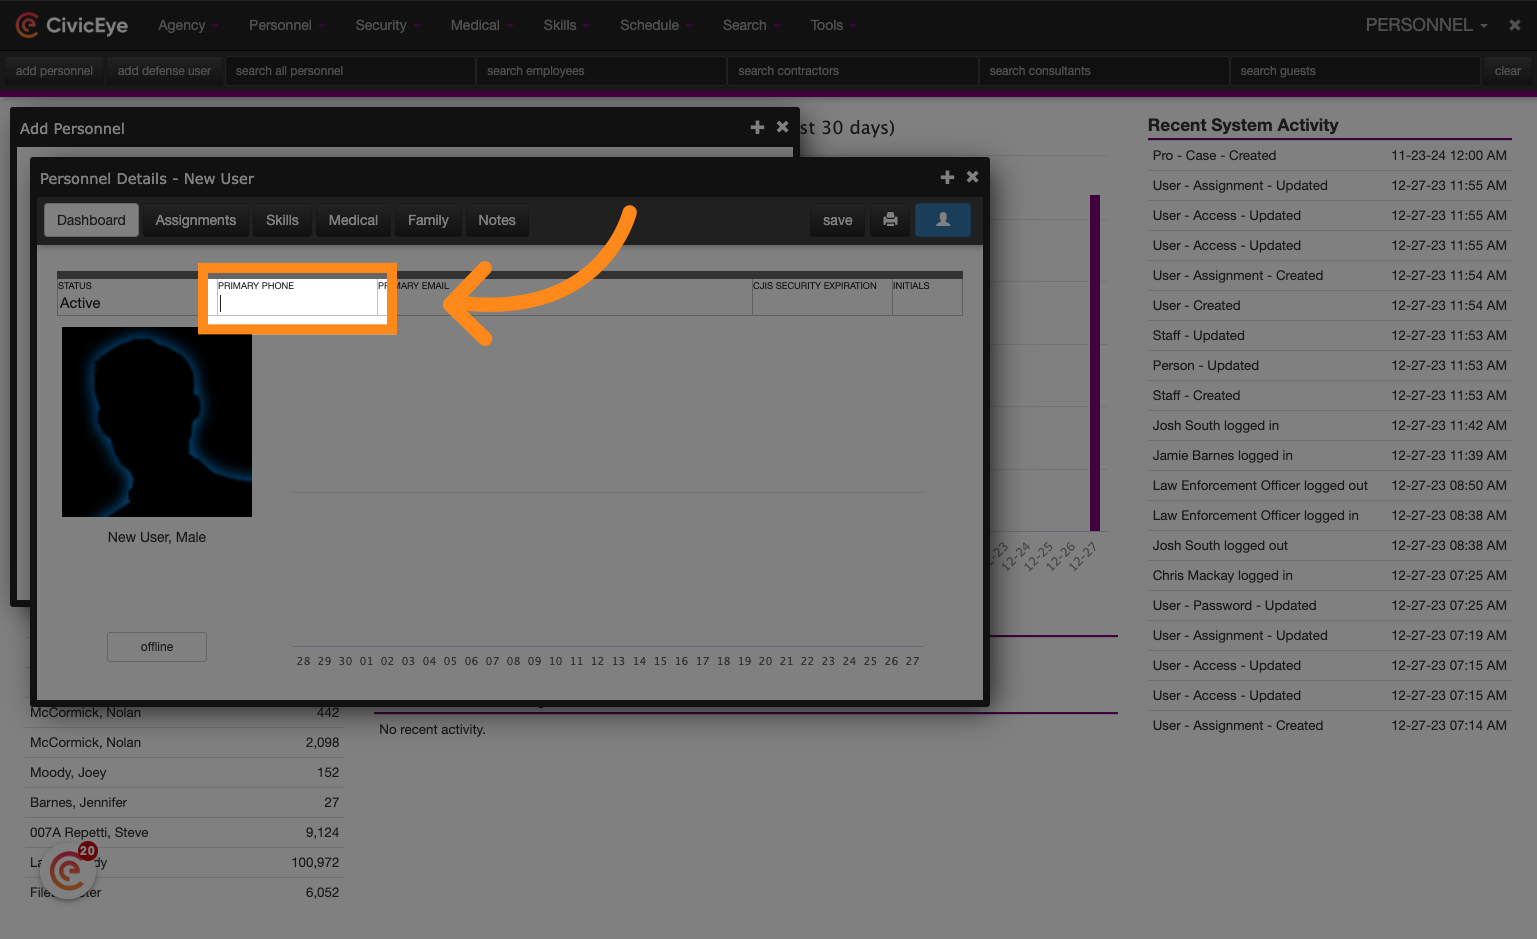
17. Enter phone contact information
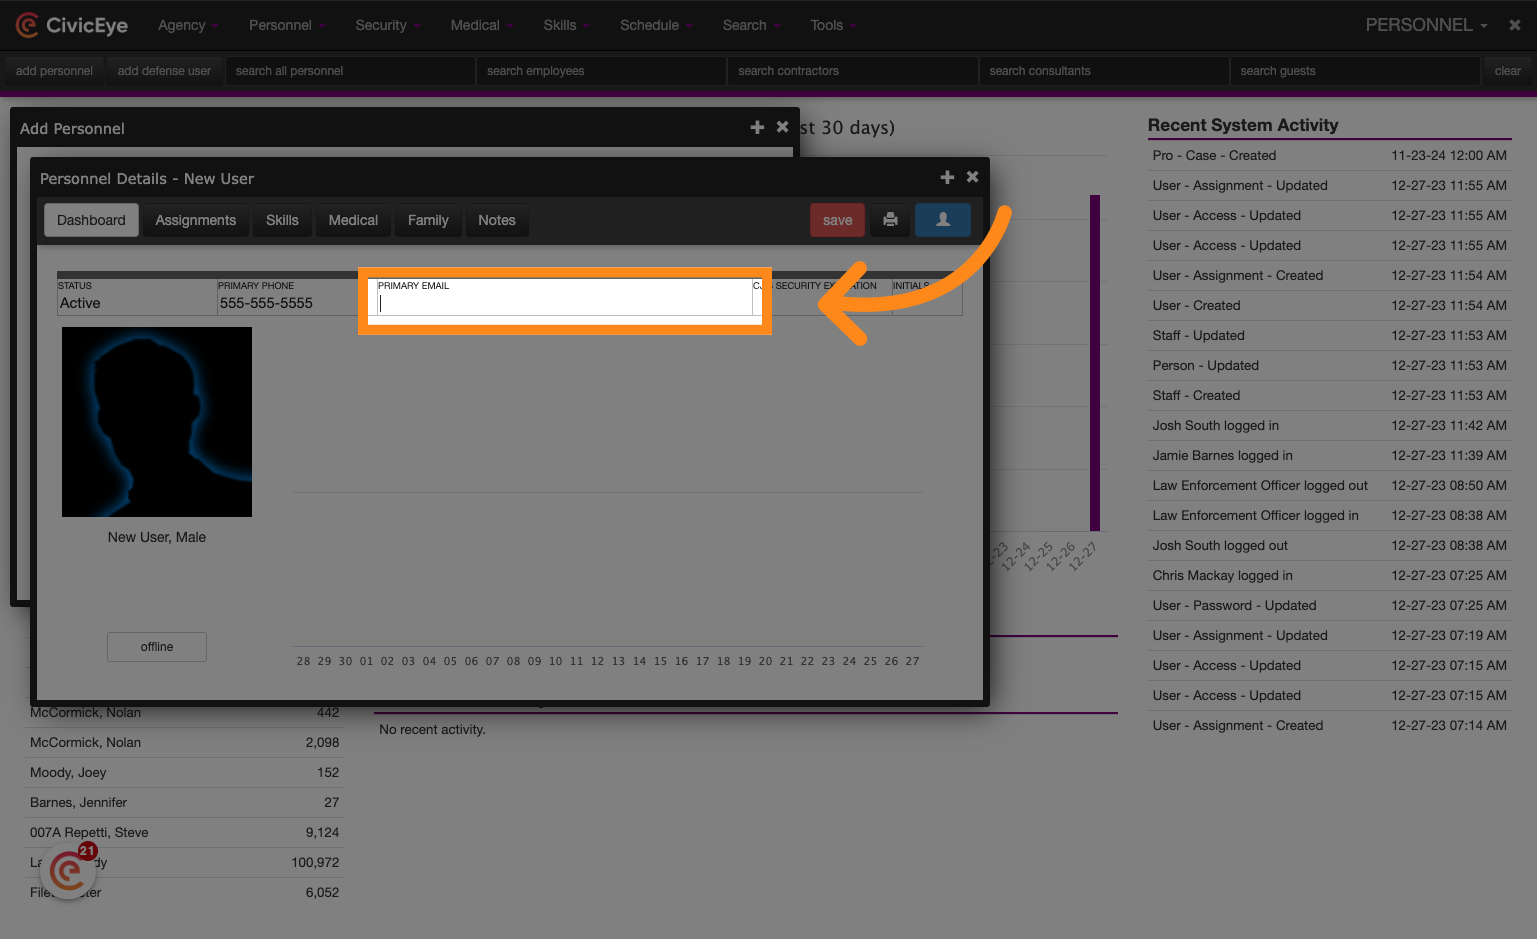
Enter the cell phone number and email address for the Personnel record. Note: The cell phone number is required to receive two-factor authentication messages during the login process.
18. Enter email contact information
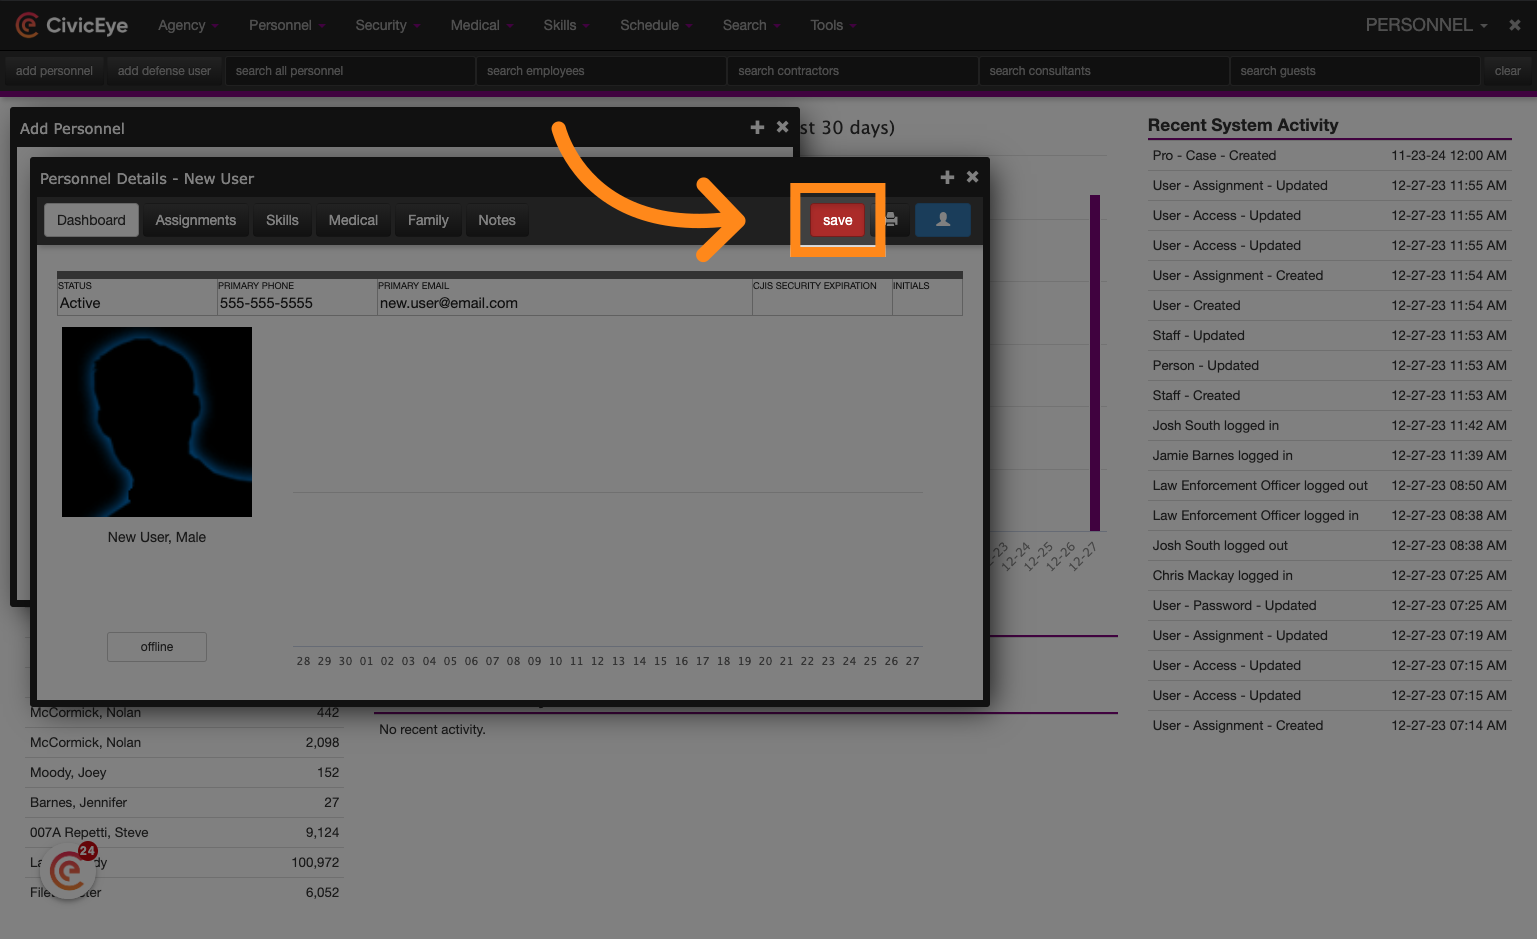
19. Click "save"
Click on "save" to save the changes.
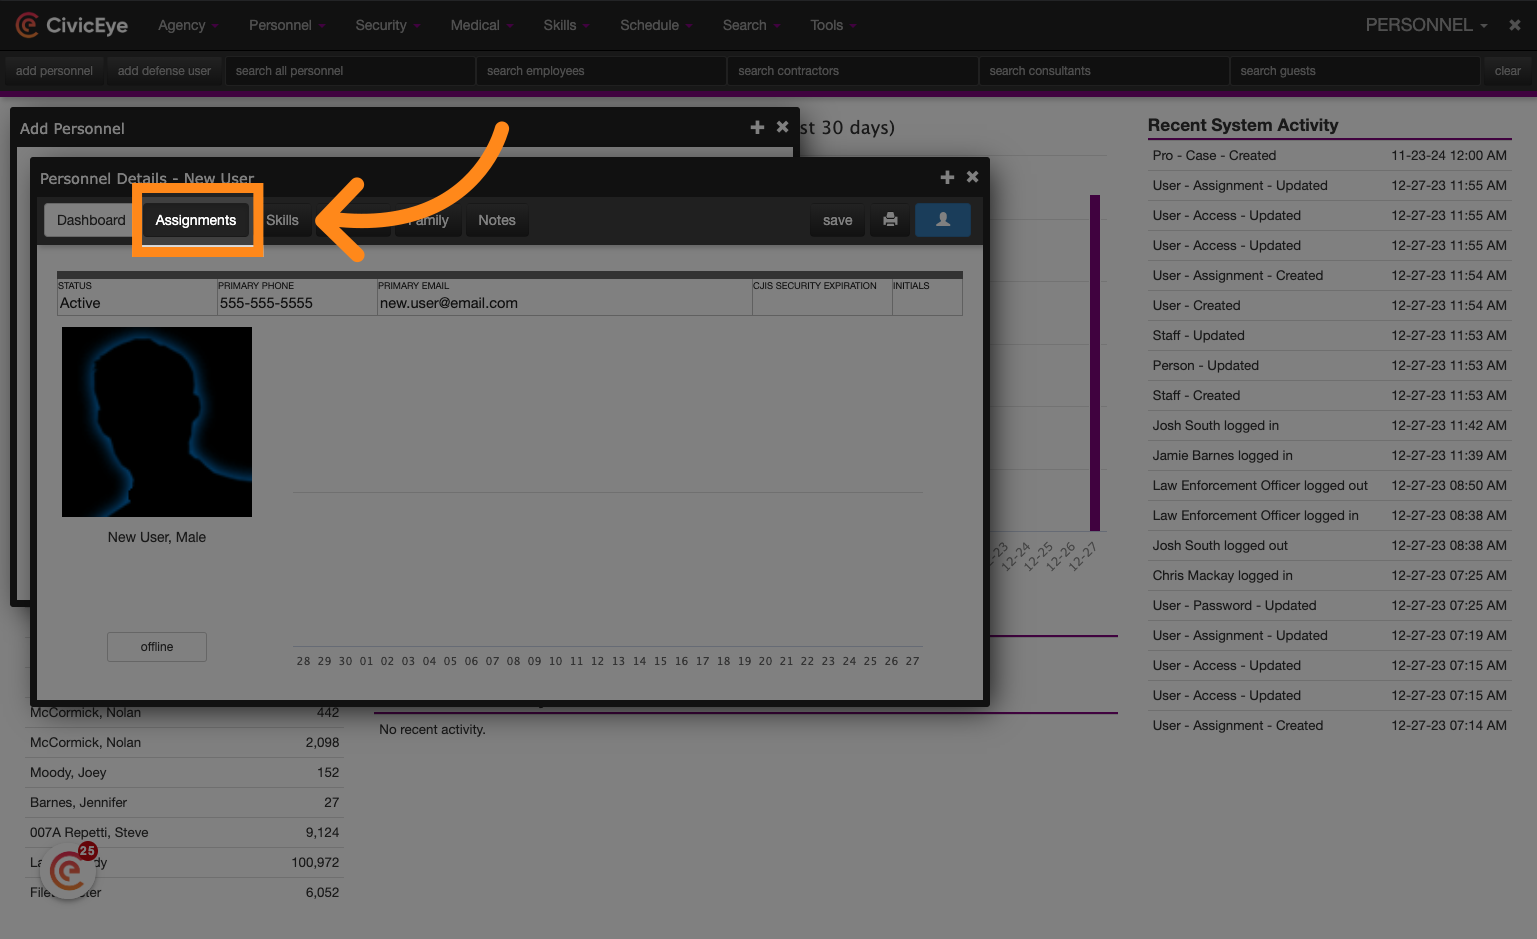
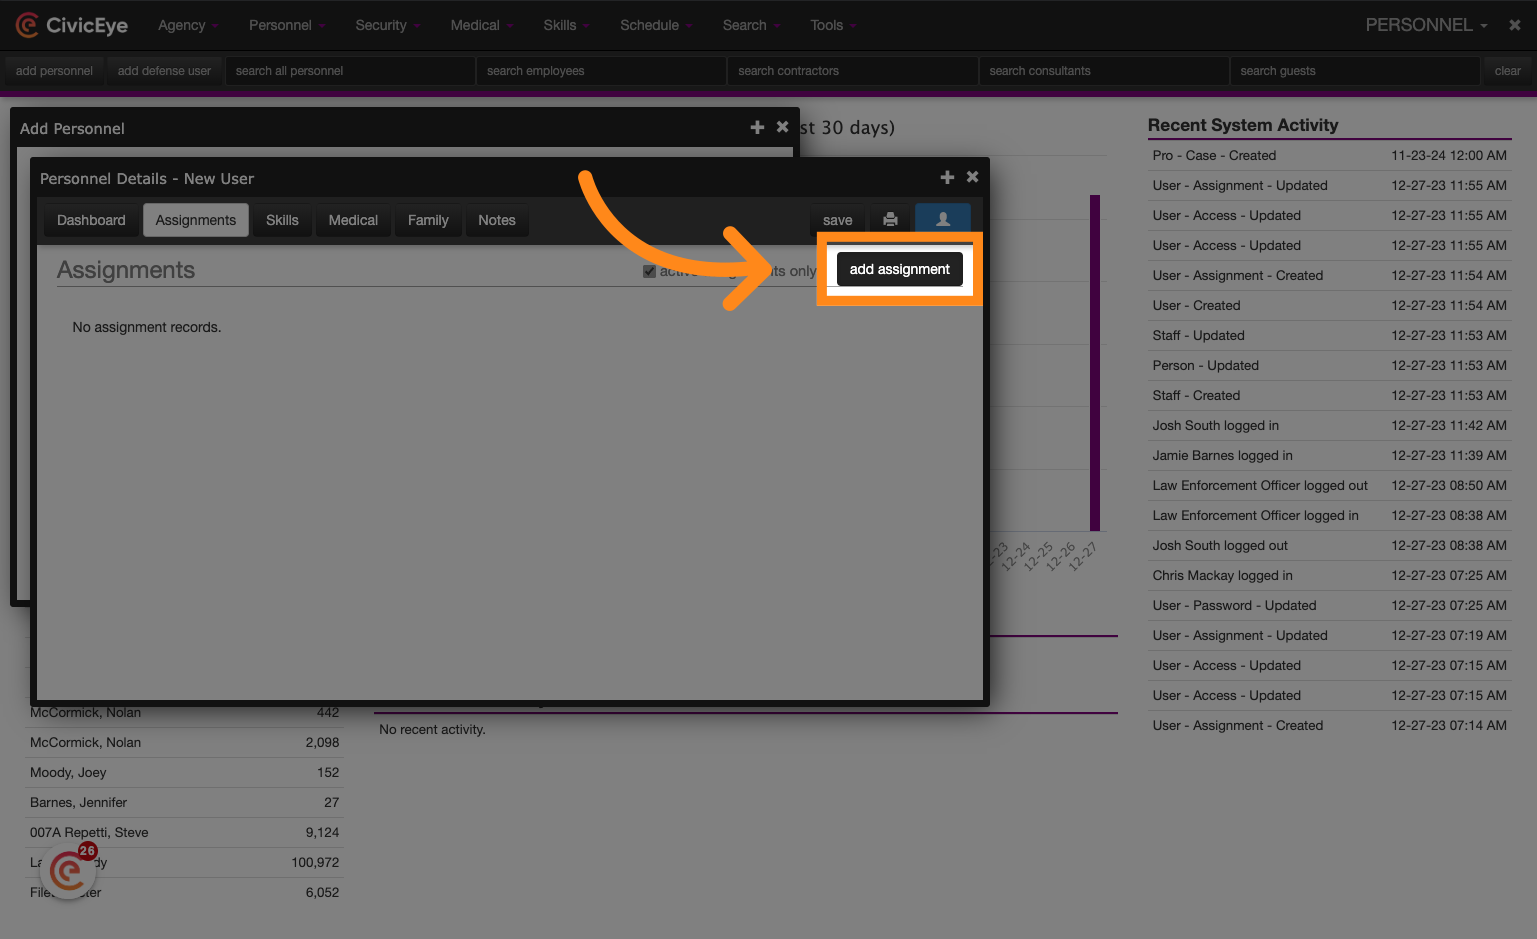
20. Click "Assignments"
To associate the Personnel record with a Law Enforcement Agency or Prosecution Office, navigate to the Assignments tab and add a new assignment.
21. Click "add assignment"
Click on "add assignment" to add a new assignment.
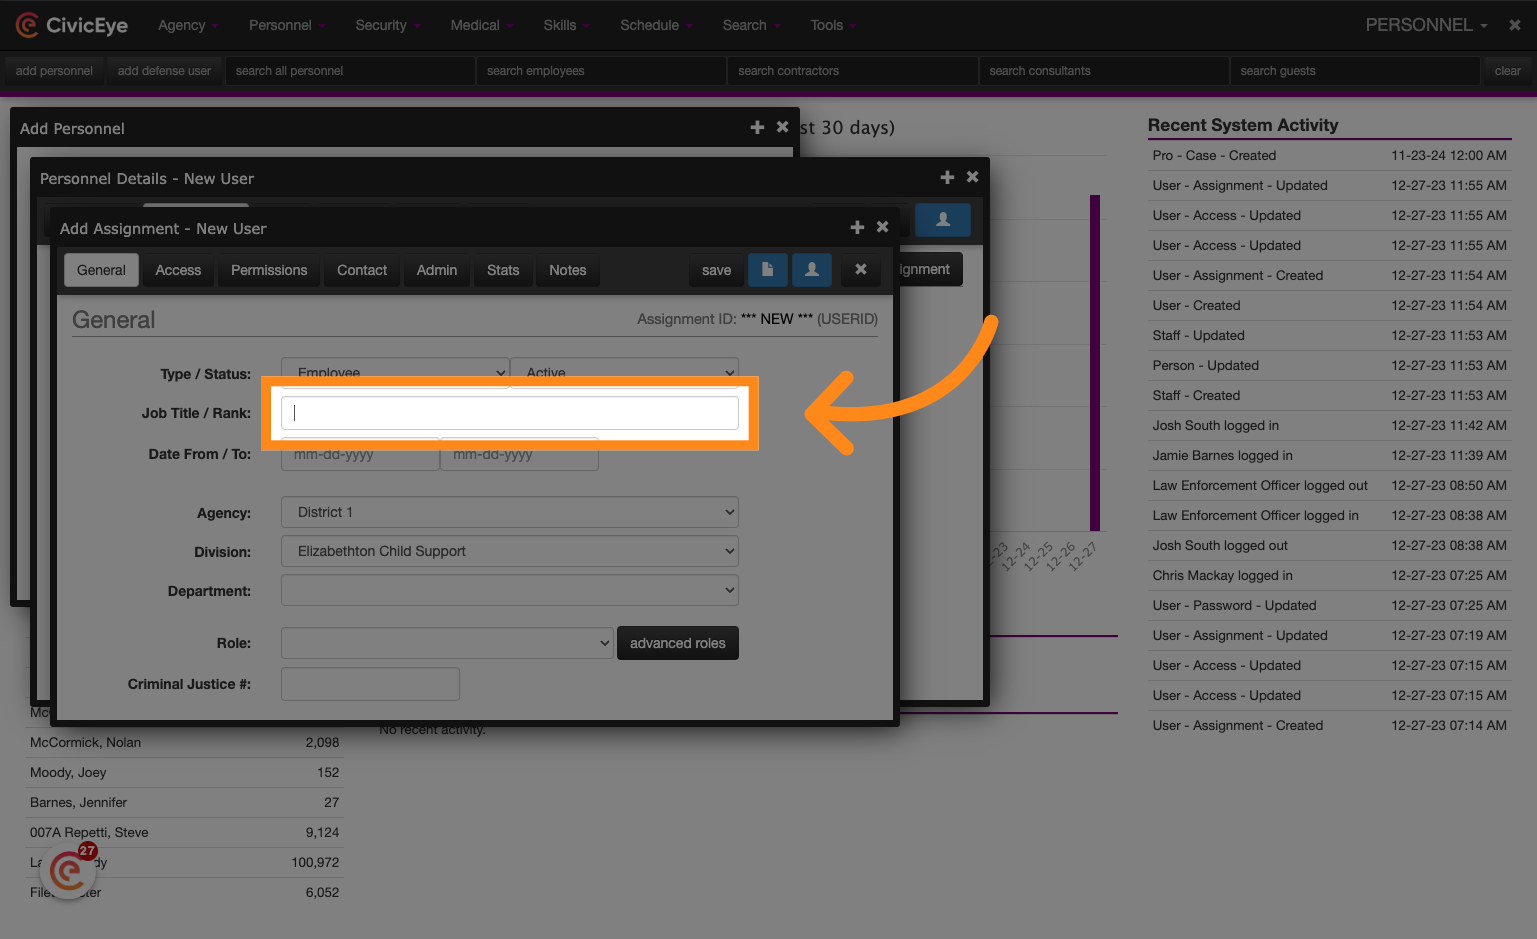
22. Enter a Title or Rank
Fill out the applicable information and choose an agency to which the Personnel record should be associated. For roles, choose the applicable value from the role drop-down menu based on the user's Personnel type.
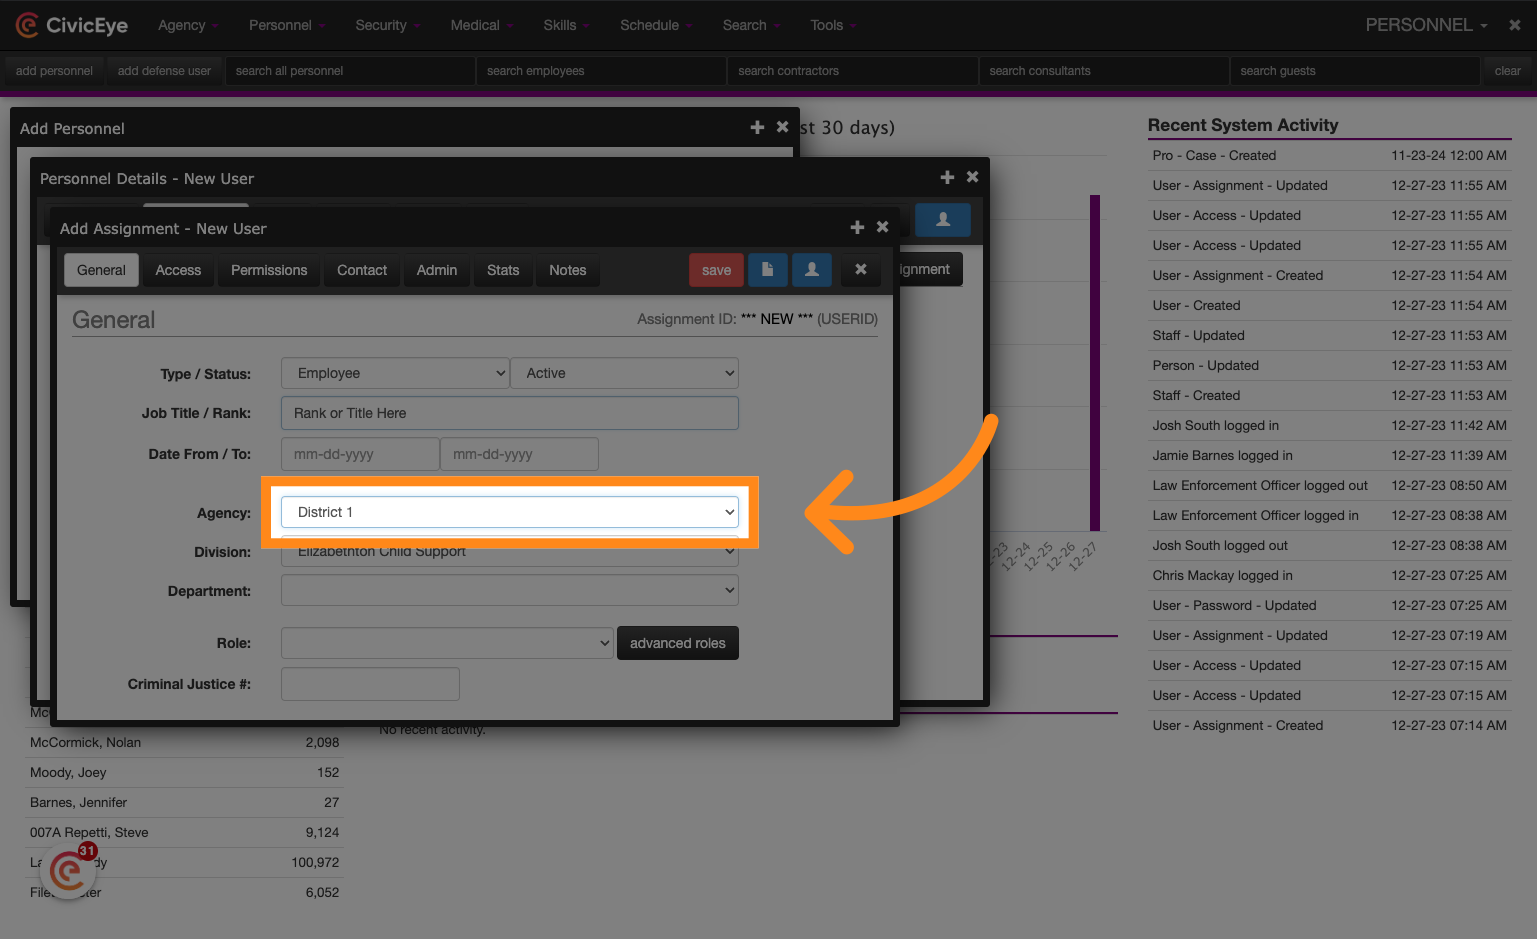
23. Choose the applicable Agency
Choose the appropriate agency from the list of options.
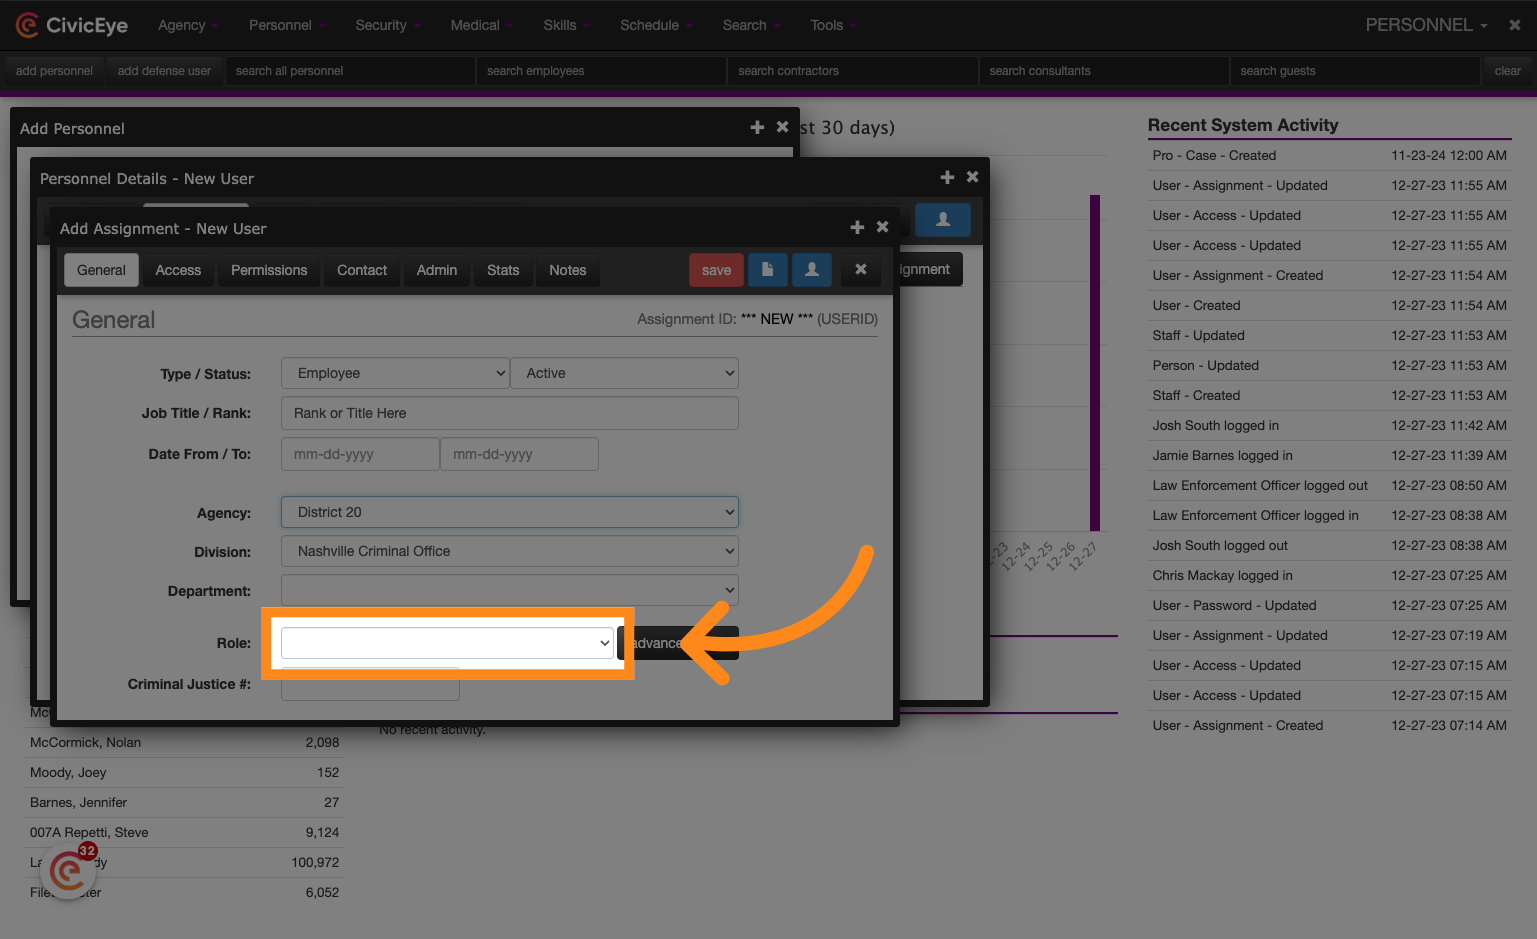
24. Select the appropriate role
Choose from the list of options.
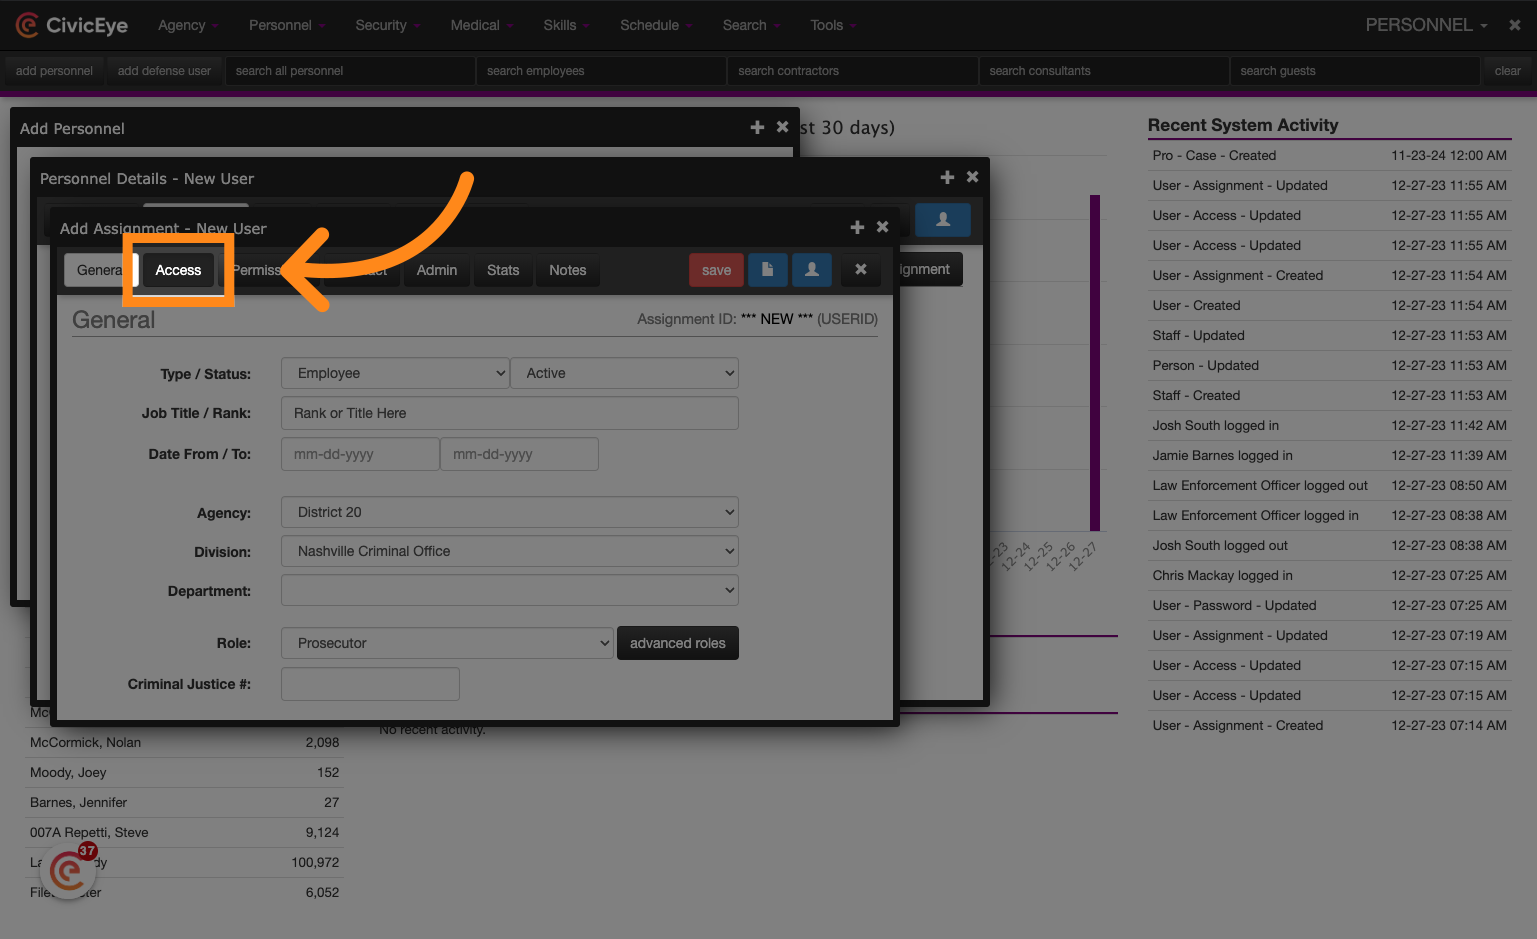
25. Click "Access"
Navigate to the access tab to set up a user ID and temporary password.
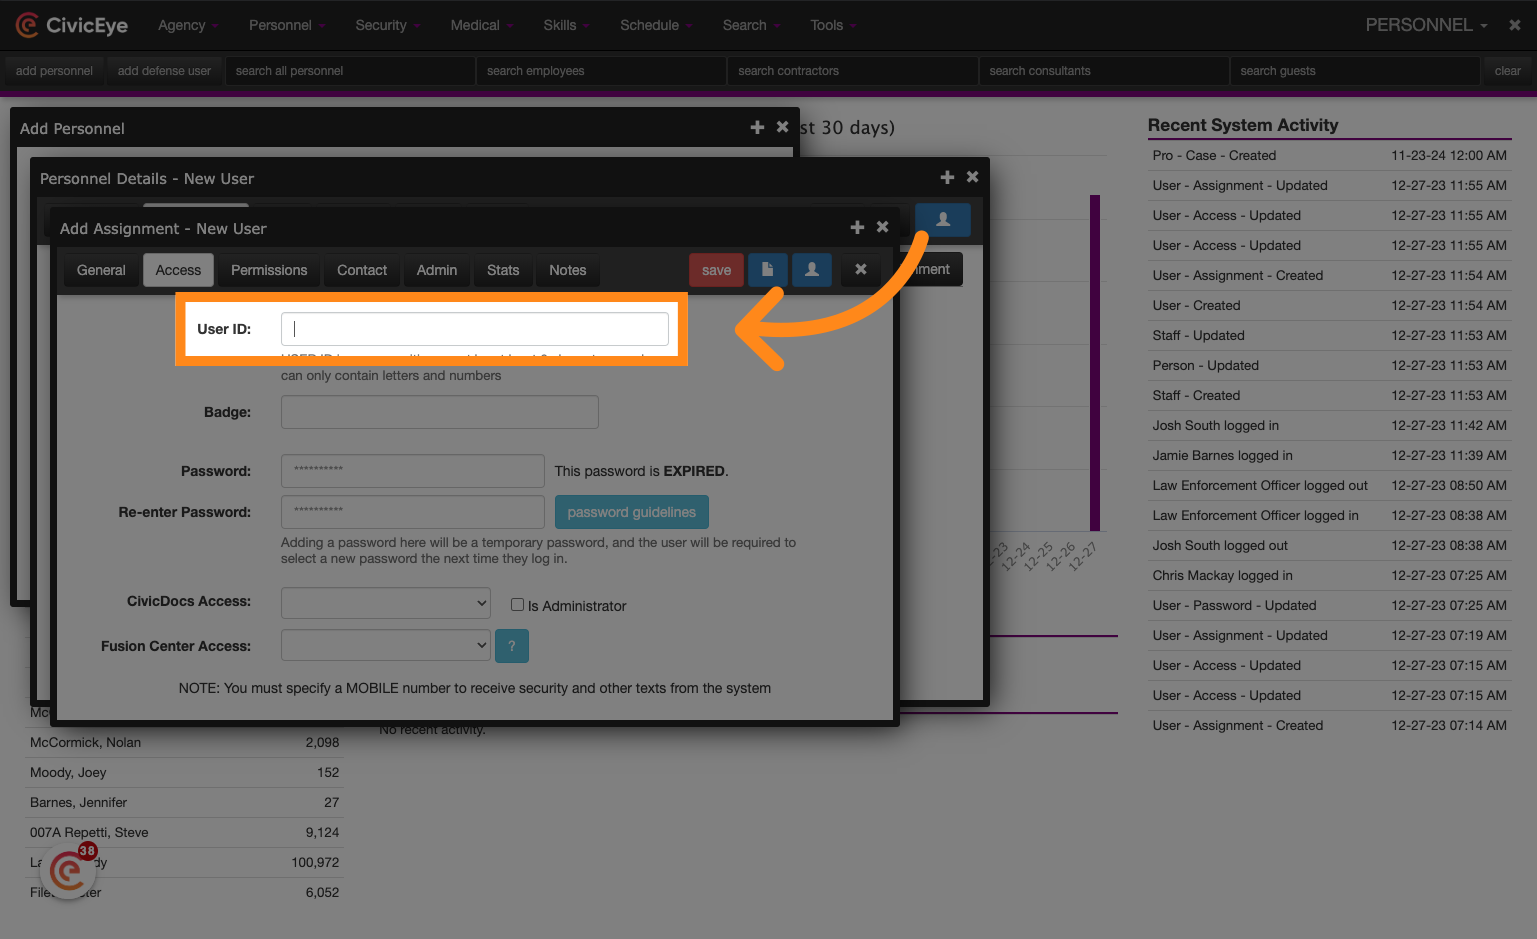
26. Enter a User ID
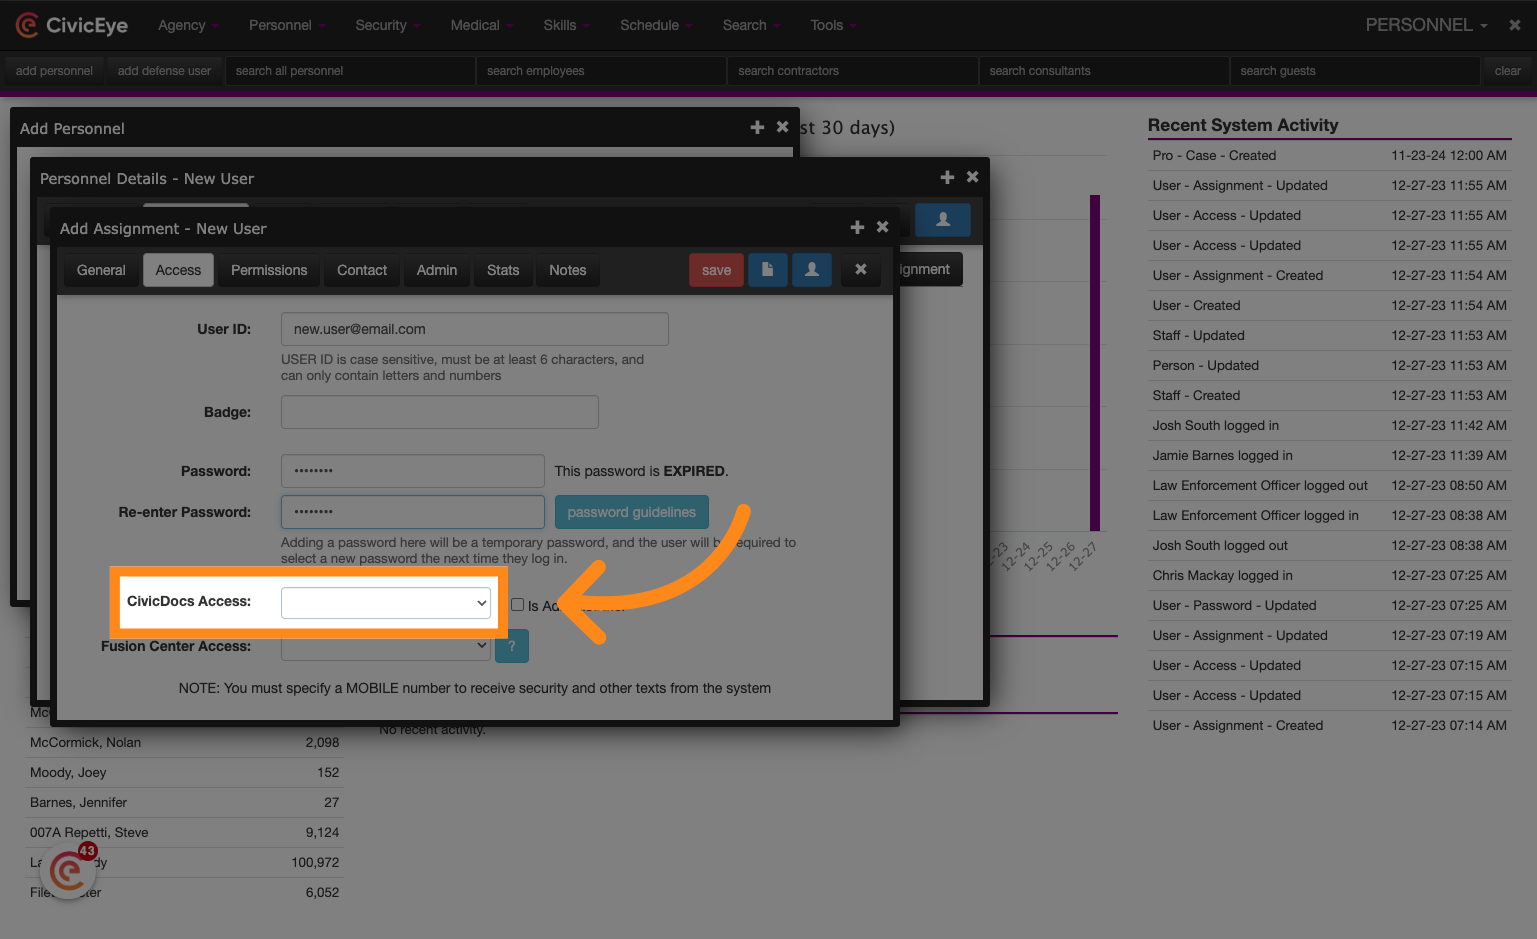
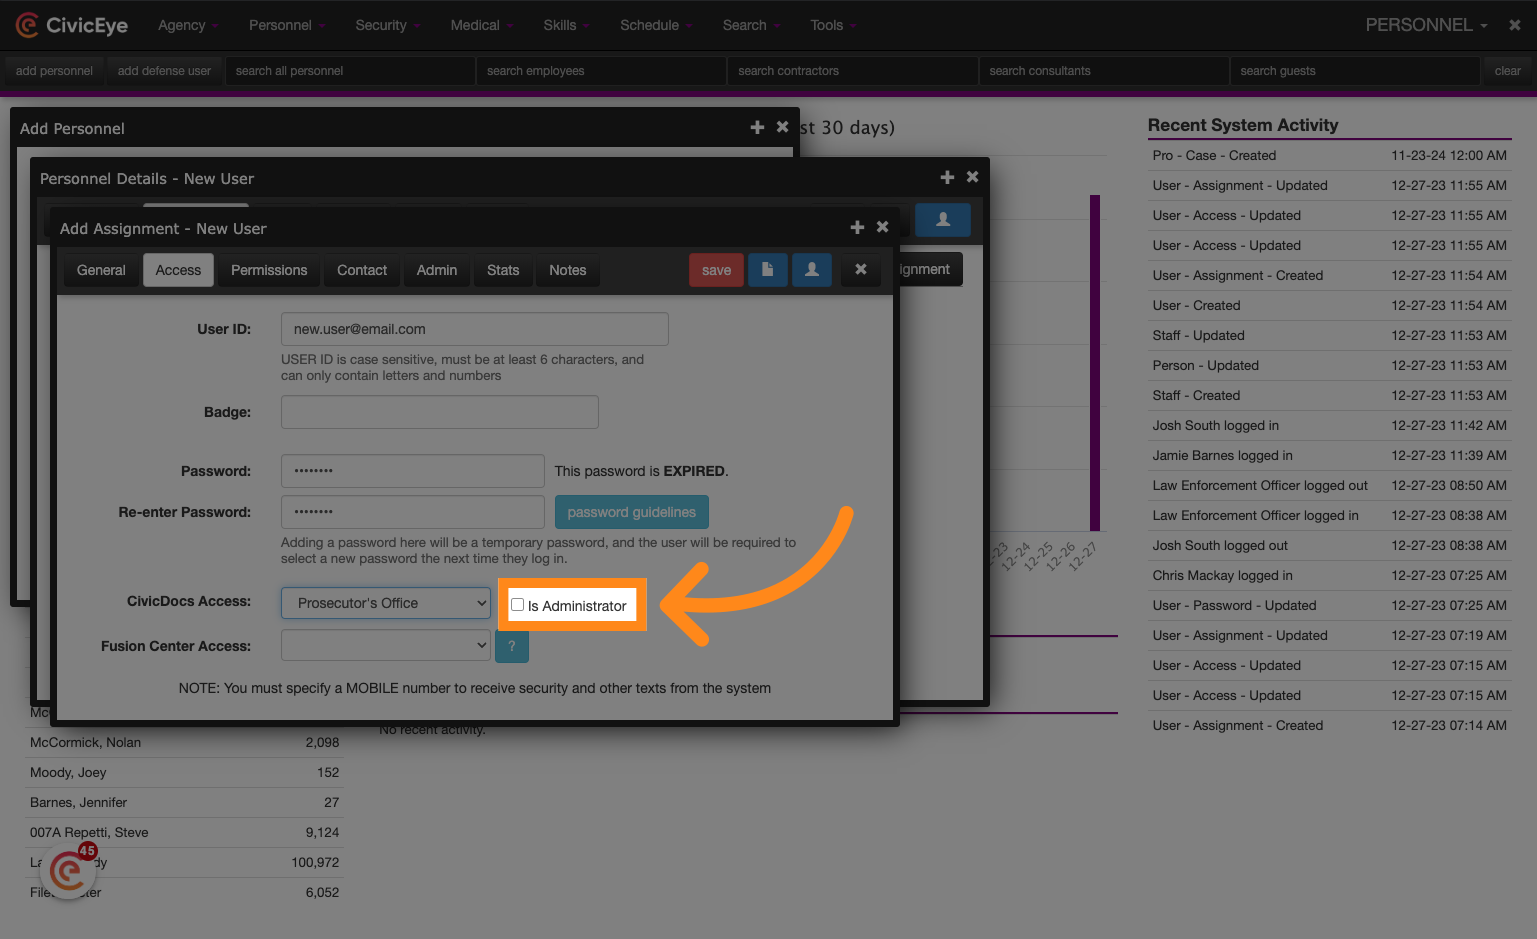
Enter a unique user ID, such as an email address. If the email address is too long for the field, enter a user ID that will not result in potential duplication in the future. For example, first initial last name is not recommended. Enter a password and confirm the temporary password by reentering it in the re-enter password field. For users requiring CivicDocs access, choose the applicable role in the CivicDocs access dropdown. For prosecution support staff, also check the "Is administrator" checkbox.
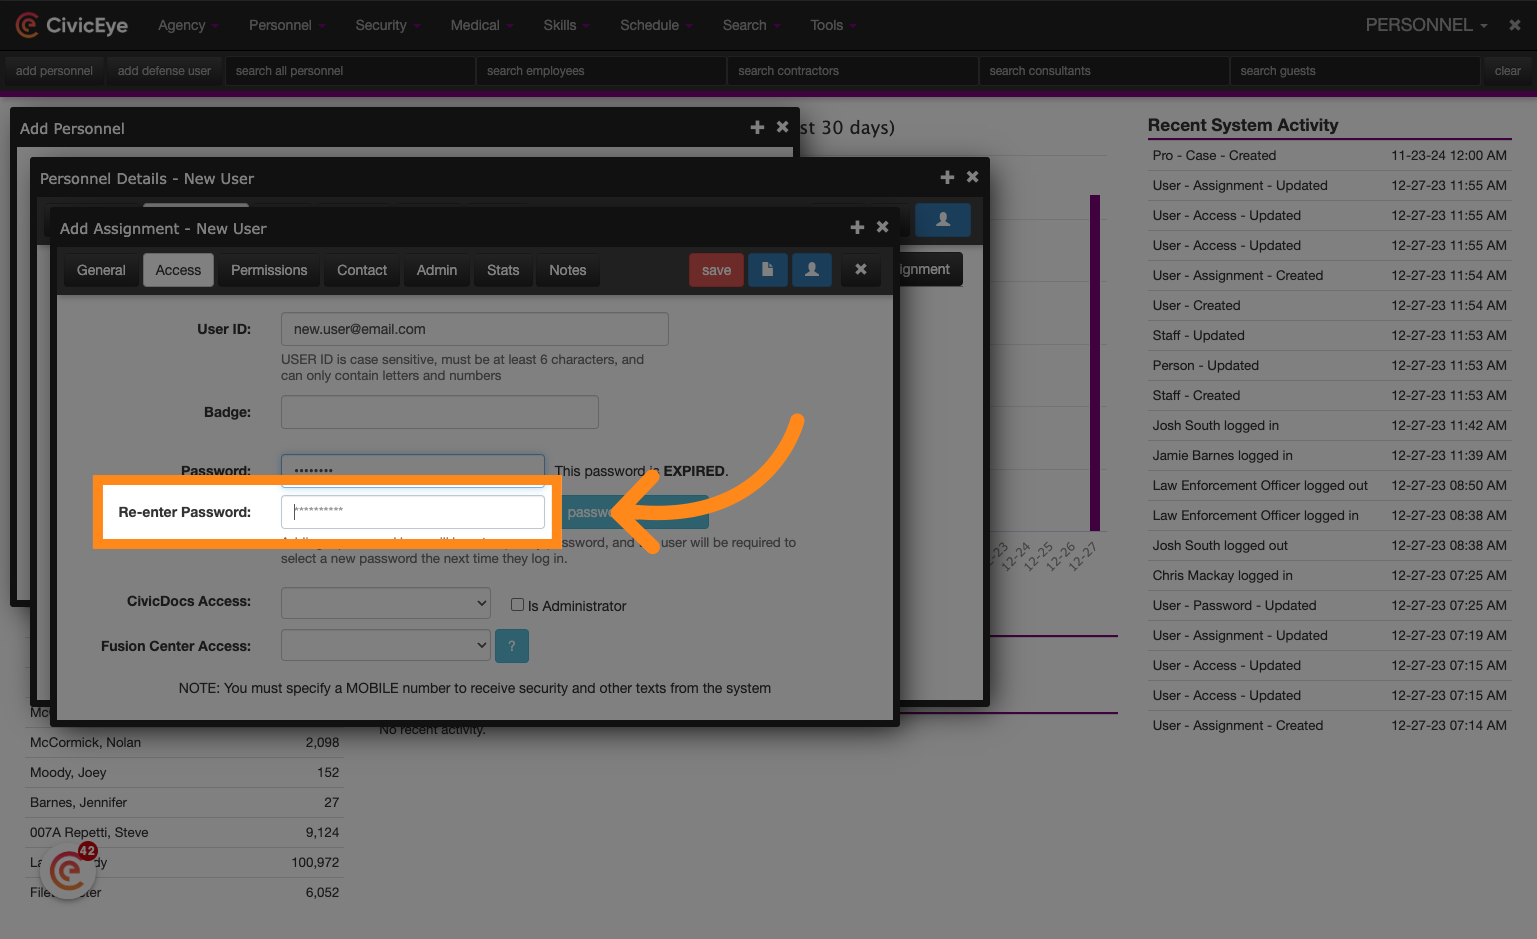
27. Enter a temporary password
Click on the password field.
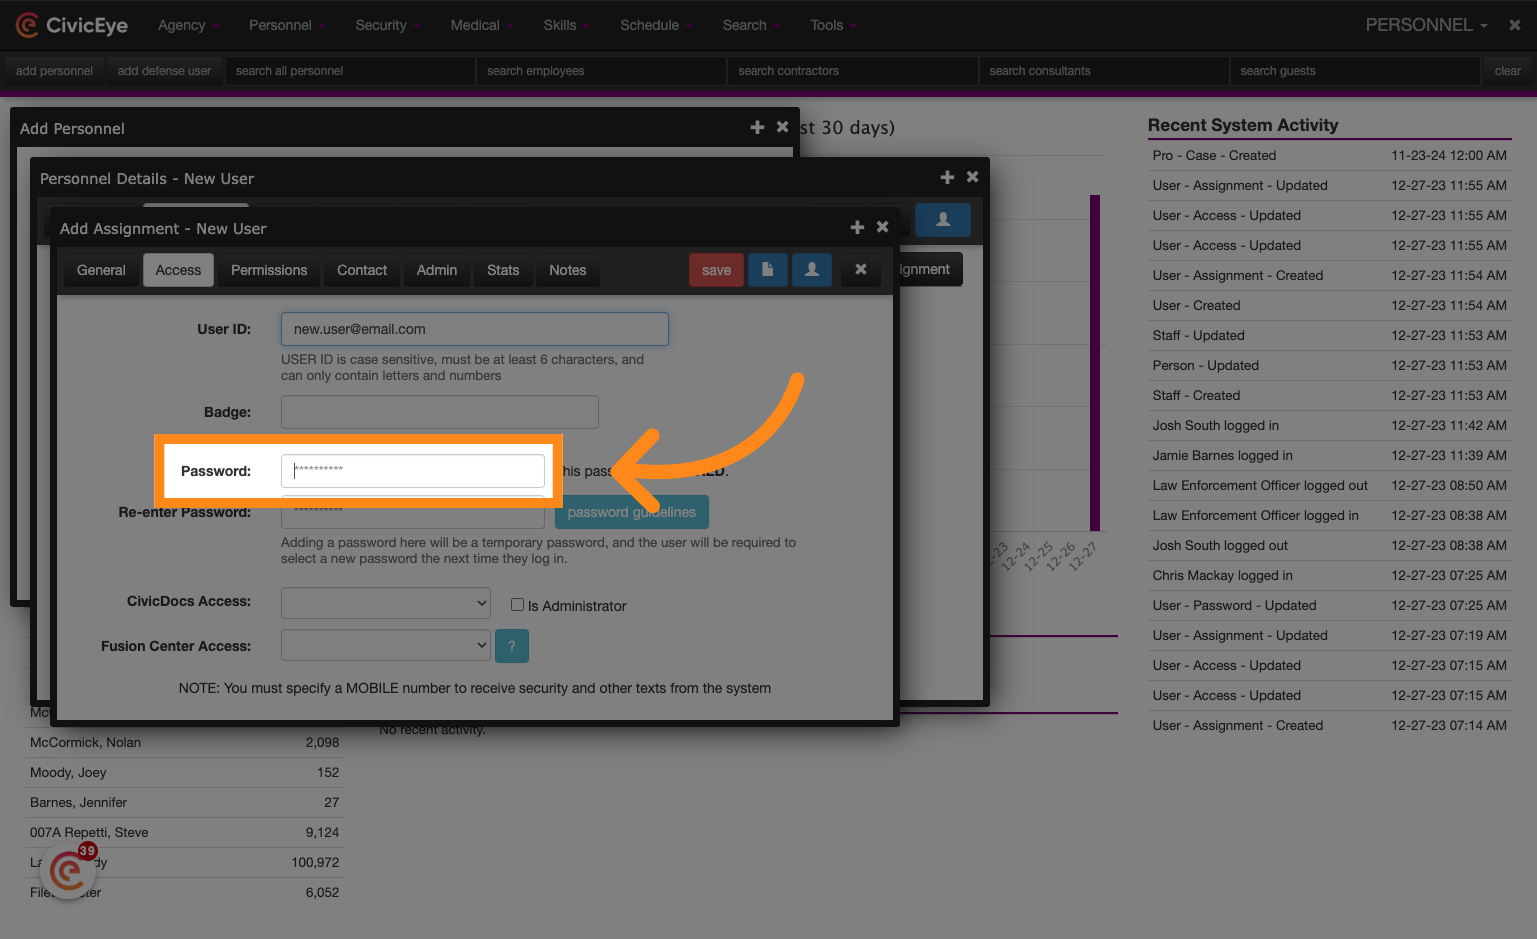
28. Confirm the temporary password
29. Set CivicDocs Access if applicable
Select the appropriate option from the list.
30. Grant Admin Portal rights to Support Staff users
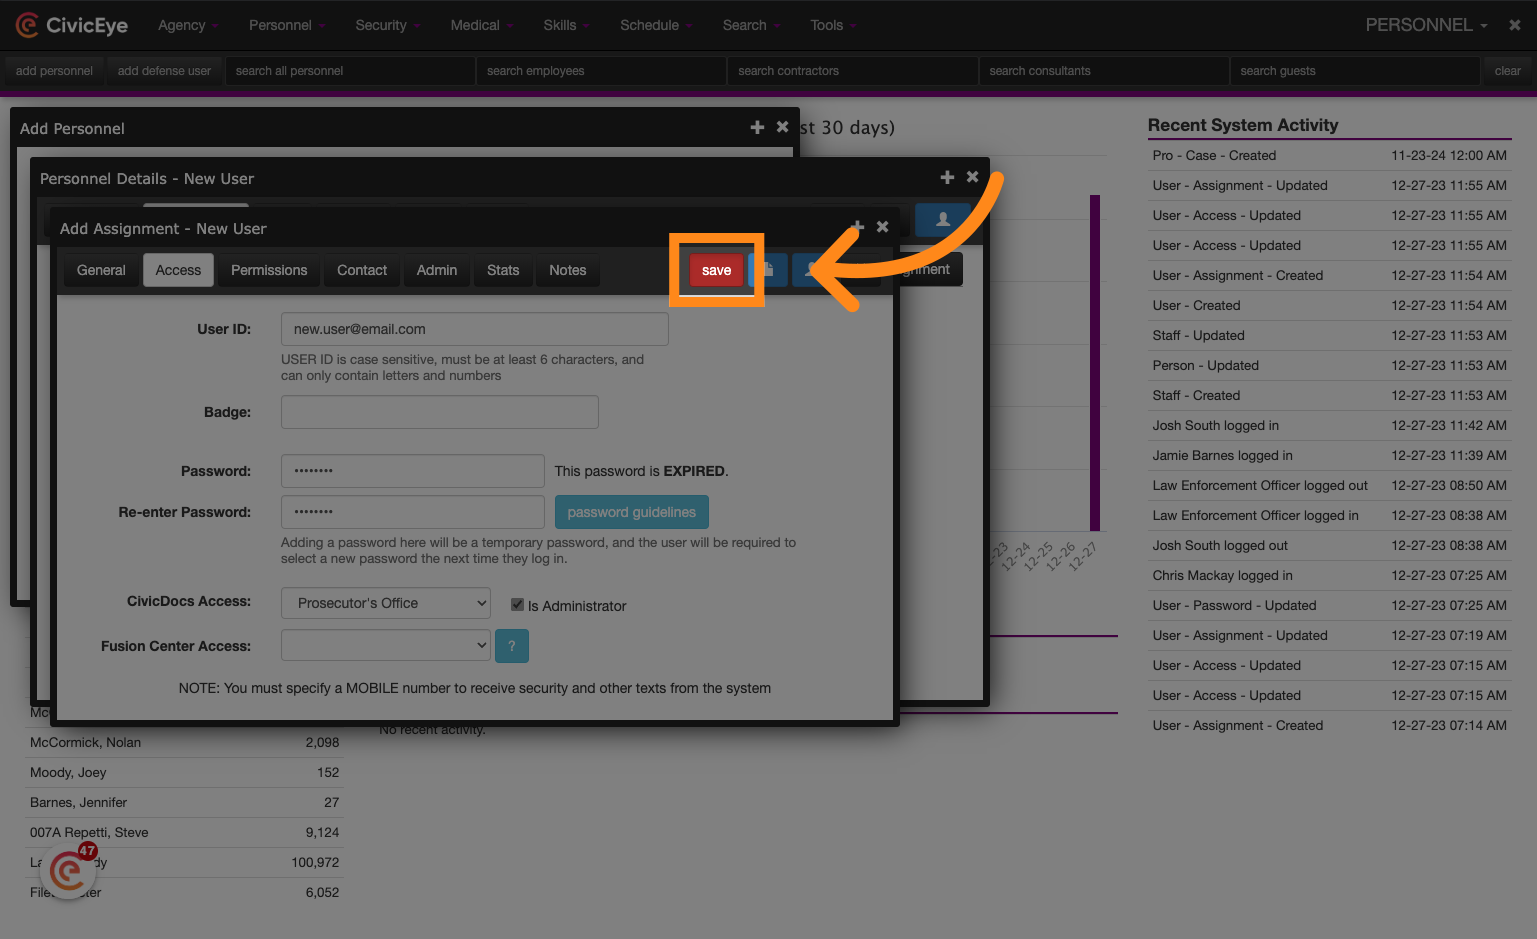
31. Click "save"
Click on "save" to save the changes.
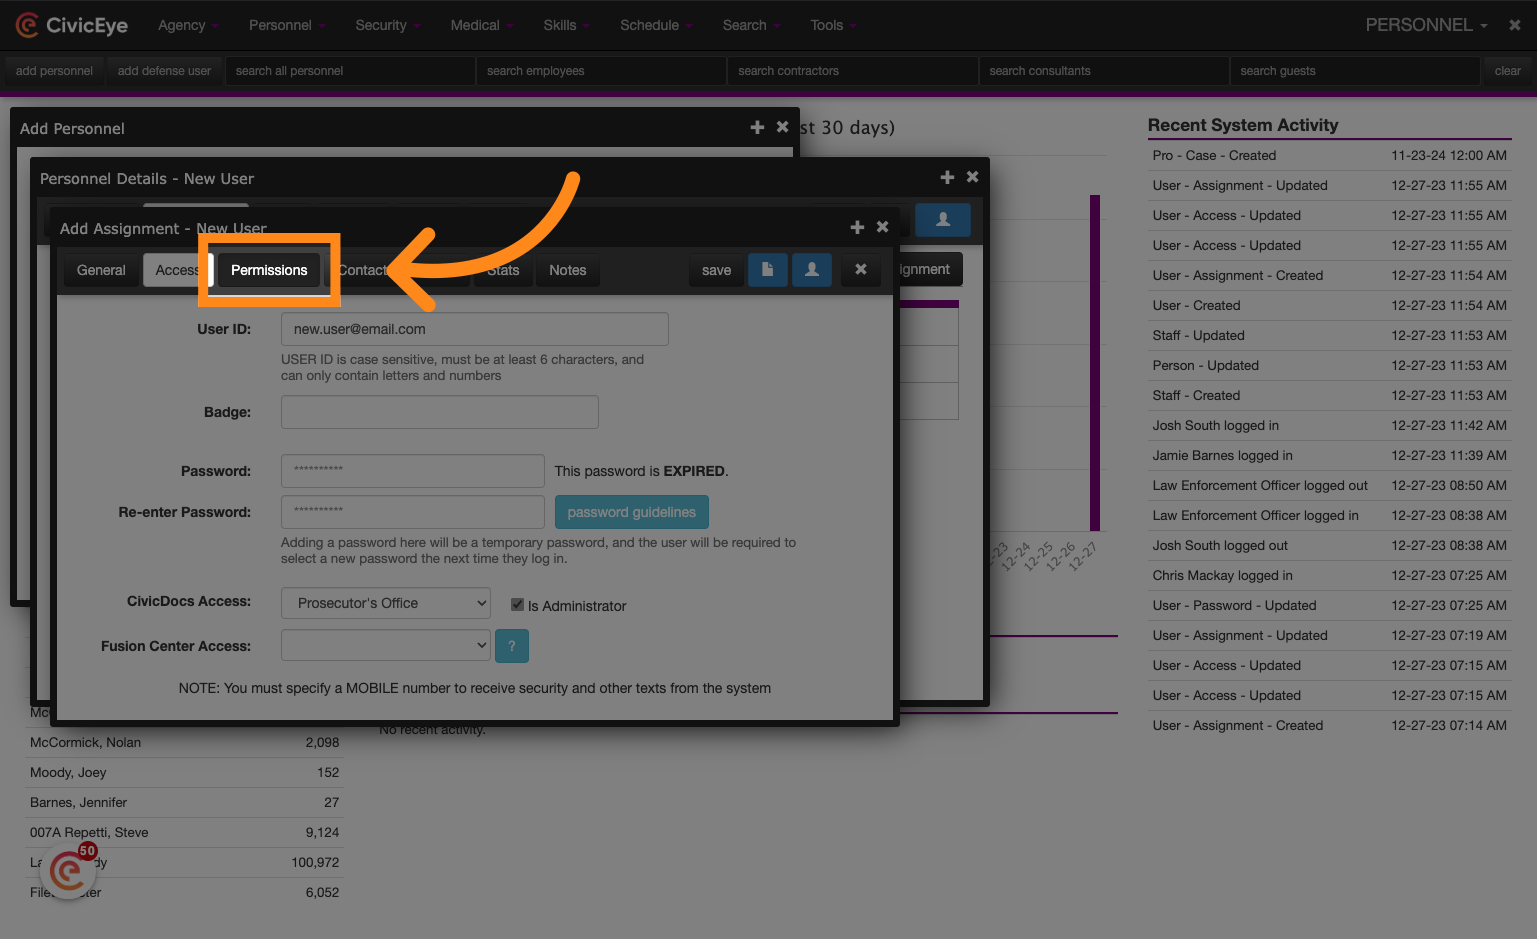
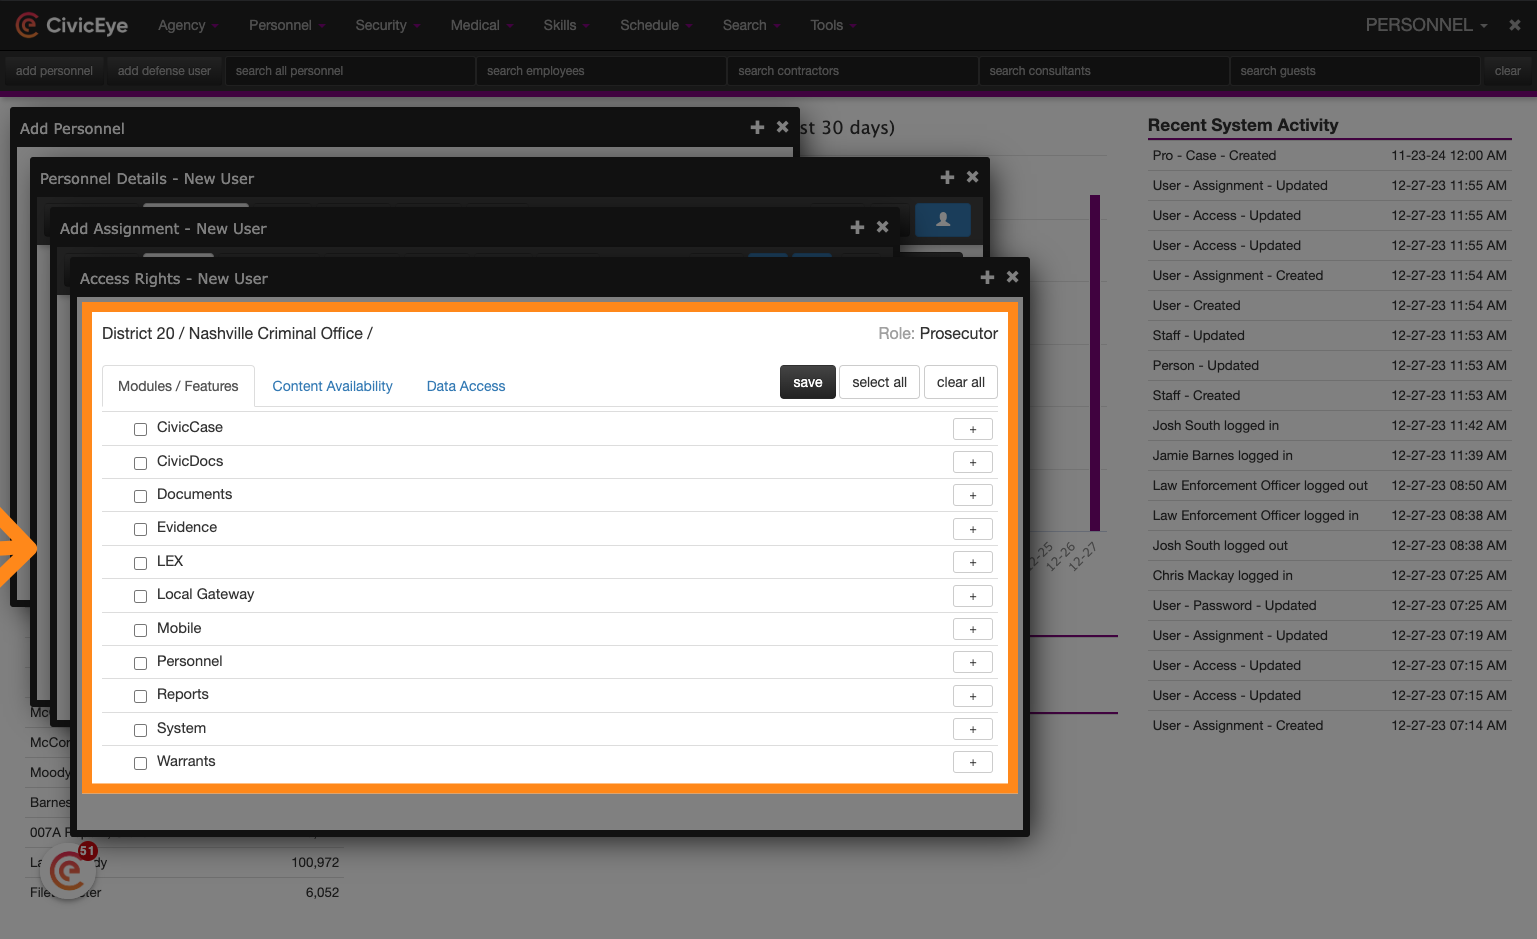
32. Set permissions
Select "Permissions" from the menu.
33. Set applicable module permissions
Navigate to the permissions Tab and set application permissions by checking the applicable boxes. If you are unsure of which boxes to check, consult your system administrator, or contact CivicEye technical support.
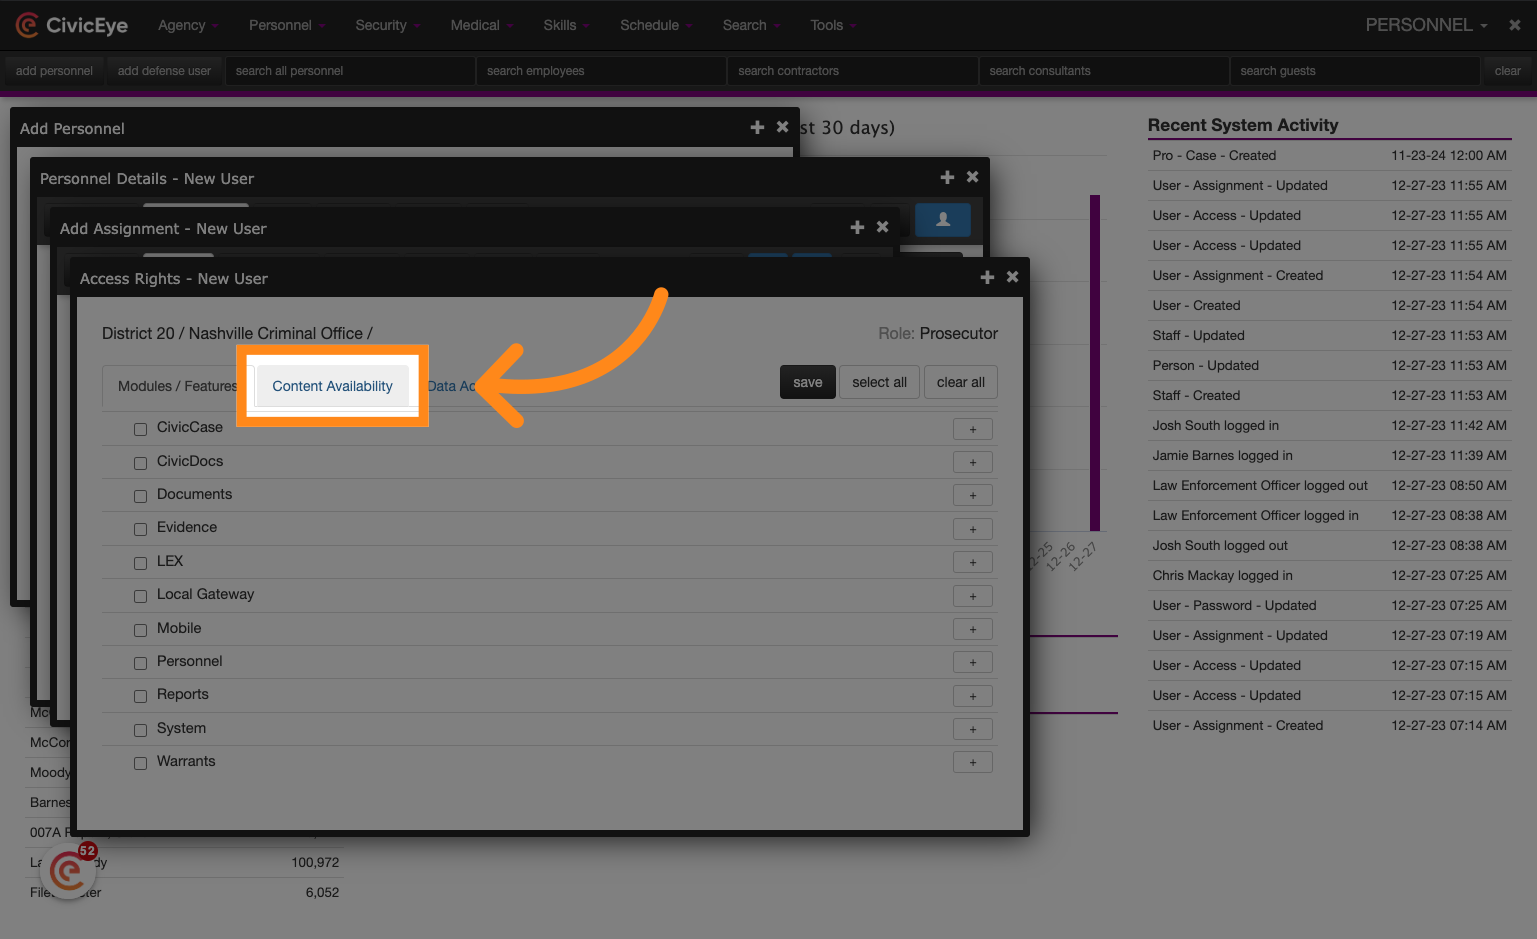
34. Set Content Availability Access
To set permissions within individual cases and manage content availability, navigate to the content availability tab.
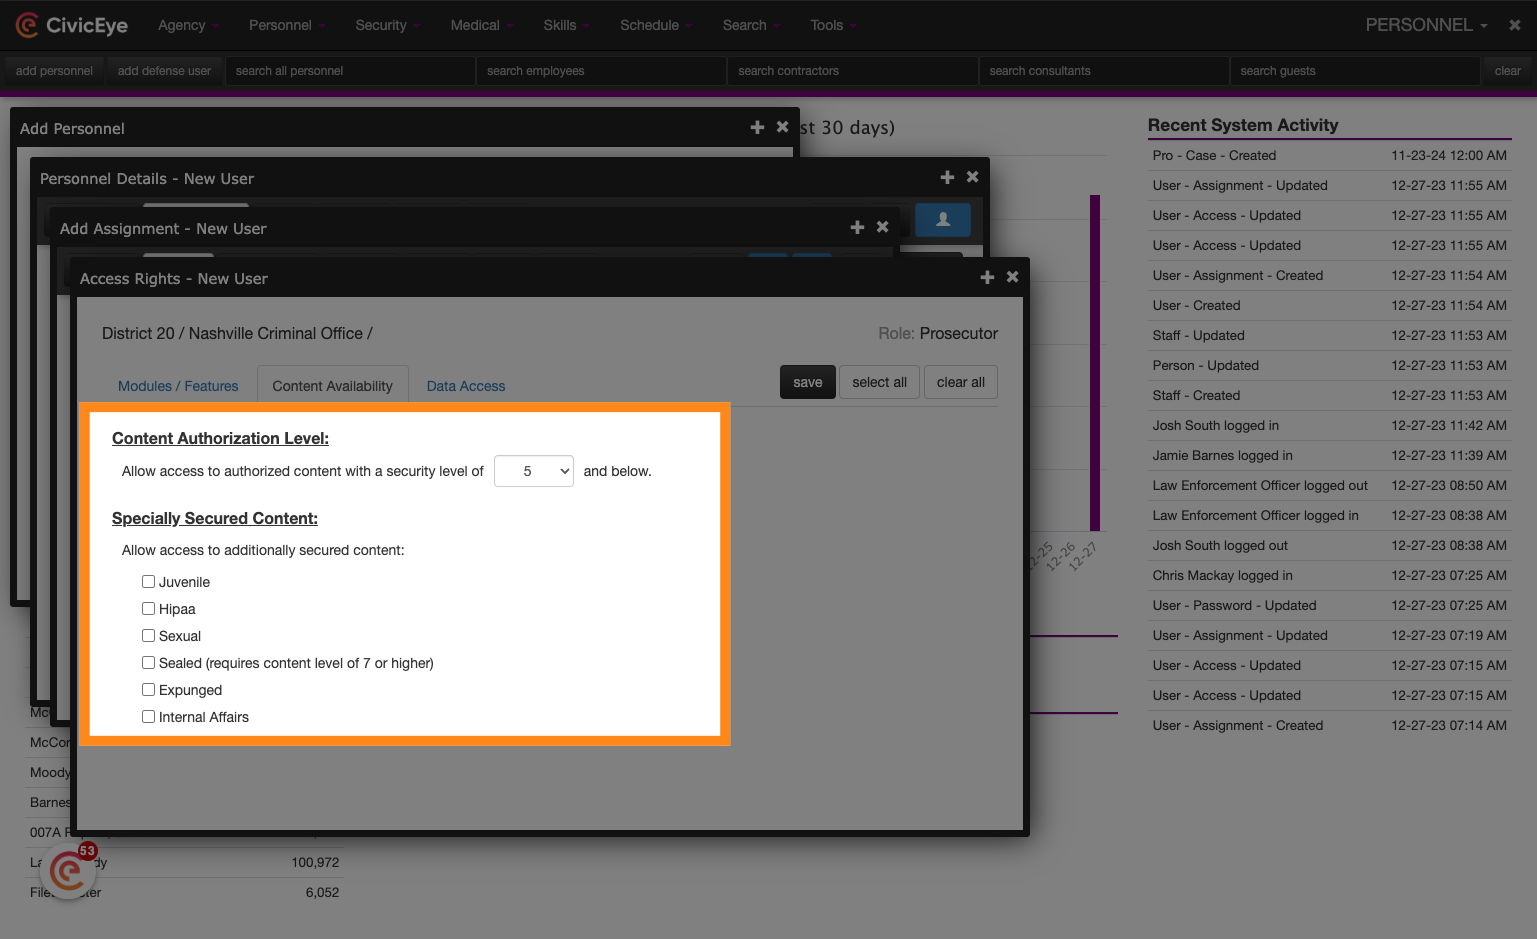
35. Set Content Availability Access
Set the appropriate content authorization level, and check the boxes for any specially secured content that should be visible to the user.
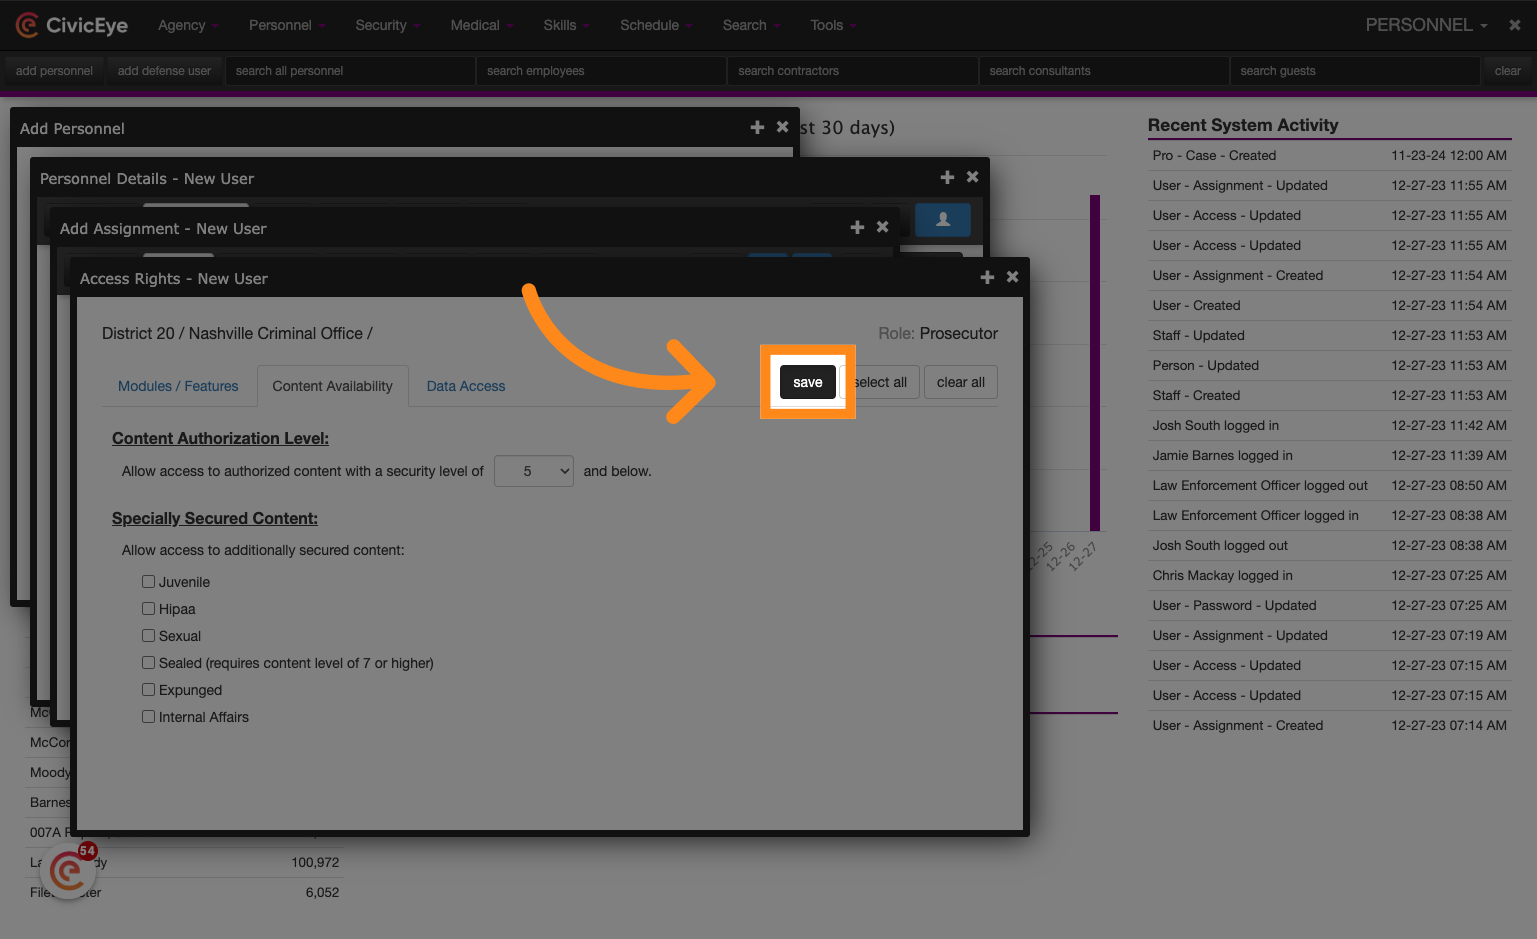
36. Click "save"
Click "save" to save the changes.
Thank you for partnering with CivicEye. We hope you found this tutorial video helpful! Please click on the link below to learn more about our products.
Learn more about CivicEye